Most amigurumi projects start with a magic ring (also called magic circle), because to make round or oval shapes for the head or the body of a little animal, we crochet in the round, and the magic ring is a way of starting crocheting in the round. So it’s really a skill to master when you begin with crochet, and I promise it’s not at scary as it seems ! This very detailed step by step will help you get the hang of it and I also give you a little tip to make this first rounds easier.
No time right now? Pin this tutorial for later.
BEFORE YOU START
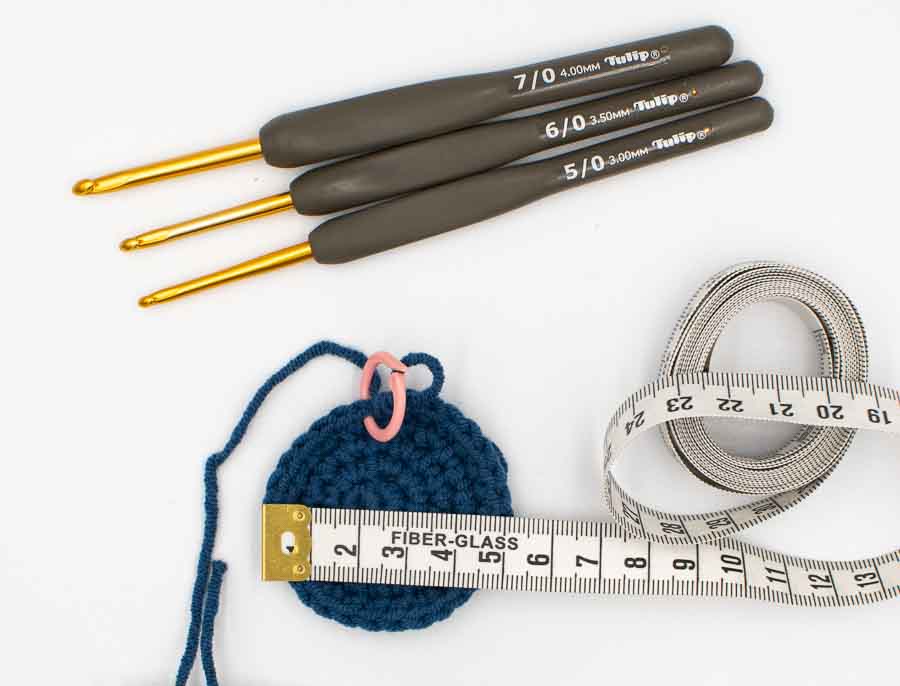
MATERIAL
To practice the magic ring, it’s a lot easier if you use a relatively thick yarn, like a #3, 8 ply, DK / light worsted yarn.
The color is also important especially if you are a beginner, because it’s much easier to see your stitches if you use a light color, like off-white, light pink, light blue, or a very bright colour like a fuchsia or red or orange, or yellow.
Last but not least, use a hook adapted to your yarn. For me it’s a 3.5mm hook, which is a good size to begin with because even if you tend to crochet very tight like most beginners, the stitches are big enough to see all you need to see.
ABBREVIATIONS
This tutorial follows US crochet notations.
- sc = single crochet
- inc = increase (= work 2sc in the next stitch)
- st = stitch
VIDEO TUTORIAL
This is an explicative video to show you how to do the magic ring and the first two rows that usually come next. I demonstrate the start of the magic ring again at the end of the video, so that you can practice and practice again. I’ve also made a step by step tutorial with pictures below, if it makes it easier for you.
I’m right handed so if you are left-handed you can do the same by inverted hands, but if it’s too confusing you can also check my left-handed friend’s tutorial on her blog Knitting with Chopsticks here.
STEP BY STEP TUTORIAL
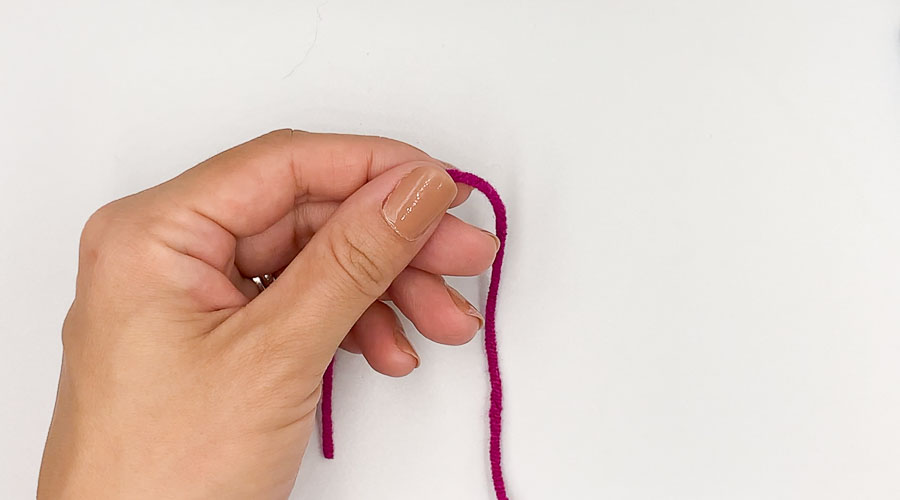
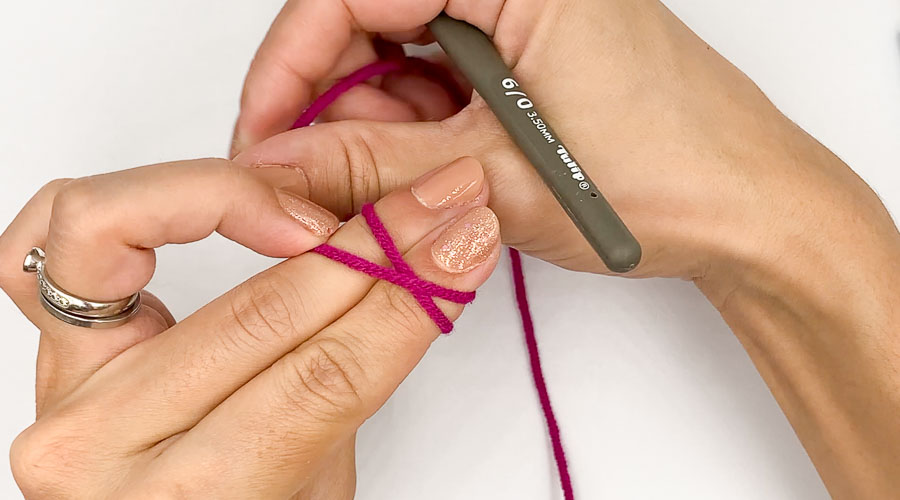
Hold your yarn between your thumb and index finger. Wrap it around your index and middle finger.
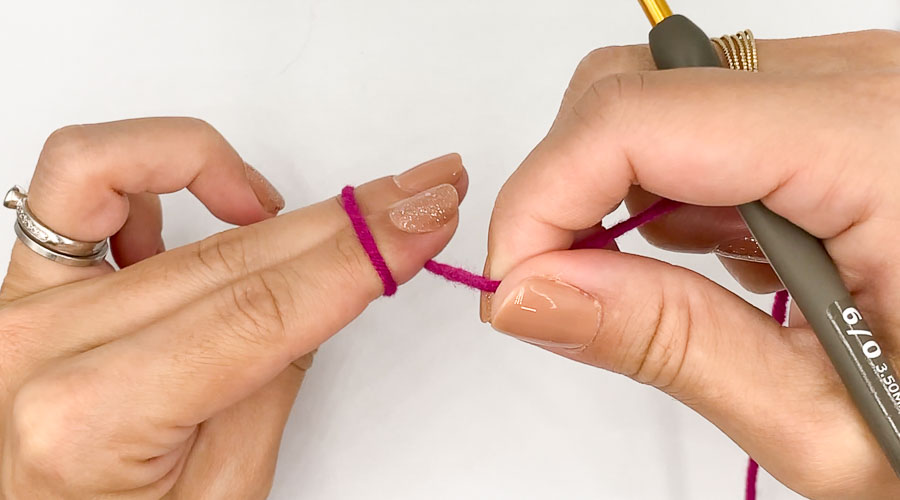
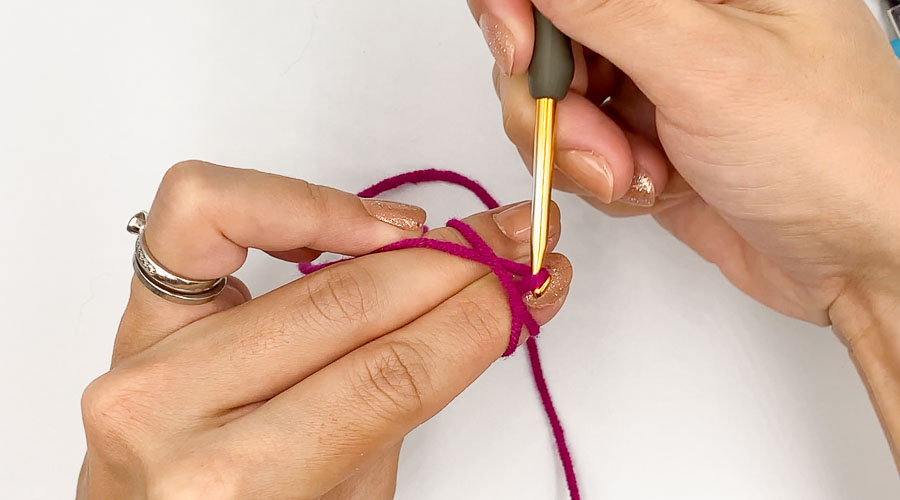
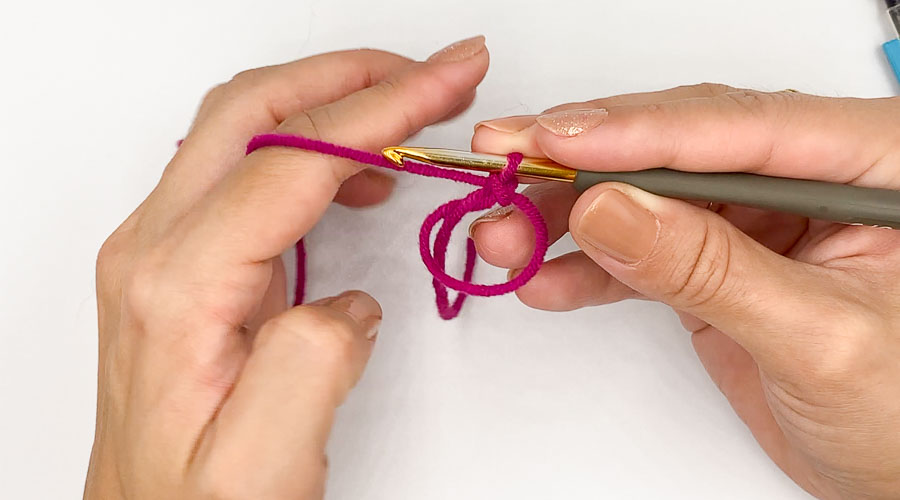
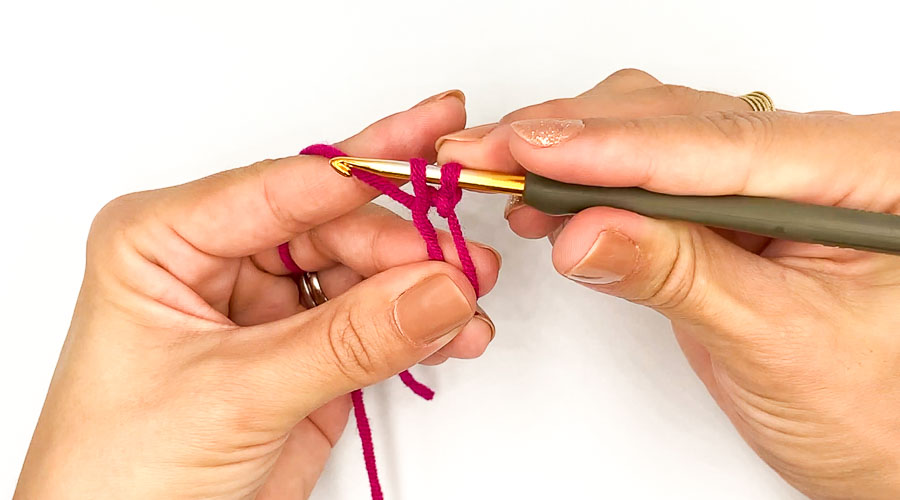
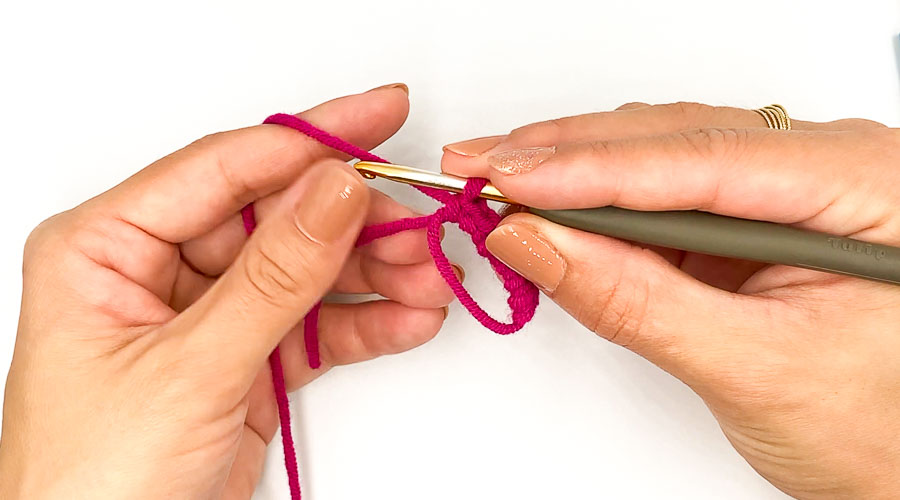
Wrap it again and cross your first loop, hold the yarn with your ring finger. Insert your hook under the first loop.
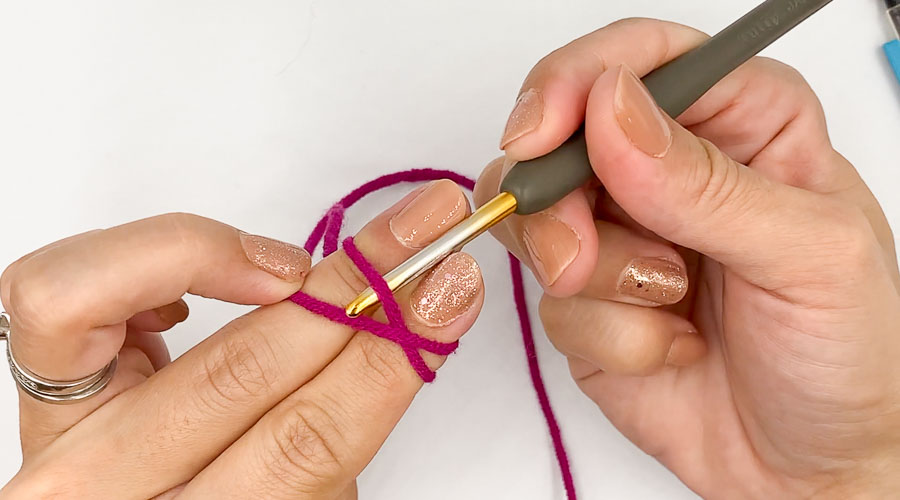
Grab the yarn you were holding with your ring finger, and pull it under the first loop.
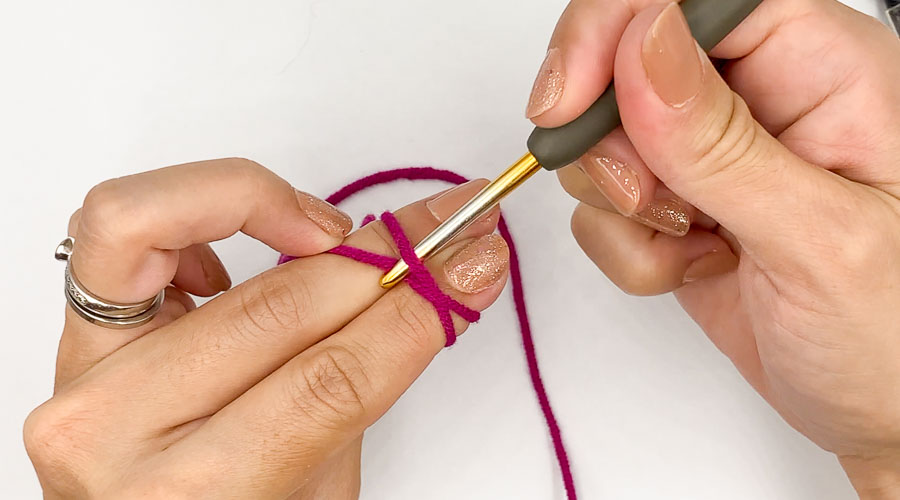
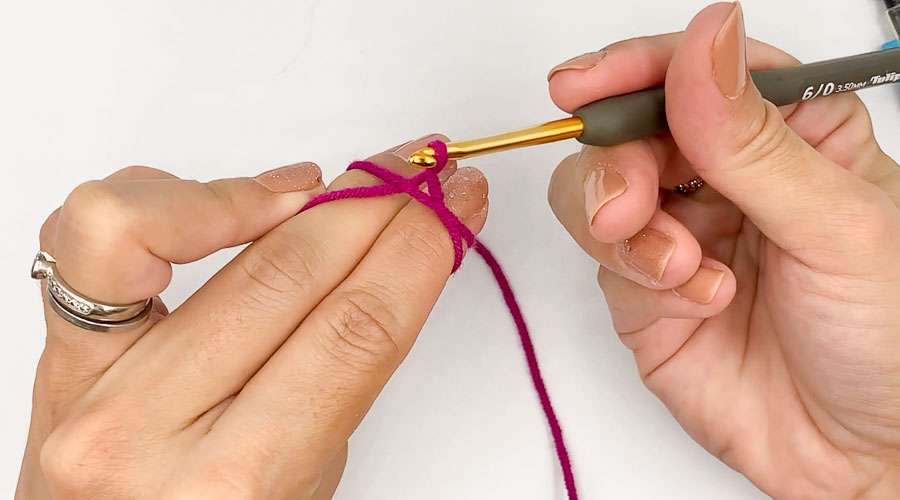
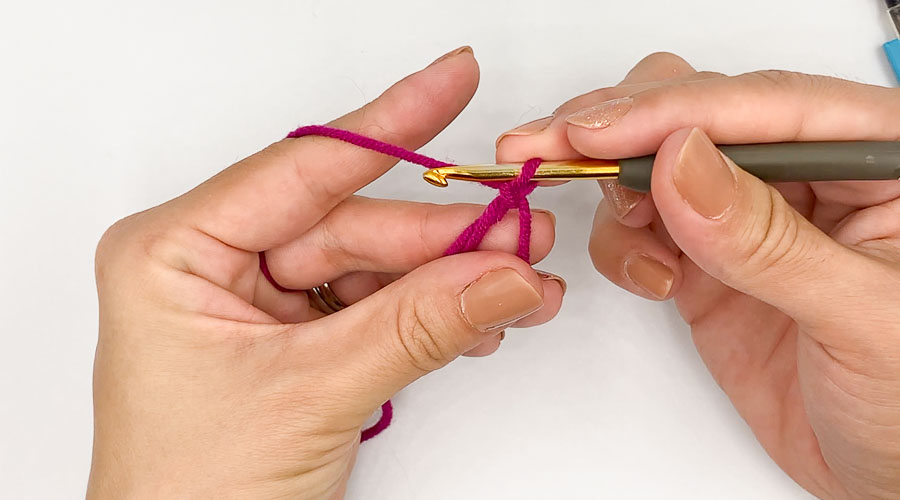
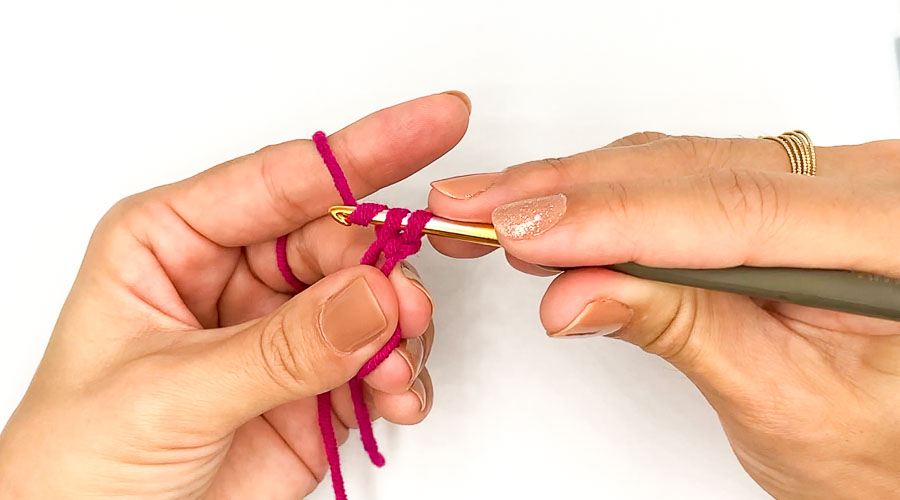
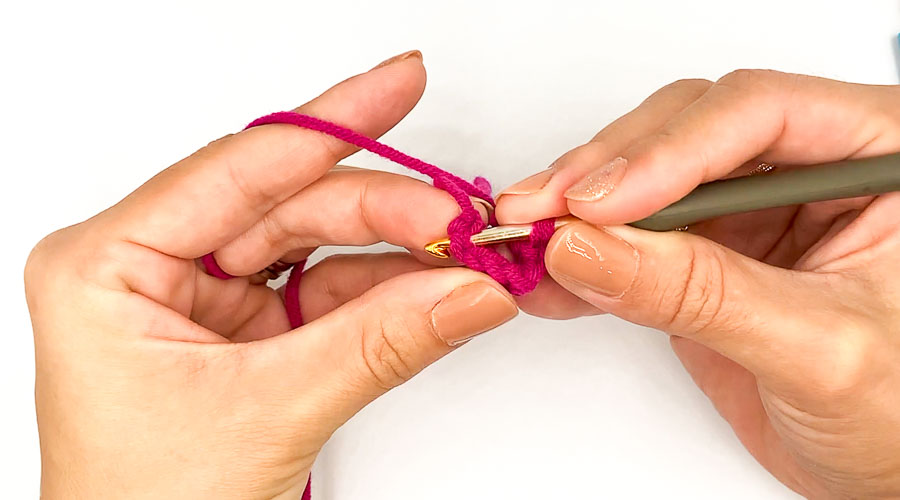
Turn your hook by a quarter turn towards you to secure a little loop on your hook (the two loop ends from your hook should cross).
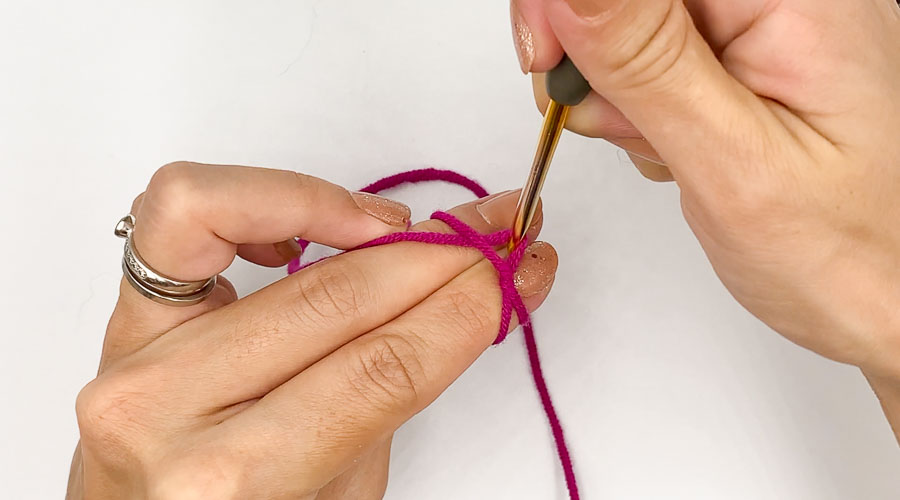
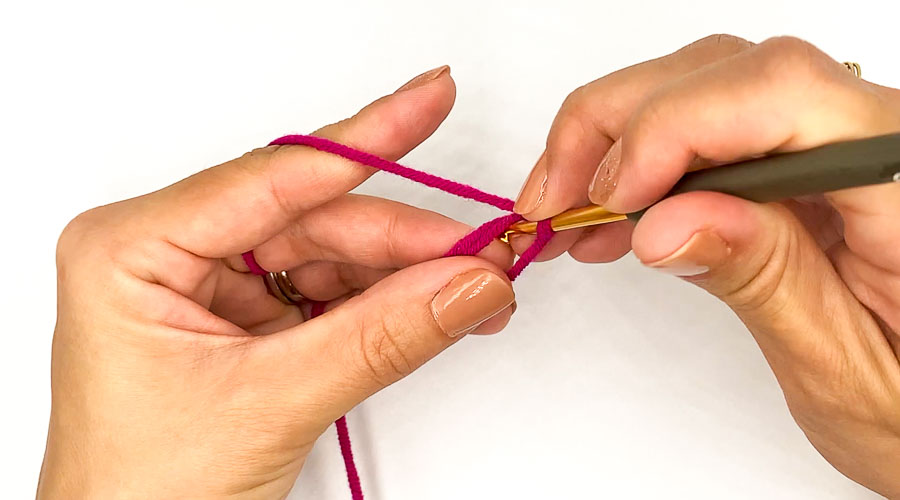
Now grab the yarn you were still holding with your ring finger, from underneath (like you yarn over), and pull it through your loop.
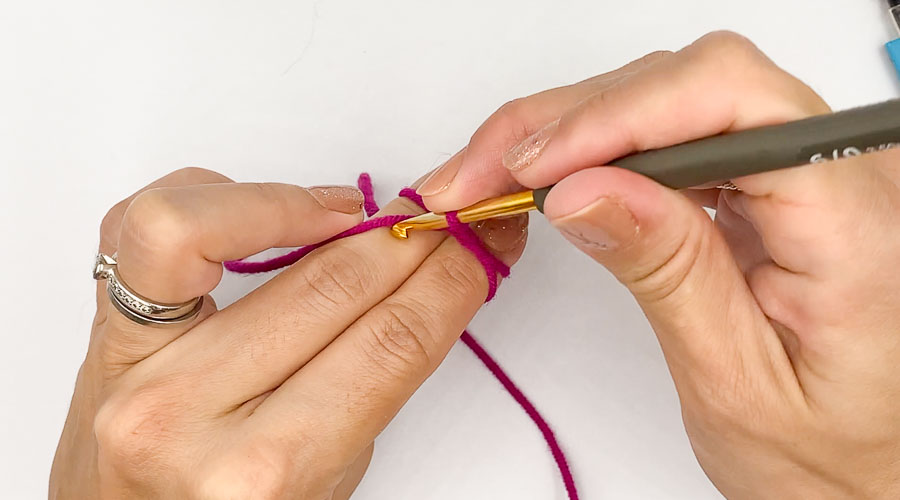
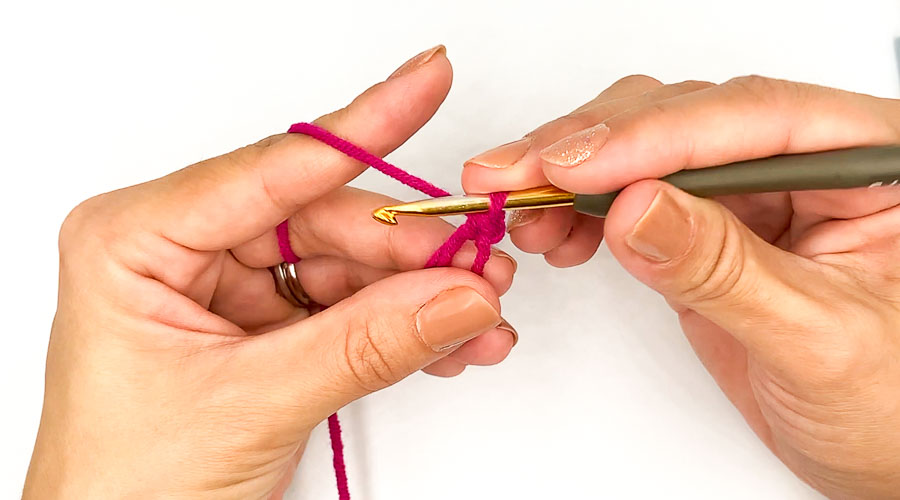
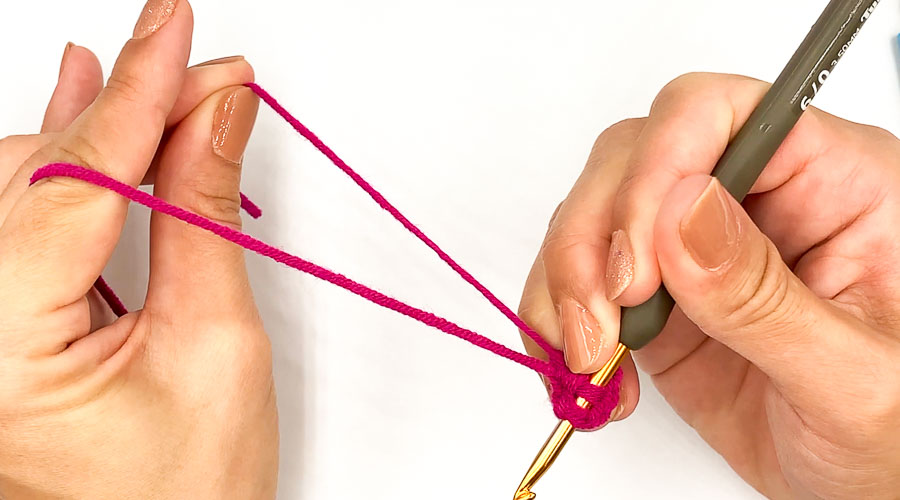
So now you have your magic ring ready. Hold the loop (including the yarn tail) downwards, between your thumb and middle finger.
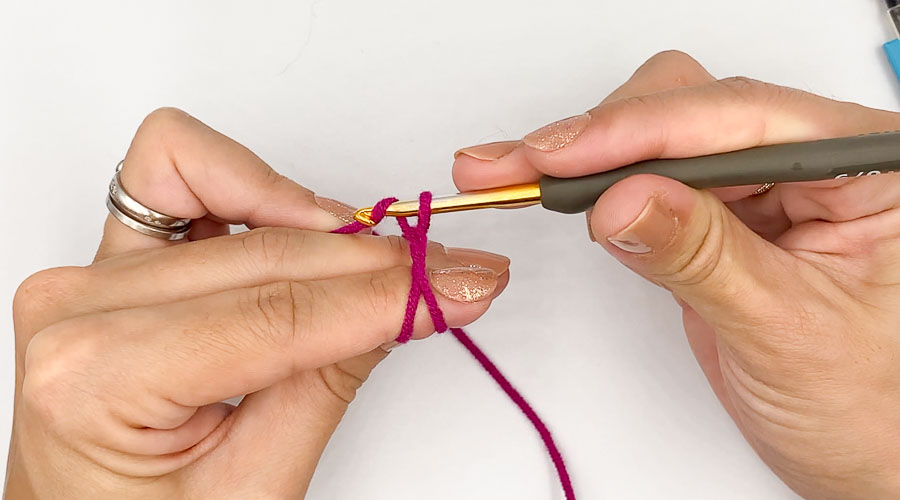
Insert your hook in the ring (under both the loop and the yarn tail), yarn over.
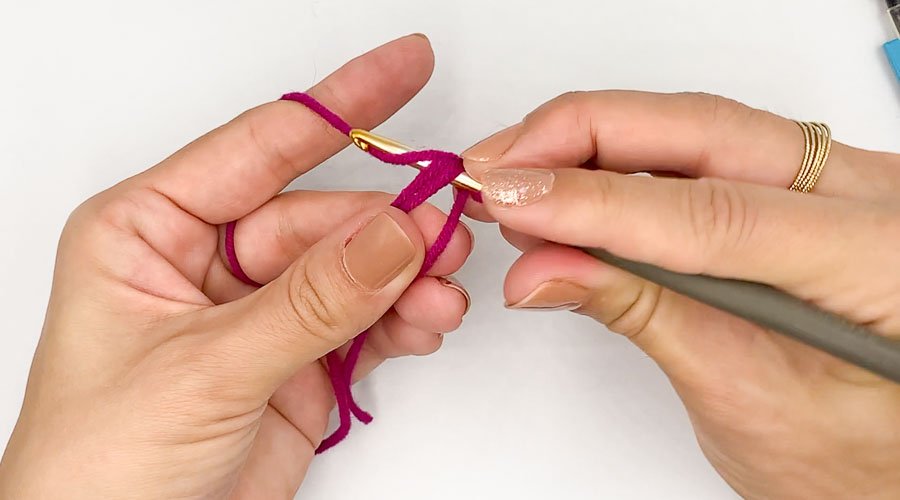
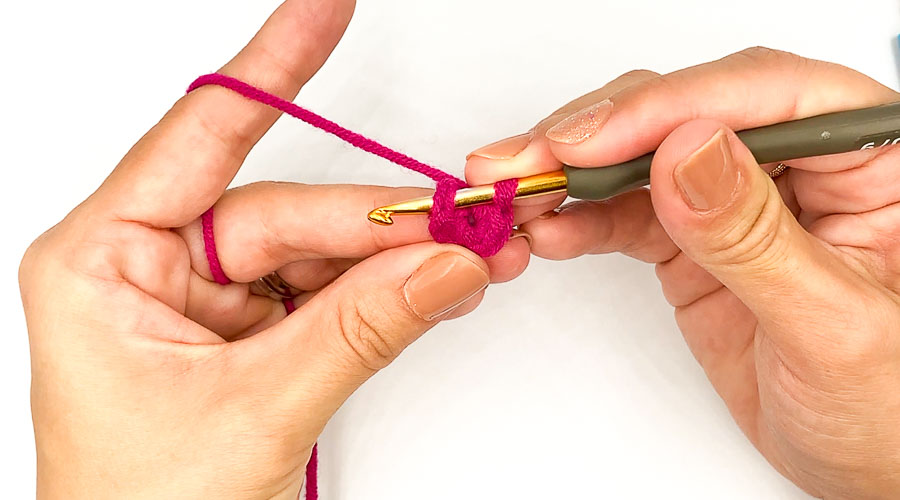
Pull it back in the ring so that you have two loops on your hook now. Yarn over again.
And pull through the two loops on your hook. You just did your first single crochet in your magic ring. Keep going with the desired number of single crochets in your magic ring. The picture below shows 4 single crochets, I’ll do 6 in total in this tutorial, which is a very common start for amigurumis in general.
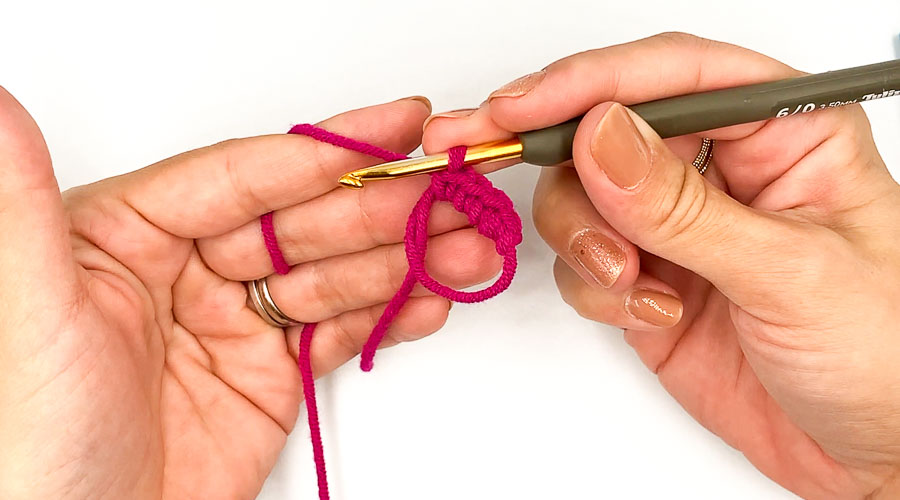
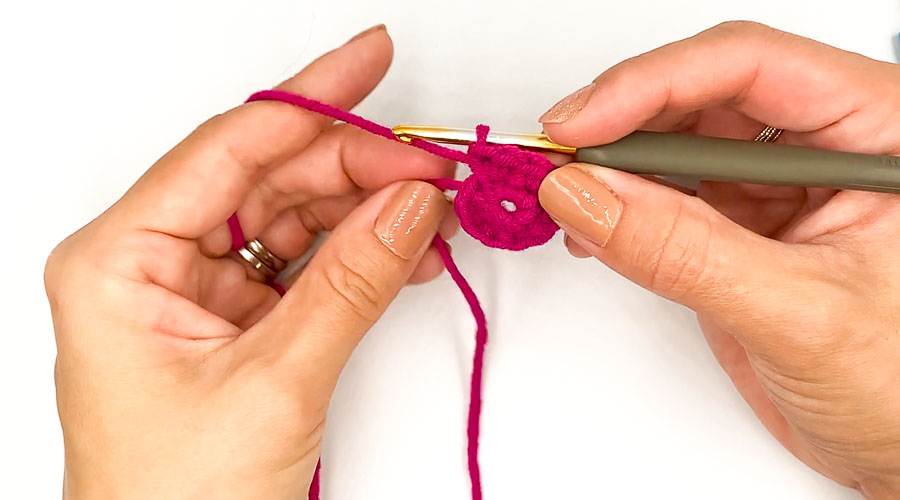
Now I’ve reached 6 single crochet. Before closing the magic ring, insert your hook in the first stitch of the first round. This is were you will start your second round if you crochet in continuous rounds (without joining rounds with a slip stitch).
Now, leave the hook inserted in the first stitch, and pull the yarn tail. The ring should close, like by magic! Hence its name.

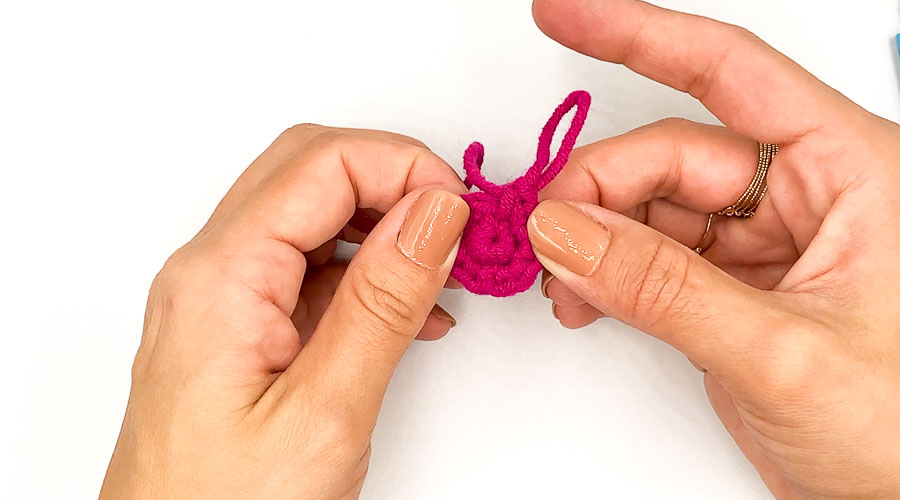
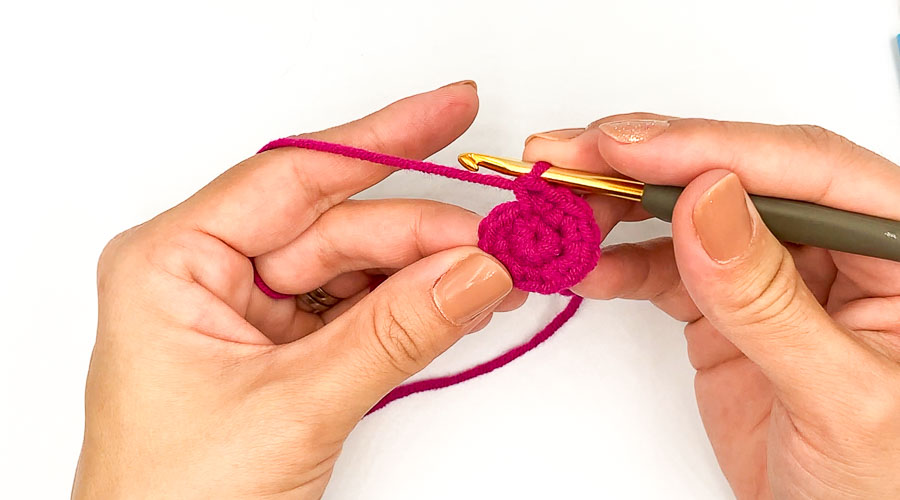
Now you can start your second round, here a round of 6 inc (=2sc in each st around). There is still a little gap in the middle, that we are going to make disappear at the next step.
Pull the yarn tail again to close tight the center of your ring. And DONE ! You can start your third round and keep going !
I hope you liked this tutorial, now it’s time to practice. Do it again a few more times so that “your fingers remember”, and you won’t have to check a tutorial for the magic ring every time it is mentioned in a pattern. Then you can jump to one of my free patterns to put this technique into practice in a real crochet project, which is a lot more fun!
If you liked this tutorial, don’t hesitate to share it with your friends, and find more tutorials here.