Sharing is caring!
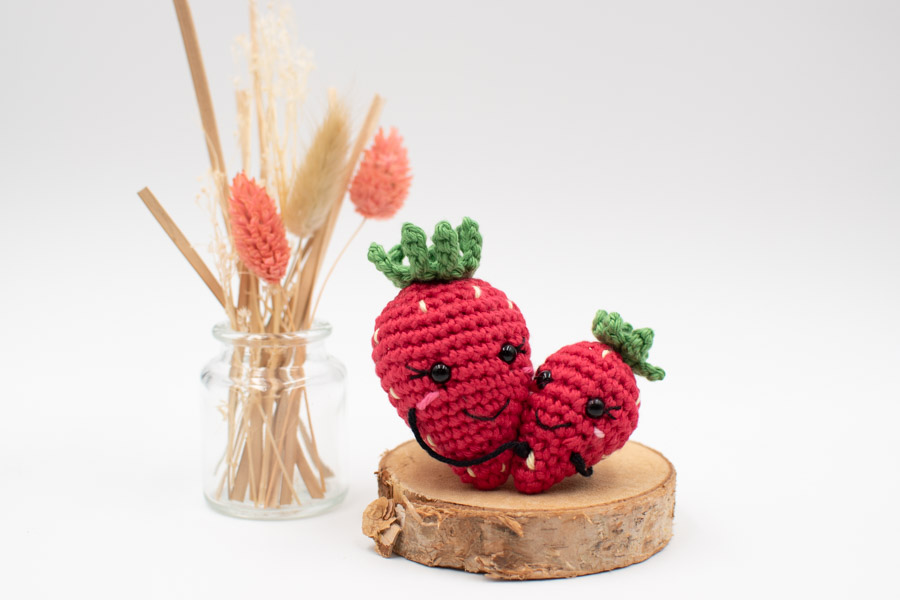
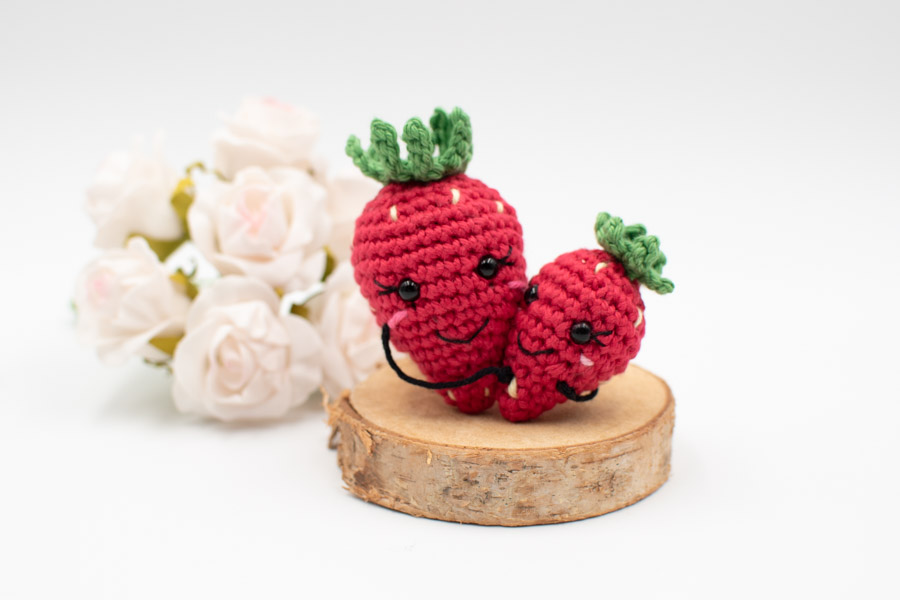
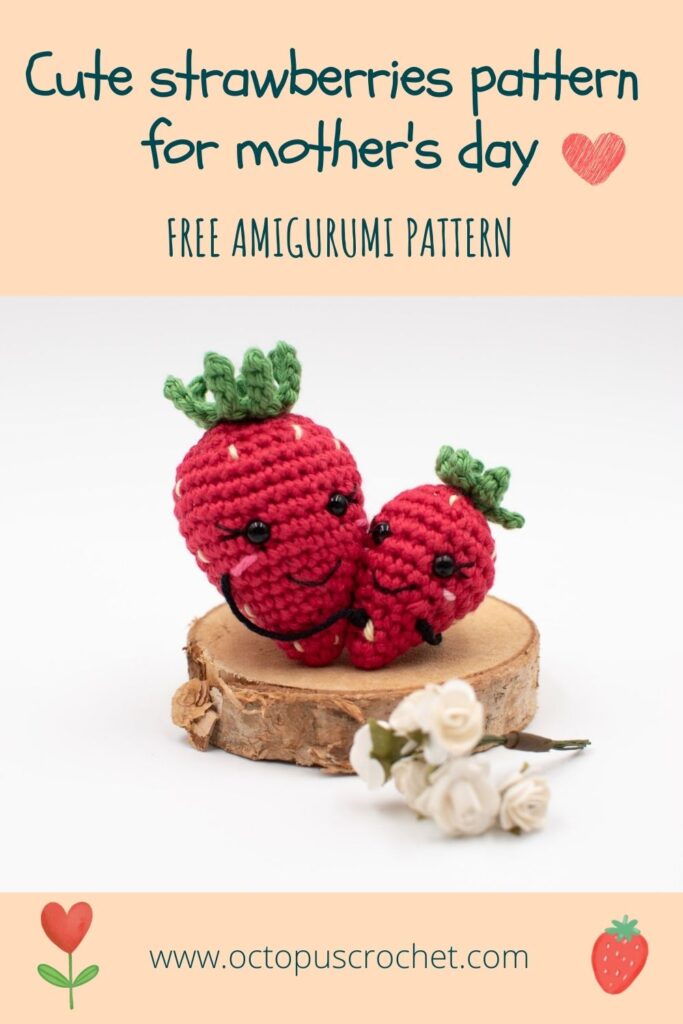
Looking for a thoughtful gift for mother’s day? Don’t look further I got you covered with this cute amigurumi strawberry pattern for mother’s day! Quick and easy to make, beginner friendly, doable with any yarn, reusable for other occasions, it has it all.
No time right now? Pin this crochet pattern for later.
*This blog contains affiliate links for products I use, believe in or recommend. This means I will earn a small commission if you make a purchase from one of these links, and of course it is at no extra cost for you. It helps me to keep Octopus Crochet going and to keep publishing new free patterns and tutorials for you to enjoy, so thank you! You can check my full disclosure here.
If you prefer to purchase an inexpensive add-free pdf version of this pattern I’ve got you covered. The premium pdf version has all the instructions, more step by step pictures, no ad, and it’s ready-to-print for you to carry around everywhere you can crochet and are not in front of a laptop. The cute amigurumi strawberry pattern for mother’s day is available in my shop on Etsy.
Cute amigurumi strawberry pattern for mother's day: inspirations
Well it’s strawberry season, and my son is eating TONS of it! Strawberries are colorful, sweet, addictive, and don’t even get me started on the whipped cream I hide them under (not in front of my son though, have to do that secretly!).
The cool thing with that pattern, is that you can reuse it in different occasions. Make both strawberries the same size, and you can use them for Valentine’s day. Or play with the colors, and use it to show your appreciation to a friend.
You can also stage it in many ways: a kitchen decoration, a desk decoration, a keychain, a car charm to hang to the rear view mirror…
Plus it builds up fast, with any yarn you have in your stash, so it can be a last minute savior!
Scroll down for the free patterns links below or you can also directly purchase a nice add-free pdf version of this project in my shop on Etsy for a small fee. The pdf version has all the pictures, instructions, and it’s ready-to-print to carry along with you wherever you want to sit and crochet!
Before you start your cute amigurumi strawberry pattern for mother's day
- Pin this pattern to your Pinterest boards here.
- If you haven’t already, subscribe below to receive my newsletter with mostly free pattern release updates and special events worth for crocheters! Don’t worry, if you don’t want to receive it anymore, you can unsubscribe anytime, no hard feelings.
Cute amigurumi strawberry pattern for mother's day
MATERIAL
- 2.5mm crochet hook / US C-2
- Yarn:
o You can use any yarn for this pattern, on the pattern pictures it’s a #3 / DK weight cotton. More specifically, I used DMC Happy cotton, shade 754 (pinkish red), 780 (green), 770 (light yellow) 775 (black). Plus strands of light pink for the cheeks.
o DMC Cotton Perle N°8 shade 310 (black) to embroider the mouth and eyelashes
- Tapestry needle
- Fiberfill
- Stitch marker or a strand of thinner yarn
- Two pairs of 6 mm safety eyes (see safety warning below)
- Ball point pins for assembly
LEVEL
Beginner friendly
CROCHET LANGUAGE
This pattern uses US terms abbreviations.
GAUGE
Gauge is not critical for this pattern, however as an indication, the gauge with the above material (2.5mm hook) is: 5-round circle = 4 cm (2″)
. Find out how to measure gauge for amigurumis in my tutorial here.
With the material mentioned above and when gauge is achieved:
- The Strawberry mom is 8 cm tall (3.1″)
- The Strawberry kid is 6 cm tall (2.4″)
PATTERN NOTES AND SPECIAL TECHNIQUES
The number before the abbreviation represents how many times to work one type of stitch into consecutive stitches from the previous round (unless stated otherwise). Ex: 3inc = work one increase into each of the next 3 stitches.
This pattern is worked in continuous spiral rounds (i.e. without closing the rounds with a slip stitch) unless stated otherwise. It may help to mark the first stitch of each round with a stitch marker.
For amigurumi in general, I always use an invisible decrease (unless stated otherwise and not when crocheting in rows) to minimize the gaps between these stitches so that the fiberfill doesn’t show too much. You can check this simple technique in a video tutorial here, but if it’s too much hassle and you prefer to start right away you can also work with normal decrease, no big deal!
Safety eyes Caution: please be mindful that safety eyes are NOT safe for children under 3 years old, despite their name. So if you make this item for a child, make sure to inform the parents that children under 3 should be supervised when playing with this toy, and if you intend to sell it at a crochet fair, I strongly advise to add a printable care card with a safety warning. An alternative would be to embroider eyes with yarn, instead of using safety eyes.
STITCHES AND ABBREVIATIONS (US CROCHET TERMS)
st: stitch/es
sc: single crochet
sl st: slip stitch
inc: single crochet increase (work 2 sc into the same st)
dec: single crochet decrease (single crochet two stitches together).
[number]: total number of stitches of the round
Rnd: round
(…) x 2: repeat whatever is in between the parentheses the number of times indicated
THE STRAWBERRY KID
With pinkish red.
Rnd 1: work 4sc into a magic ring. [4]
Rnd 2: (inc, sc) x 2. [6]
Rnd 3: sc around. [6]
Rnd 4: (inc, sc) x 3. [9]
Rnd 5: (inc, 2sc) x 3. [12]
Rnd 6: (inc, 3sc) x 3. [15]
Rnd 7: (4sc, inc) x 3. [18]
Rnd 8: (inc, 3sc) x 4, 2sc. [22]
Rnd 9: sc around. [22]
Rnd 10: sc around. [22]
Rnd 11: (dec, 3sc) x 4, 2sc. [18]
Insert safety eyes between rounds 8 and 9, with 4 visible stitches in between.
Rnd 12: (dec, sc) x 6. [12]
Start stuffing.
Rnd 13: 6dec. [6]
Fasten off, finish stuffing, and sew closed.
THE STRAWBERRY TOPS
With green.
Rnd 1: work 6sc into a magic ring. [6]
Sl st to first stitch of round 1, (chain 3, sl st in second chain from the hook, sc in next st, sl st in next available st) x 6.
Fasten off, leaving a tail for sewing.
Sew the tops to the strawberry, embroider the mouth, lashes, and a strand of light pink for the cheeks.
With light yellow and a tapestry needle, add little dashes here and there.
THE STRAWBERRY MOM
With red.
Rnd 1: work 6sc into a magic ring. [6]
Rnd 2: (inc, sc) x 3. [9]
Rnd 3: sc around. [9]
Rnd 4: (inc, 2sc) x 3. [12]
Rnd 5: (inc, 3sc) x 3. [15]
Rnd 6: (inc, 4sc) x 3. [18]
Rnd 7: (inc, 5sc) x 3. [21]
Rnd 8: (6sc, inc) x 3. [24]
Rnd 9: (3sc, inc, 4sc) x 3. [27]
Rnd 10: (inc, 8sc) x 3. [30]
Rnd 11: (inc, 9sc) x 3. [33]
Rnd 12 – 14: sc around. [33]
Rnd 15: (dec, 3sc) x 6, dec, sc. [26]
Rnd 16: (dec, 2sc) x 6, dec. [19]
Insert safety eyes between rounds 10 and 11 with 4 visible stitches in between.
Rnd 17: (sc, dec) x 6, sc. [13]
Start stuffing with fiberfill.
Rnd 18: 6dec, sc. [7]
Fasten off, finish stuffing and sew closed.
THE STRAWBERRY TOPS
With green.
Rnd 1: work 8sc into a magic ring. [8]
Sl st to first stitch of round 1, (chain 5, sl st in second chain from the hook, sl st in next 2 st, sc in next st, sl st in next available st of the round) x 8.
Fasten off, leaving a tail for sewing.
Sew the tops to the strawberry, embroider the mouth, lashes, a strand of light pink for the cheeks.
With light yellow and a tapestry needle, add little dashes here and there.
ASSEMBLY OF THE STRAWBERRIES
1) Sewing the strawberries together.
Using ball point pins, pin the two strawberries together to secure their position.
Now take a long strand of red yarn. With your tapestry needle, insert it at the back of the strawberry mom, and exit between the two strawberries (where it’s not visible), grab a stitch from the small strawberry, and go back inside the other one. Exit at another point between the two strawberries to secure a second stitch. You can repeat this a third time if needed, then exit through the large strawberry, through a hole just next to your very first entry point (but not the same one).
Pull on both ends to make sure the strawberries are sewn tight together, and tie a tight knot. Hide the tails inside.
2) The Hugging arms.
With black yarn.
Refer to the drawing below. Using a tapestry needle, insert it at the back of the strawberry mom, and exit just next to the right cheek. Then tie a knot on the strawberry kid, as if this arm was hugging, and the knot would be the hand. Once the knot is done, insert your tapestry needle in the stitch right next to the knot, go back inside and go through both strawberries where they are sewn together so that your black yarn isn’t visible. Exit at the back through the same hole than your entry point, adjust the length and movement of the arm by pulling a bit on the first black strand (not too much), tie a tight double knot, and push it inside using the point of your scissors, so that no black yarn is visible at the back of your strawberry.
Do the same for your second arm.
More ideas: you could also use a black gardening wire for the arms. You can make the strawberries into a keychain, or a car charm to hang to the rear view mirror.
Looking forward to see your makes, don’t forget to tag me on Instagram @octopuscrochetdesign