What’s the difference between a decrease vs invisible decrease ? How to make them? When ? You are a beginner and feel a bit lost with decreases ? I got you covered with a detailed tutorial.
It’s a great idea to learn how to make a decrease before starting an amigurumi project because when it comes to building 3D shapes, you will most definitely need it. And if you are a tiny bit perfectionist like me, you’ll like invisible decrease even more!
No time right now? Pin this tutorial for later.

WHAT’S THE DIFFERENCE BETWEEN NORMAL DECREASE AND INVISIBLE DECREASE?
A decrease is a way to reduce the number of stitches of your round (or row) by crocheting 2 stitches together. Invisible decreases are mostly used for amigurumi projects to reduce the gap between stitches created by the decrease, so that the fiberfill you put inside your amigurumi doesn’t show too much.
WHEN TO USE AN INVISIBLE DECREASE ?
An invisible decrease is worked in the front loops only, so if you work in rows on a piece of clothes, blanket, scarf, where both sides of your final work will be visible, it’s better to use a normal decrease. In Amigurumi, usually the “wrong side” is hidden inside as we crochet 3D shapes stuffed with fiberfill.
BEFORE YOU START
MATERIAL
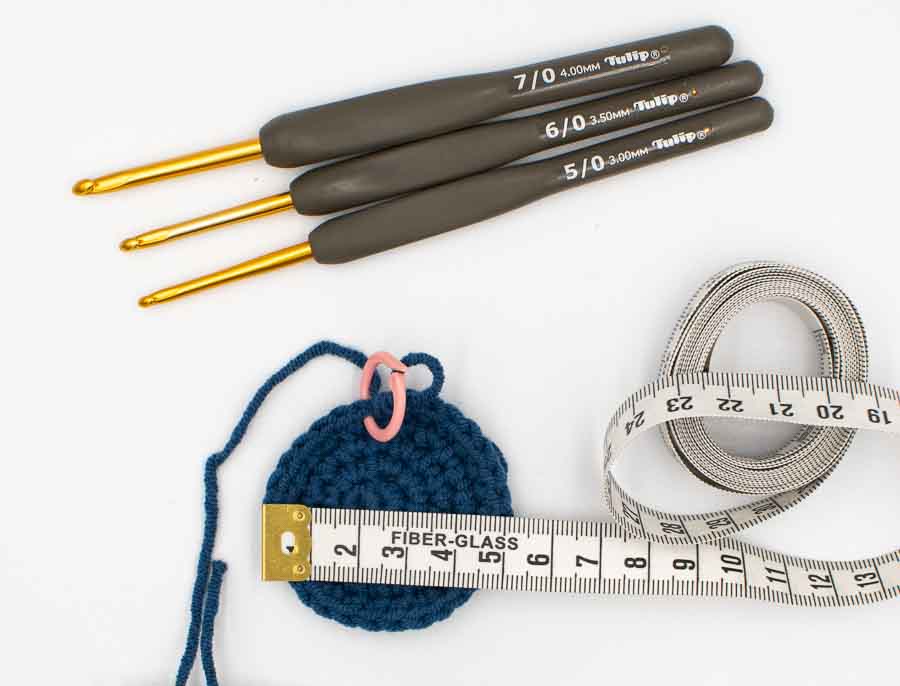
To practice the decrease and invisible decrease, it’s a lot easier if you use a relatively thick yarn, like a #3, 8 ply, DK / light worsted yarn.
The color is also important especially if you are a beginner, because it’s much easier to see your stitches if you use a light color, like off-white, light pink, light blue, or a very bright colour like a fuchsia or red or orange, or yellow.
Last but not least, use a hook adapted to your yarn. For me it’s a 3.5mm / US E-4 crochet hook, which is a good size to begin with because even if you tend to crochet very tight like most beginners, the stitches are big enough to see all you need to see.
ABBREVIATIONS
This tutorial follows US crochet notations.
- ch: chain
- sc: single crochet
- inc: increase (work 2sc in the next stitch)
- dec: single crochet two stitches together (2 techniques explained in this tutorial below: normal decrease and invisible decrease)
- st: stitch
- Rnd: round
- FLO: in the front loop only
WORKING BASE
You can practice the decrease and invisible decrease on any working piece you have.
For the purpose of this tutorial, I am working on a 5-round circle, as if I was starting an amigurumi project. You could also practice on rows. You’ll find below the instructions for both. If you are a beginner, I advise to make at least 3 rows so that you have a good size, flat piece of crochet.
5-round circle pattern:
Rnd 1: work 6sc into a magic ring. [6]
Rnd 2: 6inc. [12]
Rnd 3: (sc, inc) x 6. [18]
Rnd 4: (2sc, inc) x 6. [24]
Rnd 5: (3sc, inc) x 6. [30]
15 st / 3 rows rectangle:
Make a slip knot, and ch 16 st.
Row 1: From the 2nd st from the hook, sc across, ch 1, turn. [15]
Row 2-3: sc across, ch 1, turn. [15]
VIDEO TUTORIAL
This is an explicative video to show you how to make a decrease and an invisible decrease. I’ve also made a step by step tutorial with pictures below, if it makes it easier for you.
STEP BY STEP TUTORIAL
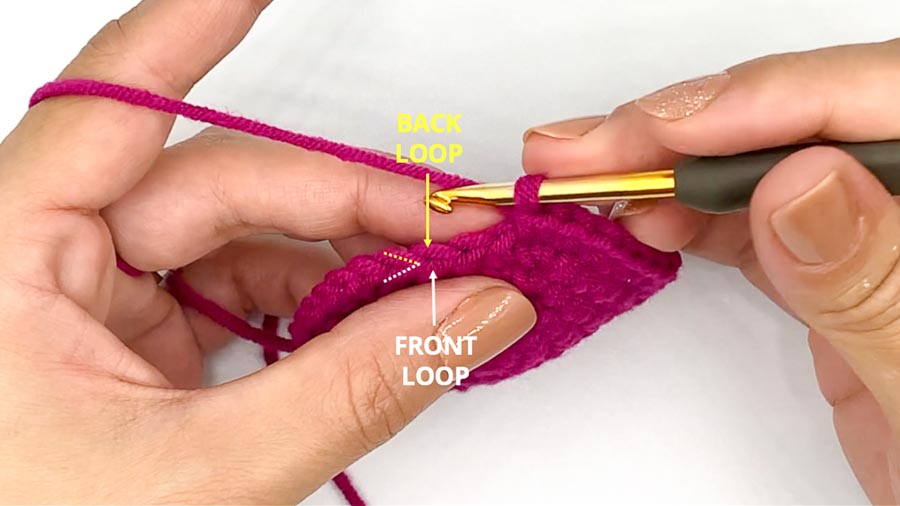
Before starting, this is a little reminder on the stitch structure: you’ll need to be able to identify the front loop and back loop of your stitches. Every stitch is build as a little “v-shape”. The front loop is the v-arm closer to you.
NORMAL DECREASE TUTORIAL
- Insert your hook under both loops of the next stitch. Yarn over, and pull up a loop. You have 2 loops on your hook now. ↓
- Insert your hook in the next stitch under both loops. Yarn over and pull another loop. You have 3 loops on your hook now. ↓
- Yarn over, and pull through the 3 loops. ↓
Congratulations, you have just single crochet 2 stitches together. Now let’s do an invisible decrease.
INSIVIBLE DECREASE TUTORIAL
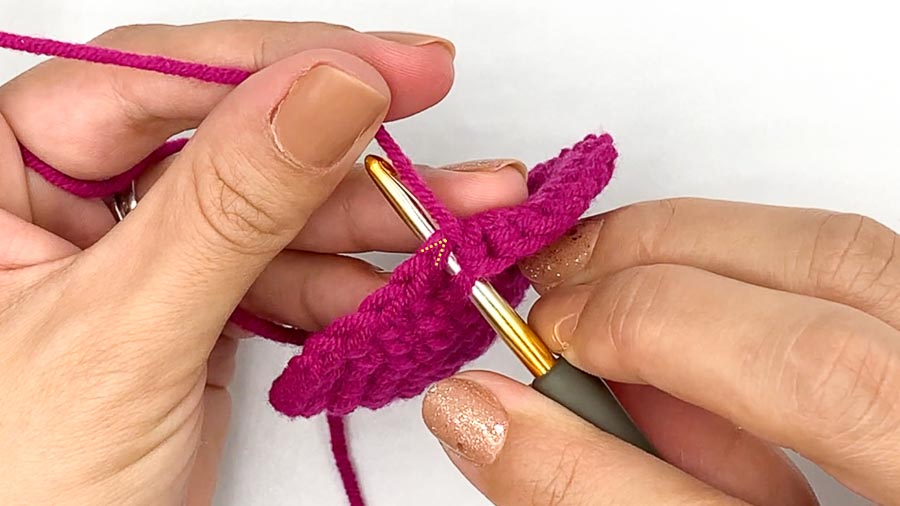
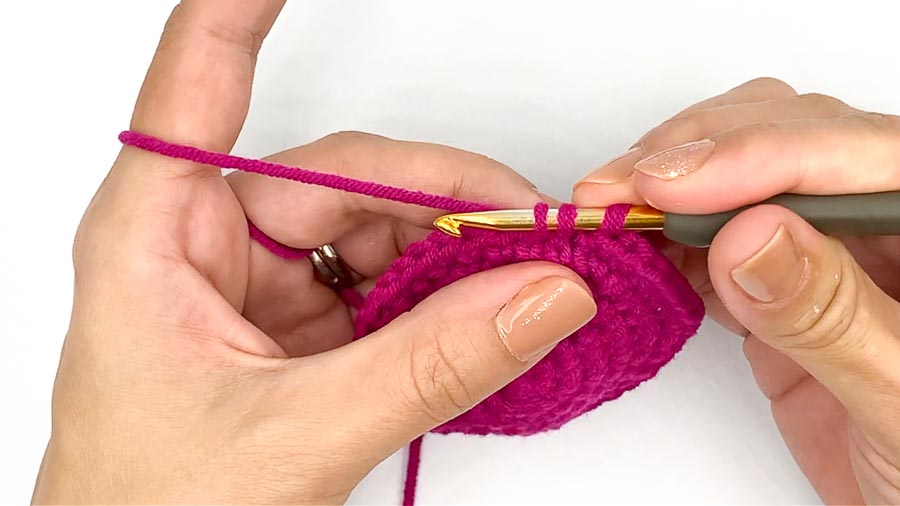
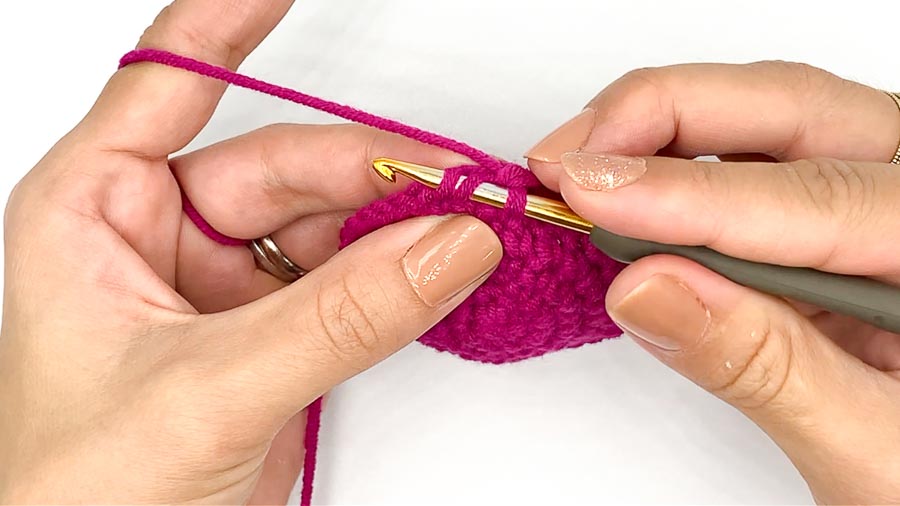
- Insert your hook in the FLO of the next stitch. And straight away, insert your hook again in the FLO of the next stitch. ↓

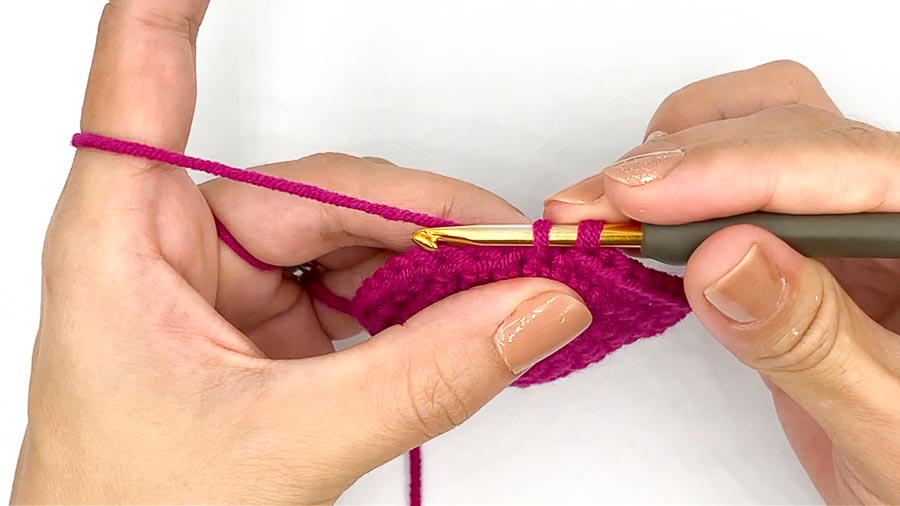
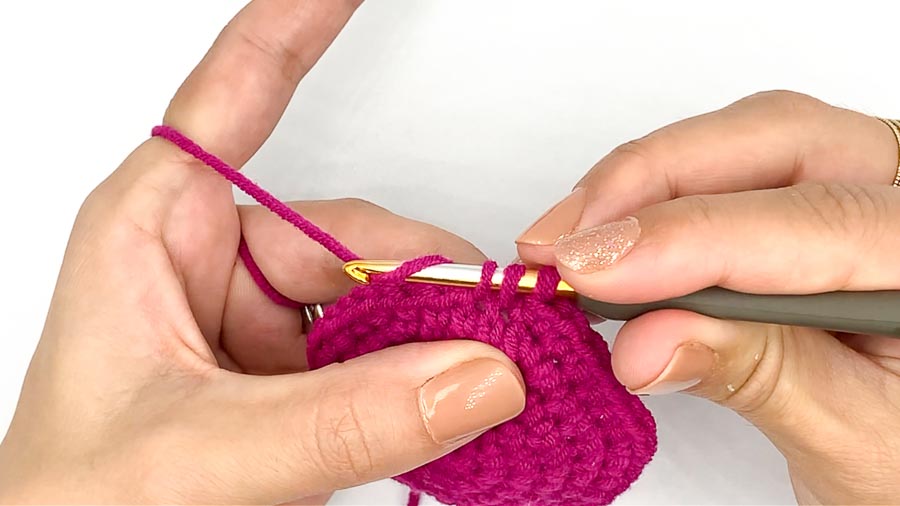
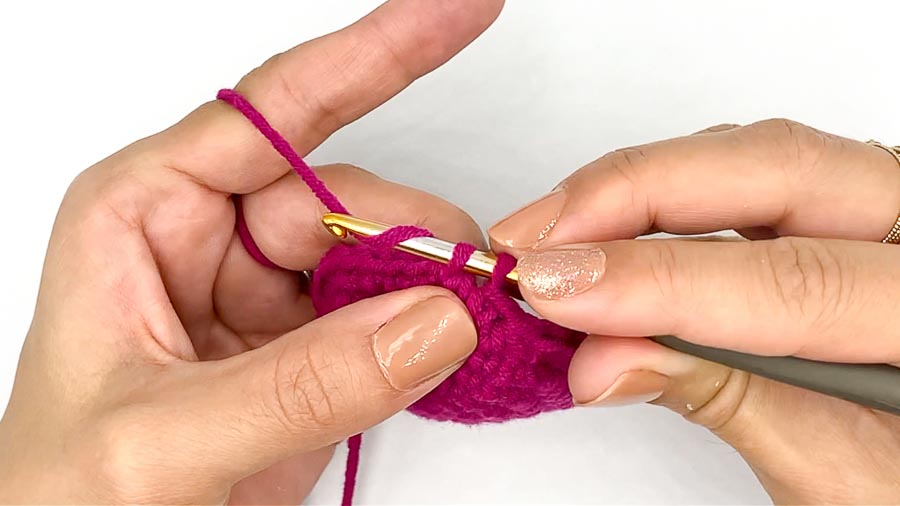
- You have 3 loops on your hook now. Yarn over and pull through the first 2 loops on your hook. ↓

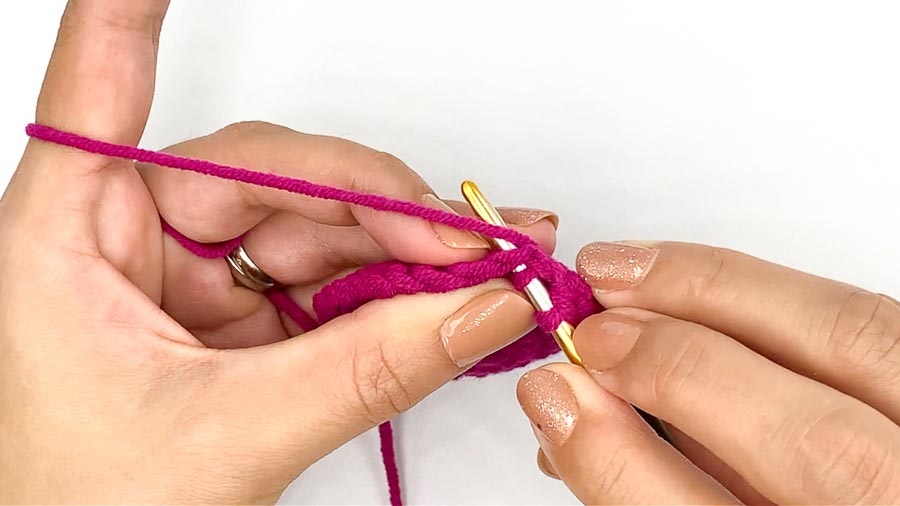
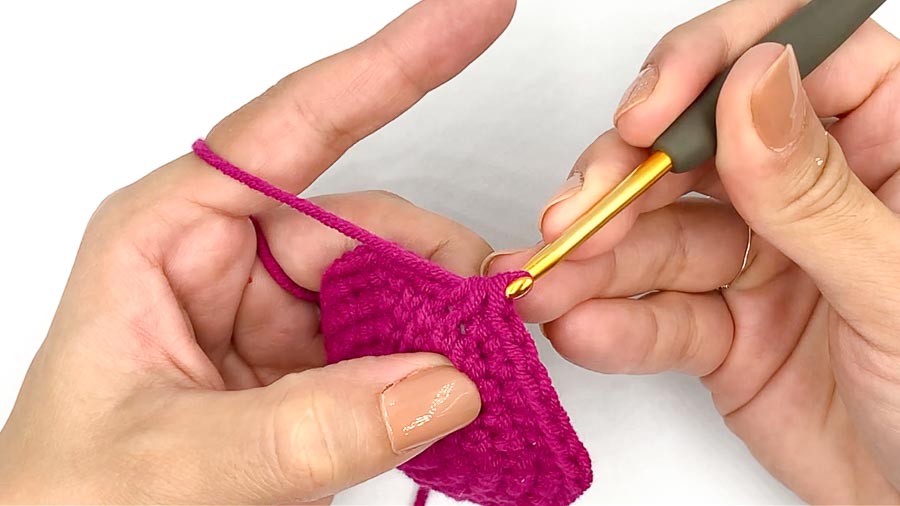
- You still have 2 loops on your hook. Yarn over again, and pull through the last 2 loops on your hook. ↓

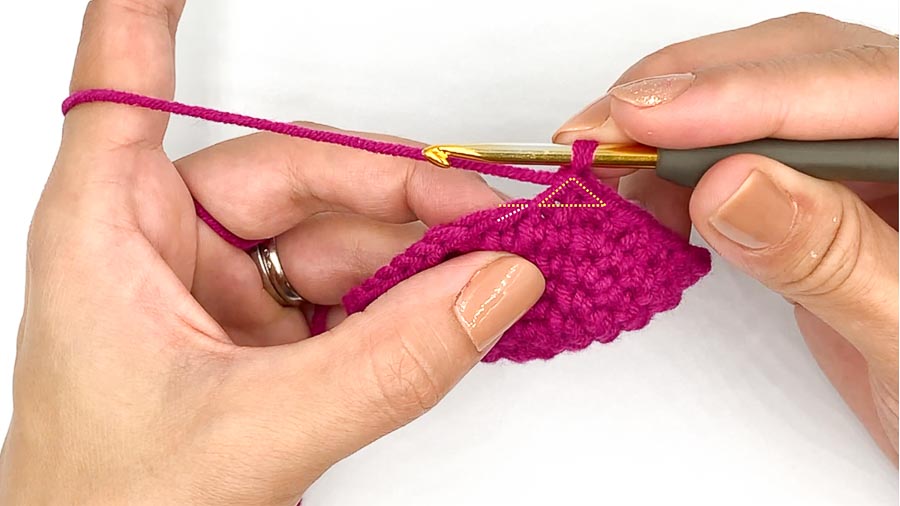
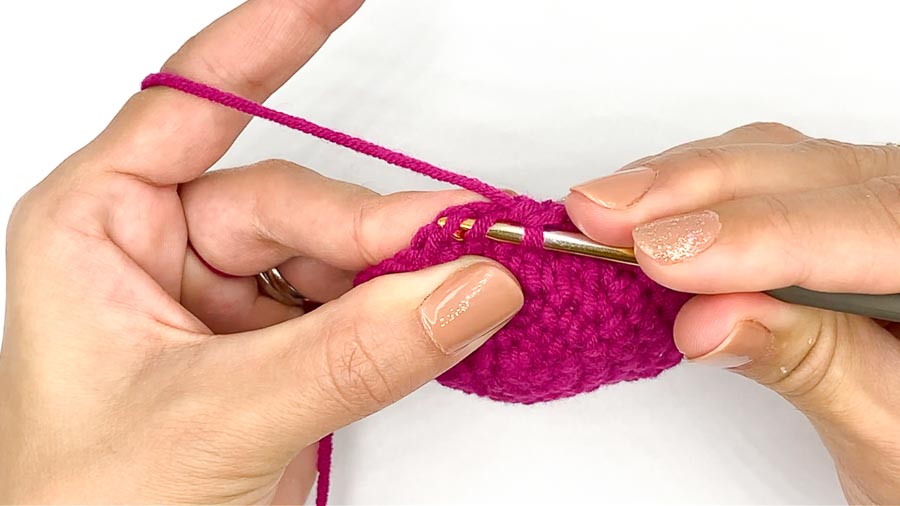
And you are done with your invisible decrease! If you are not sure where to make your next single crochet stitch, here is a little tip below: the invisible decrease you just did forms a little “mountain” shape or triangle shape. Your next available stitch, is just after the mountain, the first stitch where you can clearly identify the front loop and back loop of the stitch. ↓