WHAT IS GAUGE IN CROCHET?
You are about to start a new exciting project and in the “before you start“ section you find indications about the “gauge for this pattern”. Gauge? What is that? Why do I need that? Don’t panic, it is not as scarry as it seems. In this tutorial I’ll explain what is gauge in crochet and how to use it for amigurumi, as well as why it can help to check the gauge before starting a project to avoid certain issues with your final work.
No time right now? Pin this tutorial for later.

Gauge is the number of stitches and rows per inch in a pattern, using a specific yarn and specific hook size. In other words, it measures your tension. Or if you prefer, how loosely or tightly you crochet, since all crocheters have a different tension.
It’s not used that much in amigurumi or crochet toys, as usually it’s not really crucial if the final size of your bear or rabbit is a few centimeters bigger than in the pattern, unlike for pieces of clothes where you actually want the final size to fit perfectly. The second reason why it is not mentioned very often, is that in general in amigurumi you should crochet tight enough so that the stuffing doesn’t show when you stuff your toy.
BUT. When doing a workshop recently with beginners, I noticed that every student had a different final size for the toy. Because what you tend to forget when you crochet alone in your cave all day, is that every crocheter out there has a different tension. It is even worse if you use a different yarn fiber, like acrylic yarn versus cotton yarn. Some fibers tend to stretch much more, which can influence your tension a lot.
So, to avoid the frustration of having a final toy with stuffing showing too much, or a final size smaller or bigger than you expected, you can definitely use the gauge system for amigurumi before starting your work, just for a safe check.
HOW TO USE GAUGE FOR AMIGURUMI?
The only difference with traditional crochet gauge, is that instead of measuring the number of stitches and rows that fit into a 4” by 4” square, we are going to measure a 5-round circle of single crochet, because most of the pieces in amigurumi start with rounds and use single crochet, and we rarely do flat pieces with rows.
So let’s create a classic 5-round circle :
Rnd 1: Work 6sc in a magic ring [6]
Rnd 2: Inc 6 times ]12]
Rnd 3: (sc, inc) repeat 6 times [18]
Rnd 4: (2sc, inc) repeat 6 times [24]
Rnd 5: (3sc, inc) repeat 6 times [30]
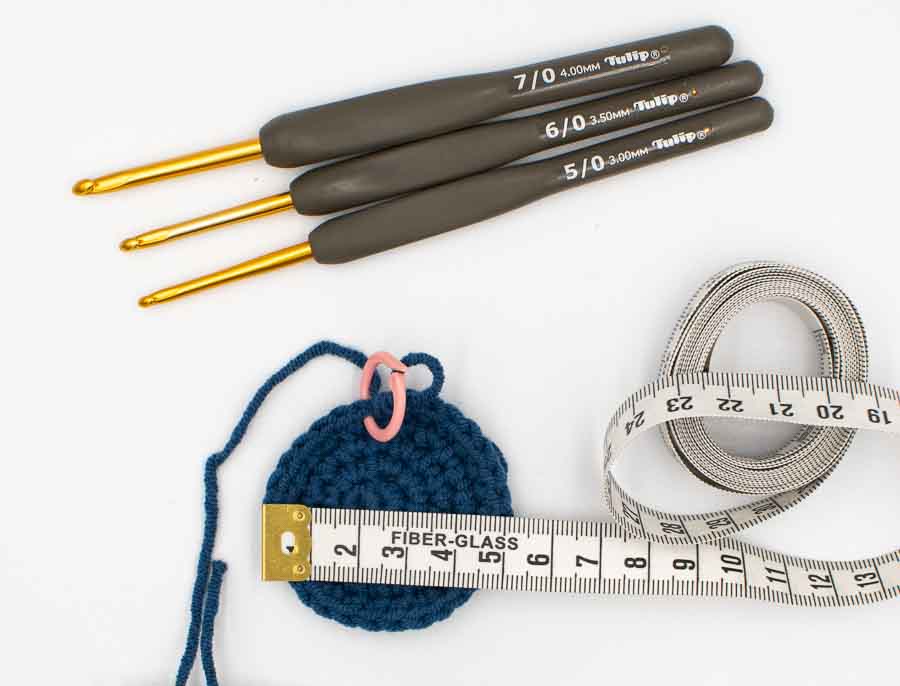
The important info here is the material used for this gauge measurement :
- I’m using a #3 / DK / light worsted yarn, 8 ply, 80% cotton 20% milk fiber (so if you’re using a 100% cotton yarn it’s quite similar) from a local shop.
- I’m using a 3.5mm / US E-4 crochet hook
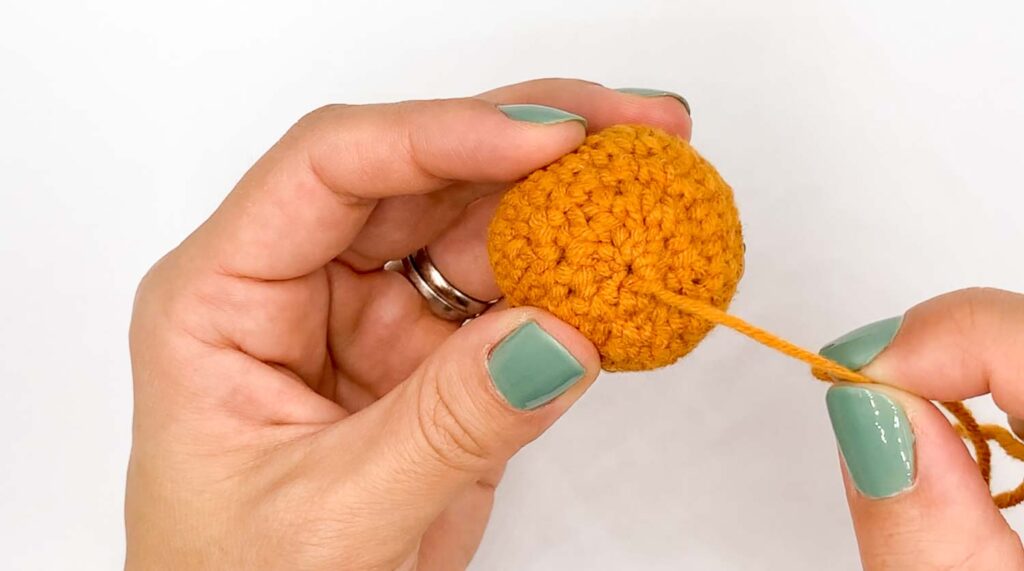
My 5 round circle width measures 5cm / 2”.
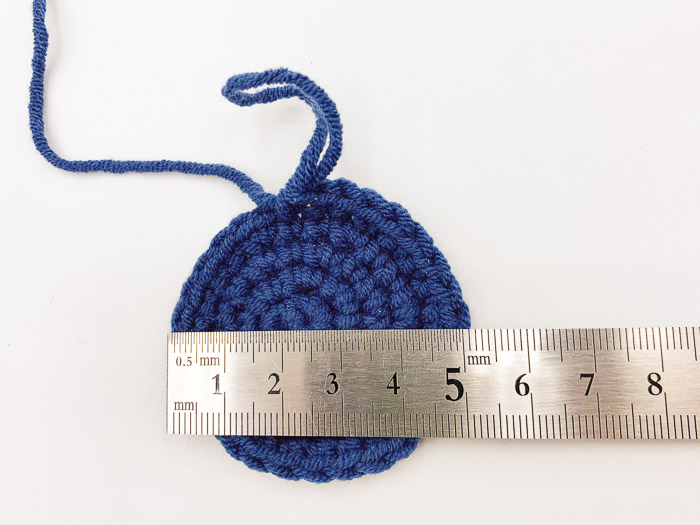
So if your circle is bigger than mine (using the same material) I would definitely recommend crocheting tighter, so that the final stuffing doesn’t show. You could also go down a hook size or two (3.25mm or 3mm).
I find this is the most frustrating thing that can happen when you have worked so hard on a toy and you realize once it’s finished that the stuffing shows too much. However, if that happens to you, one thing you can do if you don’t want to restart the toy all over again, is to stuff it a little bit less firmly. This way, the stuffing doesn’t push too much against the edges (that stretches the yarn and makes the gaps between stitches even bigger).
If your circle is smaller than mine, it means your tension is tighter than mine, so you’re safe on the gaps side, but you might want to loosen up a little bit your tension.
That’s it ! I hope this can help you make beautiful toys, and again it’s not widely used on amigurumi patterns in general. If you are a beginner it can help you to understand why your finished toy is much bigger or smaller than indicated on the pattern. But once you have figured out your tension you probably won’t need to use this anymore.
If you liked this tutorial don’t hesitate to share it with your crochet friends, and if you want to check more tips and tricks or techniques, they’re all here.