
Sharing is caring!
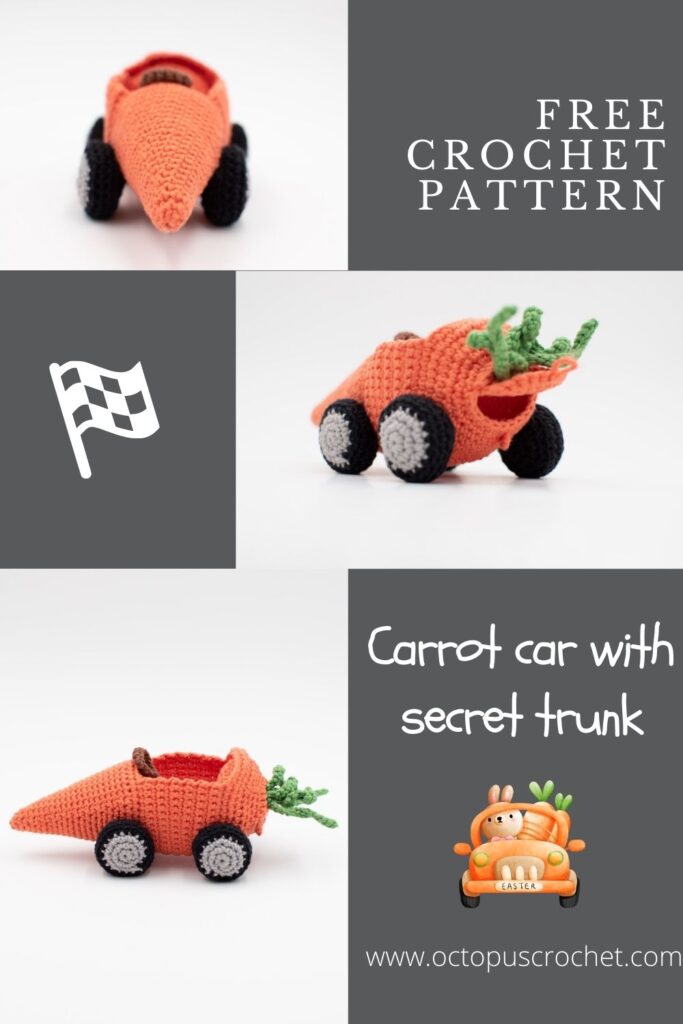
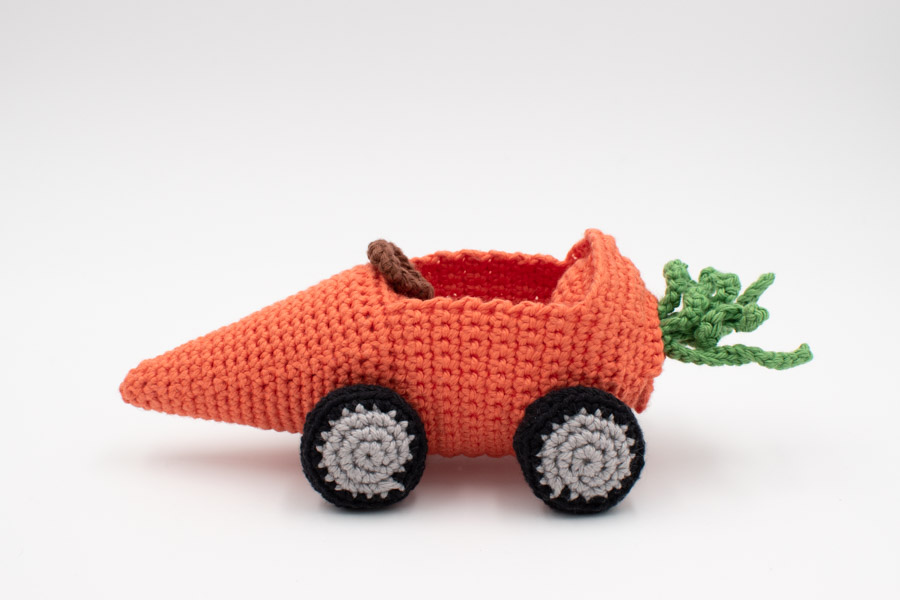
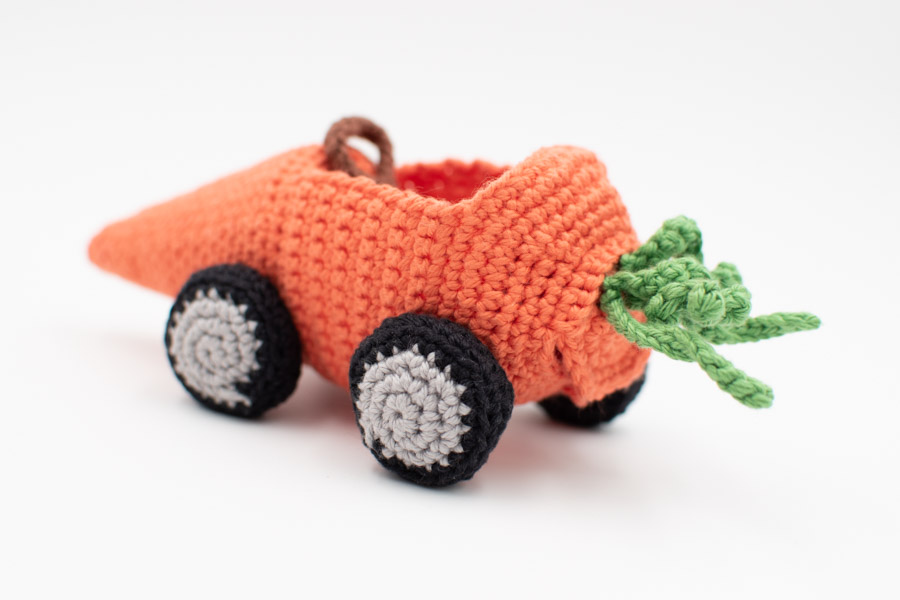
Every bunny dreams of it! This carrot car with secret trunk crochet pattern is one of the coolest projects I’ve worked on this year, I had so much fun. Don’t be fooled by its vegg-ish look, the engine has real power inside!
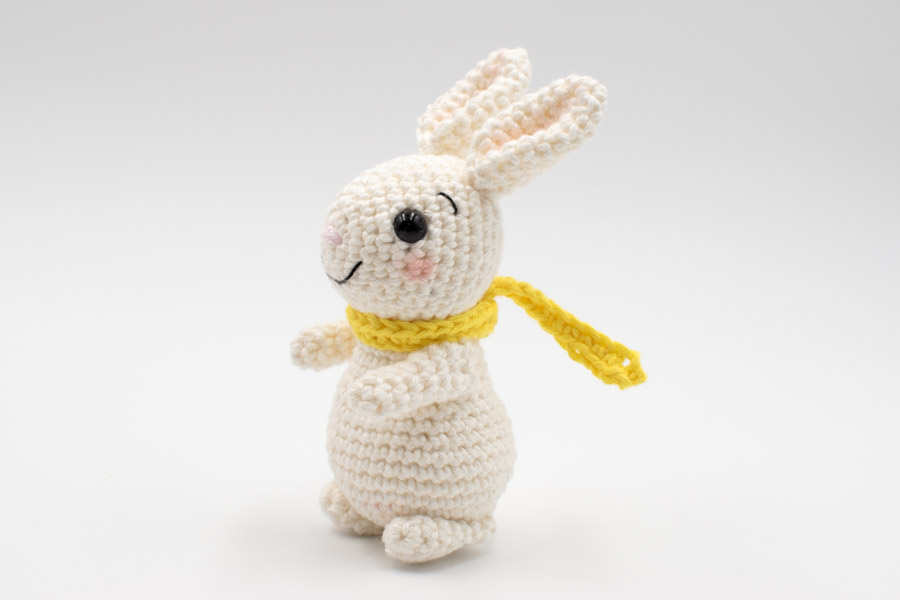
If you would like to start with the bunny, click here to the Bunny pilote amigurumi pattern.
No time right now? Pin this carrot car pattern to your Pinterest boards here.
*This blog contains affiliate links for products I use, believe in or recommend. This means I will earn a small commission if you make a purchase from one of these links, and of course it is at no extra cost for you. It helps me to keep Octopus Crochet going and to keep publishing new free patterns and tutorials for you to enjoy, so thank you! You can check my full disclosure here.
When I thought “carrot car”, at first I just saw a carrot, with wheels, and a space to sit the bunny. But then while crocheting I thought it was too bad that the carrot was just filled with fiberfill, that he could actually hide stuff inside Like Easter eggs. That’s how the trunk idea came out! And that’s why I’m alwaaaaaays late to publish my patterns, because while crocheting I have more and more ideas and I can’t help myself, once the idea is there, I have to try it, like oh, that would be so cool, let’s see…
But I have to admit I’m so happy with this one, cause it really adds something cool, and that’s probably the child in me talking. I’ve always loved secret pockets, secret codes, secret hunts, secret everything!
Scroll down for the free patterns and links below.
Beginner friendly.
This pattern uses US terms abbreviations.
Gauge with the above material (2.5mm hook): 5-round circle = 4cm (1.6″). Find out how to measure gauge for amigurumis in my tutorial here.
With the material mentioned above and when gauge is achieved:
st: stitch/es
sc: single crochet
sl st: slip stitch
inc: single crochet increase (work 2 sc into the same st)
dec: single crochet decrease (single crochet two stitches together)
[number]: total number of stitches of the round
Rnd: round
(…) x 2: repeat whatever is inside the brackets the number of times indicated
(…) in next st: work all the instructions inside the brackets in the next stitch
in BLO: in the back loop only
in FLO: in the front loop only
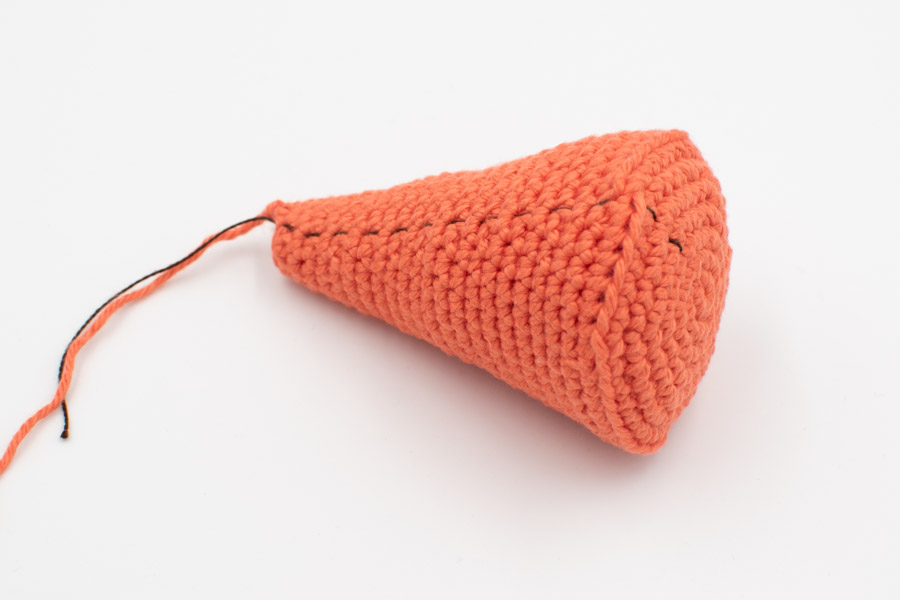
With orange. This is Part 1.
Rnd 1: work 6sc into a magic ring. [6]
Rnd 2: inc in each st around. [12]
Rnd 3: (sc, inc) x 6. [18]
Rnd 4: (2sc, inc) x 6. [24]
Rnd 5: (3sc, inc) x 6. [30]
Rnd 6: (inc, 4sc) x 6. [36]
Rnd 7: (5sc, inc) x 6.[42]
Rnd 8: in BLO, sc around, and insert a stitch marker in the first front loop left aside. [42]
Rnd 9: (in both loops) (5sc, dec) x 6. [36]
Rnd 10: sc around. [36]
Rnd 11: (dec, 10sc) x 3. [33]
Rnd 12: sc around. [33]
Rnd 13: (dec, 9sc) x 3. [30]
Rnd 14: sc around. [30]
Rnd 15: (dec, 8sc) x 3. [27]
Rnd 16: sc around. [27]
Rnd 17: (dec, 7sc) x 3. [24]
Start filling with fiberfill.
Rnd 18: sc around. [24]
Rnd 19: (dec, 6sc) x 3. [21]
Rnd 20: sc around. [21]
Rnd 21: (dec, 5sc) x 3. [18]
Rnd 22: sc around. [18]
Rnd 23: (dec, 4sc) x 3. [15]
Rnd 24: sc around. [15]
Rnd 25: (dec, 3sc) x 3. [12]
Rnd 26: sc around. [12]
Rnd 27: (dec, 2sc) x 3. [9]
Rnd 28: sc around. [9]
Rnd 29: (dec, sc) x 3. [6]
Fasten off, finish stuffing (not too much), and sew closed.
Now let’s prepare a part that will be used later for the back of the car. Let’s call it Part 3.
With orange.
Rnd 1: work 6sc into a magic ring. [6]
Rnd 2: inc in each st around. [12]
Rnd 3: (sc, inc) x 6. [18]
Rnd 4: (2sc, inc) x 6. [24]
Rnd 5: (inc, 3sc) x 6. [30]
Rnd 6: (4sc, inc) x 6. [36]
Rnd 7: (2sc, inc, 3sc) x 6. [42]
Fasten off, weave in tails.
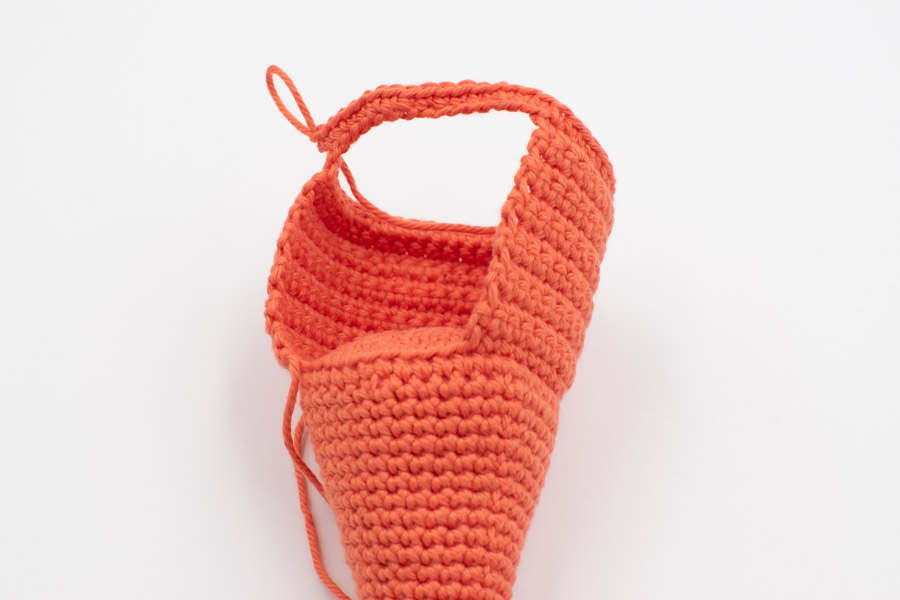
Now let’s crochet the middle of the carrot car. This is Part 2.
This part is crocheted in rows first, then in rounds.
With orange, make a slip knot.
The turning chain doesn’t count as a stitch.
Row 1: Using the stitch marker left at round 8, count 16 stitches and join yarn in the 16th front loop, crocheting in “backward” direction (towards the start of the round). Work 32sc. [32]
This way you should have 16 sc on each side of your stitch marker.
Row 2 – 12: chain 1, turn, 32sc. [32]
Row 13: 32sc, chain 16. [48] (the chains count as stitches)
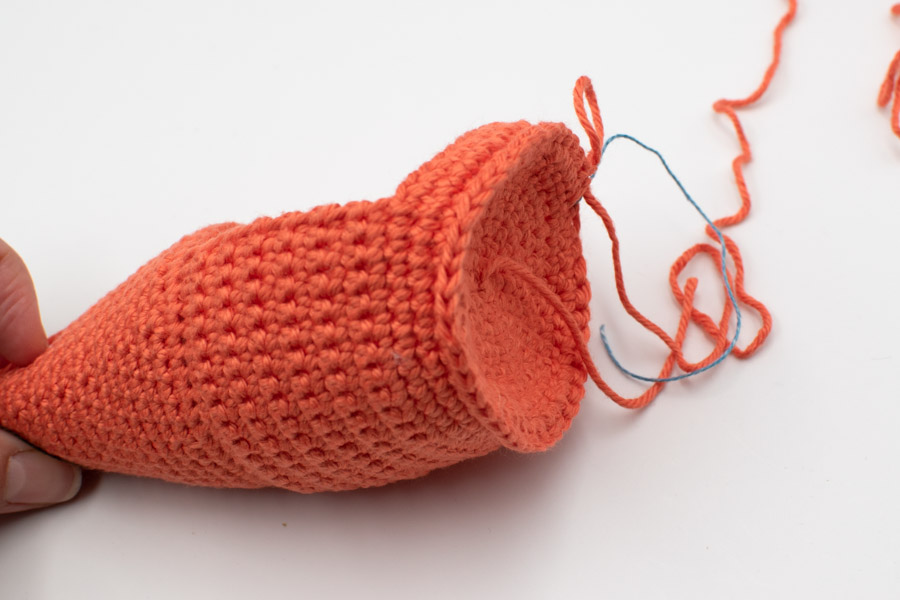
The last part of the carrot car is crocheted in rounds again.
Rnd 14: starting in the first st from row 13, 48sc. [48]
Rnd 15: (dec, 6sc) x 6. [42]
Now take Part 3. It has 42 stitches just like your last round. We are going to attach Part 3 to the car to build up the trunk, by single crocheting both parts together. The right side of Part 3 should be inside the driver’s cabin (and the wrong side hidden inside the trunk).
Rnd 16: insert your hook under your next stitch and under a stitch of Part 3, and work 42sc around this way. [42]
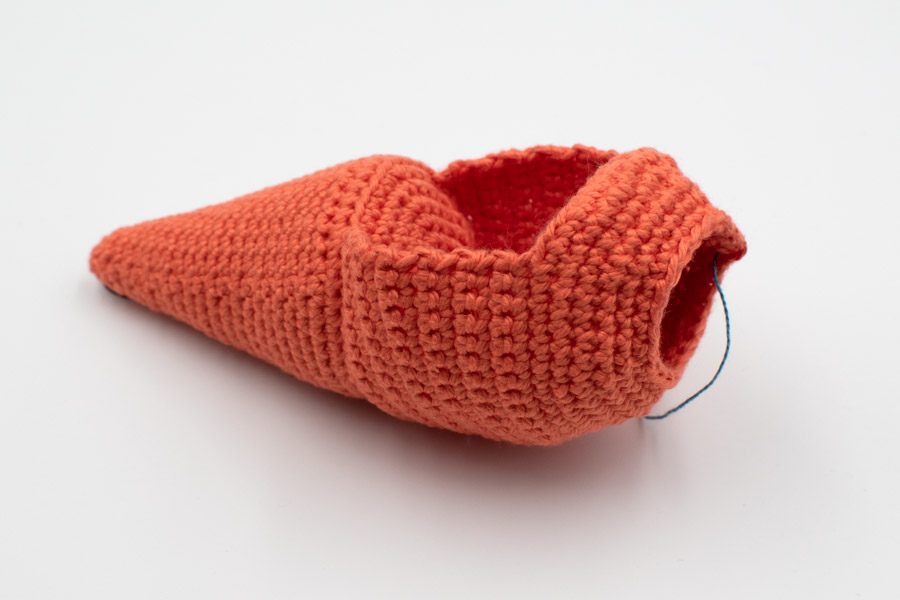
Rnd 17: (dec, 5sc) x 6. [36]
Rnd 18: (dec, 4sc) x 6. [30]
Rnd 19: (dec, 3sc) x 6. [24]
Fasten off, make an invisible finish, and weave in yarn tail.
Now let’s crochet the trunk lid. This is Part 4.
With orange.
Rnd 1: leave a long starting tail (15cm / 6″) and work 6sc into a magic ring. [6]
Rnd 2: inc in each st around. [12]
Rnd 3: (sc, inc) x 6. [18]
Rnd 4: (2sc, inc) x 6. [24]
Don’t fasten off.
Now we are going to attach Part 4 to the top of the last round by single crocheting both parts together.
Insert your hook in the next stitch of part 4 and in the last stitch of round 19. Work 11sc this way, towards the top of the car.
Fasten off, make a knot to secure the yarn tail and weave it in.
Insert the starting tail of Part 4 through a tapestry needle, weave in the tail straight to the bottom of the trunk lid, create a loop, and secure it with a knot. Then weave in the tail inside the lid.
Now let’s make a knob. Take a strand of orange yarn. With a tapestry needle, insert it at the bottom of the trunk, from inside to outside, at the center of the trunk, between rounds 17 and 18. Wrap the yarn 6 times around your needle and go back in the same hole. Tighten it up and make a knot with each yarn tail to secure it.
With light grey.
Rnd 1: work 6sc into a magic ring. [6]
Rnd 2: inc in each st around. [12]
Rnd 3: (sc, inc) x 6. [18]
Change color with black (finish the last st with black).
Rnd 4: (2sc, inc) x 6. [24]
Rnd 5: in BLO, sc around. [24]
Rnd 6: sc around. [24]
Rnd 7: in BLO, (dec, 2sc) x 6. [18]
Rnd 8: (in both loops) (dec, sc) x 6. [12]
Start filling with fiberfill.
Rnd 9: 6dec. [6]
Stuff with fiberfill, fasten off leaving an extra long tail for sewing, and sew closed.
With brown.
Make a slip knot. Chain 16. Slip stitch to the first chain to join.
Row 1: sc in each st around (start in the next available stitch and make the last sc in the sl st). [16]
Slip stitch to the next st, fasten off, leaving a tail for sewing.
The steering wheel will naturally curve a bit inward, showing the wrong side, leave it this way.
We are going to make several tops of different length and thickness. With green yarn.
Tops number 1: (make 2)
Make a slip knot, chain 15. Starting in the second chain from the hook, make 14 sl st. [14]
Fasten off, leaving a tail for sewing.
Tops number 2: (make 3)
Make a slip knot, chain 13. Starting in the second chain from the hook make 12sc. [12]
Fasten off, leaving a tail for sewing.
1)Sew the steering wheel to the cabin.
2)Sew the carrot tops to the trunk lid, weave in the tails inside.
Using ball point pins, position the four tires and sew them one by one
Here you go! Now make it roar! I can’t wait to see your makes, don’t forget to tag me on Instagram @octopuscrochetdesign .
Check out the carrot car bunny pilote amigurumi pattern here, and the easy and quick mini Easter eggs, they can fit in the trunk!

Crochet Designer
Hi friend, I learned crochet online, so you can do it too! I created this blog to share my tips and tricks for beginners and detailed patterns of amigurumis, crochet toys and home decor items. Jump in and beware of the crochet addiction: it’s real!!!