Sharing is caring!
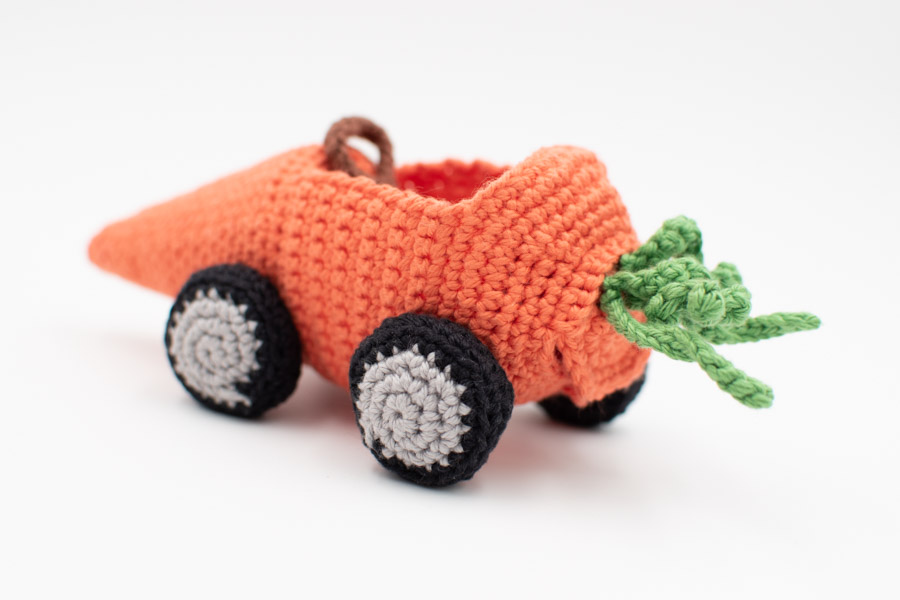
This carrot car bunny pilote amigurumi pattern is the result of way too many hours playing Cars with my 3yo son! I guess Flash Mcqueen got into my head.
*This blog contains affiliate links for products I use, believe in or recommend. This means I will earn a small commission if you make a purchase from one of these links, and of course it is at no extra cost for you. It helps me to keep Octopus Crochet going and to keep publishing new free patterns and tutorials for you to enjoy, so thank you! You can check my full disclosure here.
It actually goes back to a few years back when I created Jojo the mailman. I wanted to make him a car to distribute the mails, and quickly created a carrot car, but it was just for fun to make a little video for Easter, it wasn’t neat and and I never really wrote down a proper pattern. But this time I knew exactly what I wanted, and the carrot car was made to measure for this guy!
Scroll down for the free patterns and links below.
Beginner friendly.
This pattern uses US terms abbreviations.
Gauge with the above material (2.5mm hook): 5-round circle = 4cm (1.6″). Find out how to measure gauge for amigurumis in my tutorial here.
With the material mentioned above and when gauge is achieved:
st: stitch/es
sc: single crochet
sl st: slip stitch
inc: single crochet increase (work 2 sc into the same st)
dec: single crochet decrease (single crochet two stitches together)
[number]: total number of stitches of the round
Rnd: round
(…) x 2: repeat whatever is inside the brackets the number of times indicated
(…) in next st: work all the instructions inside the brackets in the next stitch
in BLO: in the back loop only
in FLO: in the front loop only
With off-white.
Rnd 1: work 6sc into a magic ring. [6]
Rnd 2: inc in each st around. [12]
Rnd 3: (sc, inc) x 6. [18]
Rnd 4: sc around. [18]
Rnd 5: (2sc, inc) x 6. [24]
Rnd 6: sc around. [24]
Rnd 7: (3sc, inc) x 6. [30]
Rnd 8 – 12: sc around. [30]
Rnd 13: (dec, 3sc) x 6. [24]
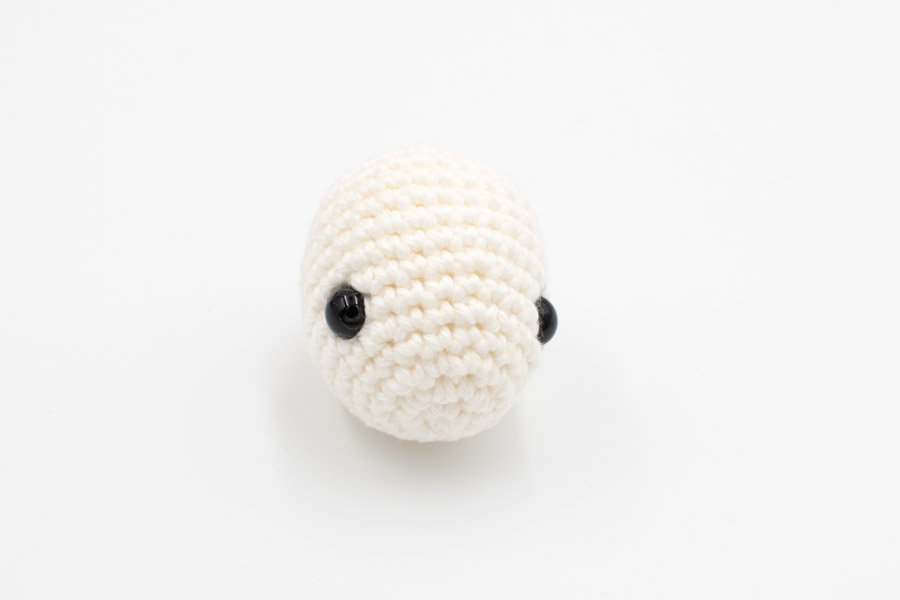
Insert safety eyes between rounds 6 and 7, 8 stitches apart when counting on round 6 (then once secured, the width of the eyes can hide the first stitch so you’ll see only 7 stitches between the two eyes on my pics for example).
Rnd 14: (dec, 2sc) x 6. [18]
Start stuffing with fiberfill.
Rnd 15: (dec, sc) x 6. [12]
Rnd 16: 6dec. [6]
Fasten off, finish stuffing, and sew closed. Hide the tail inside.
With off-white.
Rnd 1: work 4 sc into a magic ring. [4]
Rnd 2: (inc, sc) x 2. [6]
Rnd 3: (inc, sc) x 3. [9]
Rnd 4: sc around. [9]
Rnd 5: (2sc, inc) x 3. [12]
Rnd 6: sc around. [12]
Rnd 7: (3sc, inc) x 3. [15]
Rnd 8-9: sc around. [15]
Rnd 10: (3sc, dec) x 3. [12]
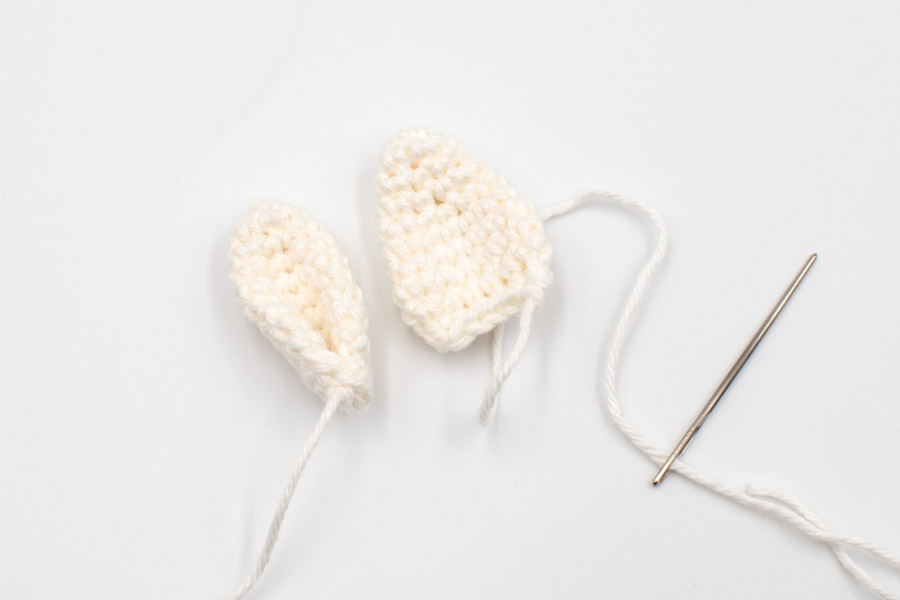
Flatten the ear and sc both sides together (it should make 5sc).
Fasten off, leaving a long tail for sewing. Fold the base of the ear and with your tapestry needle, sew the tail to the opposite side.
Make a second one.
With off-white.
Rnd 1: work 6sc into a magic ring. [6]
Rnd 2: inc in each st around. [12]
Rnd 3: (sc, inc) x 6. [18]
Rnd 4: (2sc, inc) x 6. [24]
Rnd 5: (3sc, inc) x 6. [30]
Rnd 6: (4sc, inc) x 6. [36]
Rnd 7 – 9: sc around. [36]
Rnd 10: dec, 31sc, dec, sc. [34]
Rnd 11: 7sc, dec, 6sc, dec, 6sc, dec, 7sc, dec. [30]
Rnd 12: sc around. [30]
Rnd 13: (dec, 4sc) x 5. [25]
Rnd 14: sc around. [25]
Rnd 15: (3sc, dec) x 5. [20]
Rnd 16 – 17: sc around.[20]
Rnd 18: 5sc, dec, 6sc, dec, 5sc. [18]
Finish stuffing, fasten off leaving a long tail for sewing to the head later.
With Yellow. Make a slip knot, chain 51 (try to make your chain not too tight).
Starting in the second chain from the hook, work 50sc. [50]
Fasten off, make a knot to secure it and weave in the ends.
1) Sew the body to the head (the bumpy part of the body should be at the back).
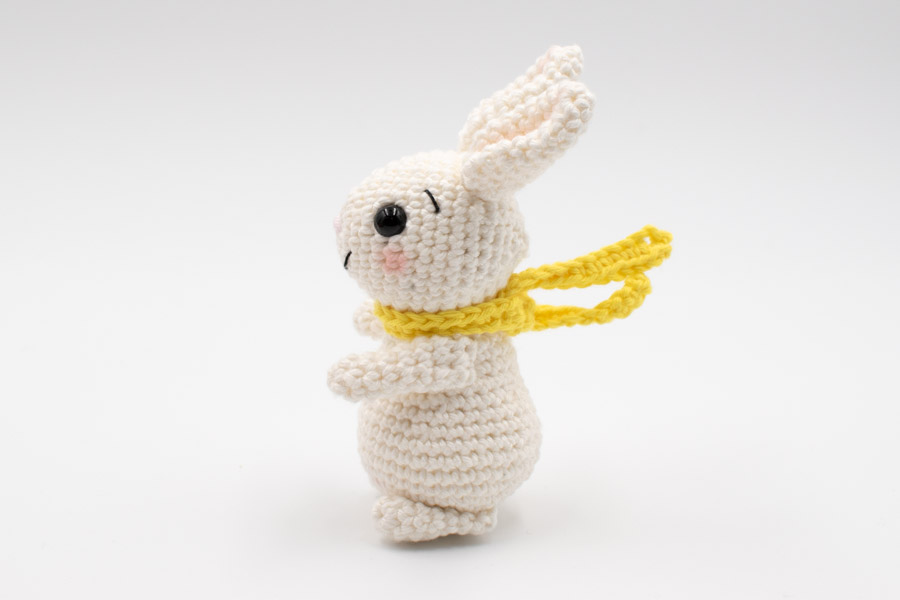
2) Sew the ears to the head, so that they are leaning backwards: the front of the ears are sewn between rounds 10 and 11, and they are 4 stitches apart.
3) Sew the feet to the body.
4) Sew the arms to the body just before the last round of the body, and grab a stitch from the upper arm to secure a straight position (as if it was holding the steering wheel).
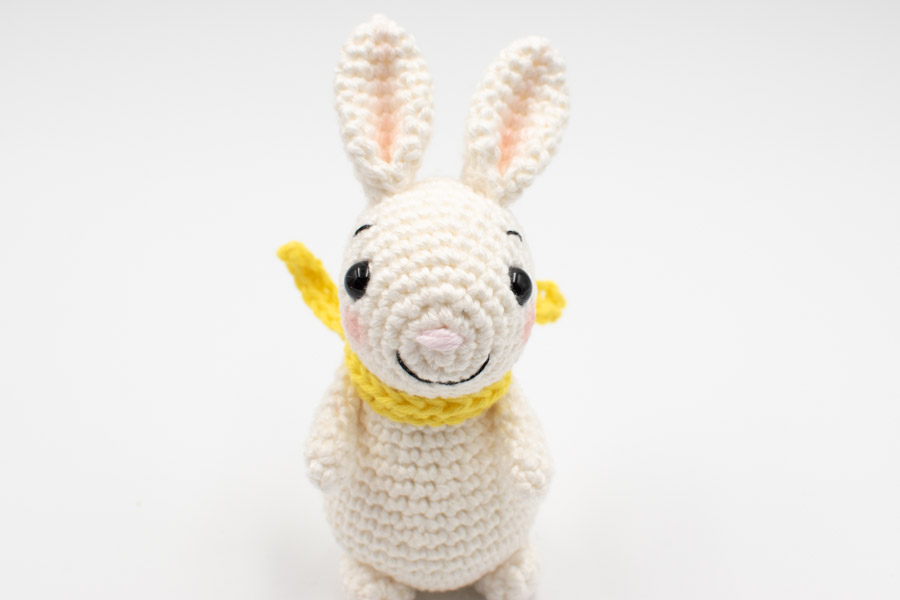
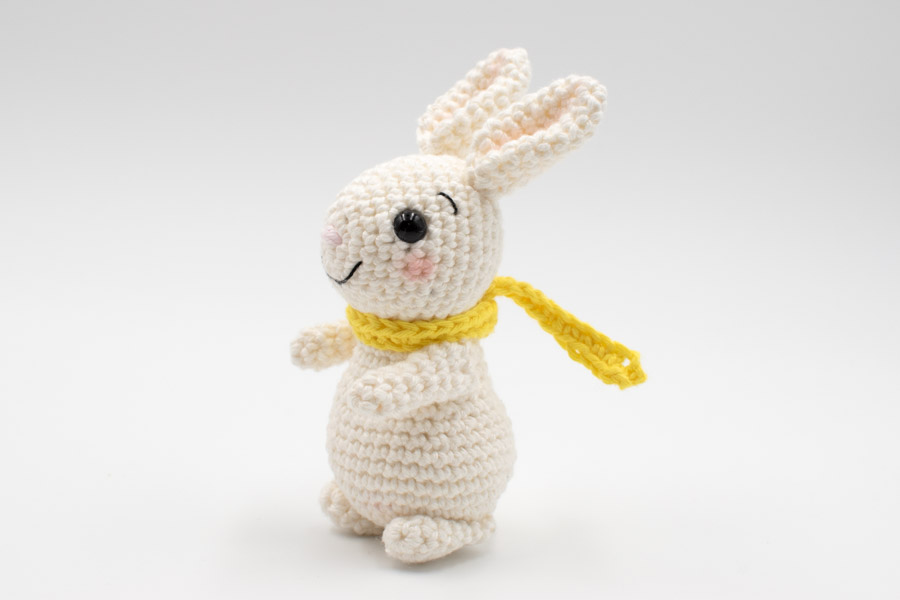
5) Put on the scarf and embroider the mouth, nose, and eyebrows. Add a bit of make up blush on the cheeks and inner part of the ears.
Your bunny is ready to drive! Oh wait, NO! he needs a car!! Jump to the next post to make the awesome carrot car, it even has a secret trunk to hide some chocolate but shhh, don’t tell anyone! I can’t wait to see your makes, don’t forget to tag me on Instagram @octopuscrochetdesign .
Crochet Designer
Hi friend, I learned crochet online, so you can do it too! I created this blog to share my tips and tricks for beginners and detailed patterns of amigurumis, crochet toys and home decor items. Jump in and beware of the crochet addiction: it’s real!!!