

Sharing is caring!
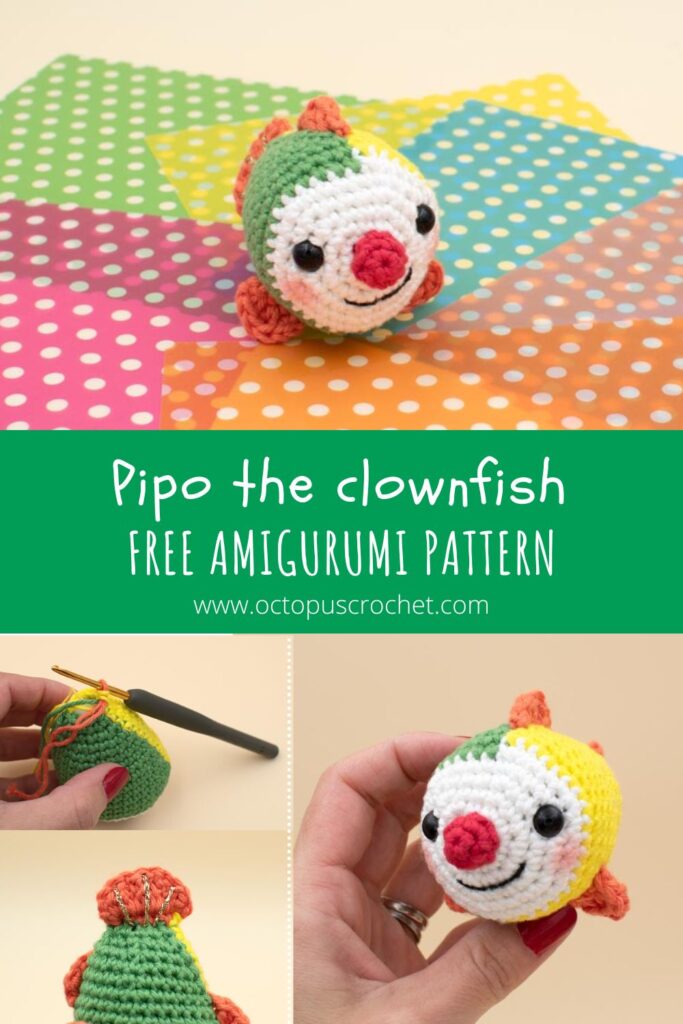
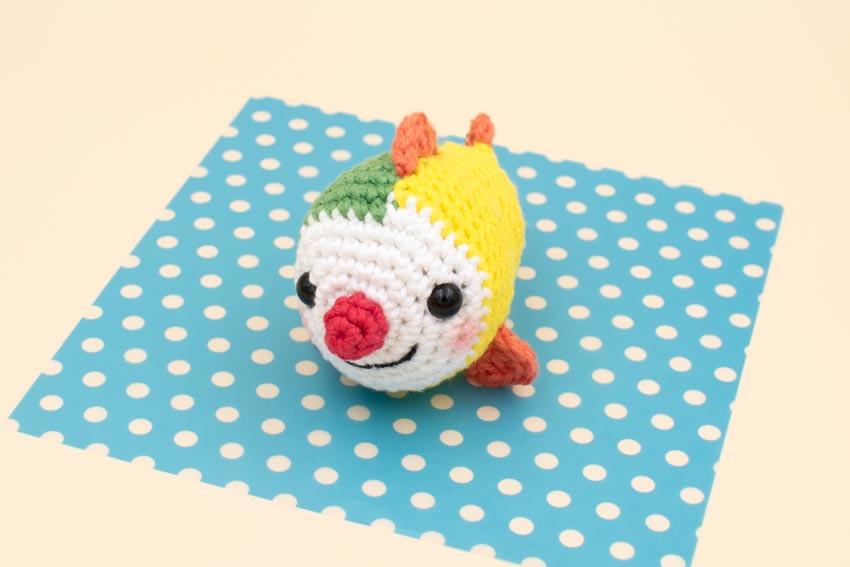
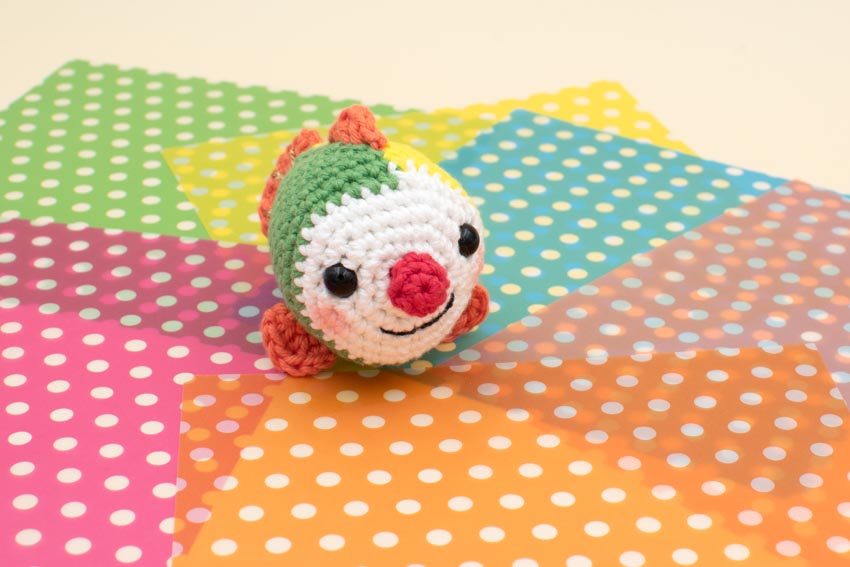
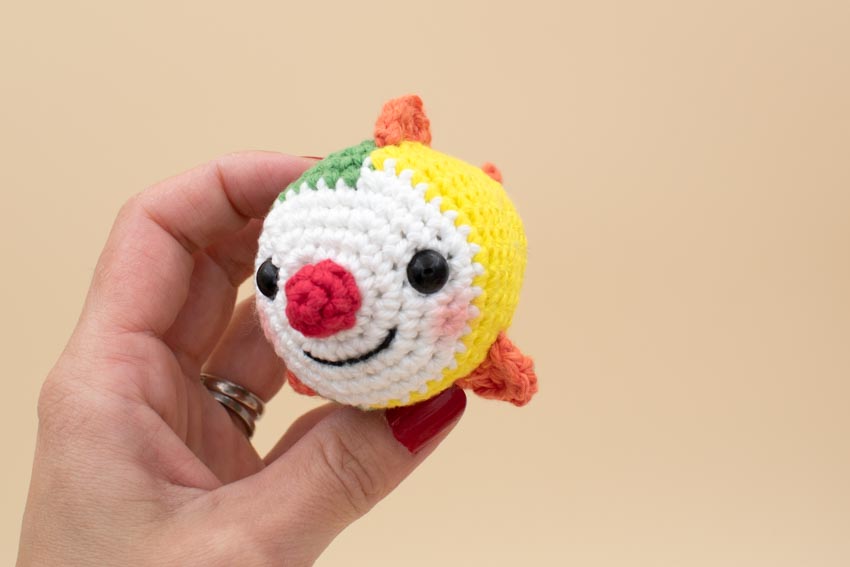
Part two of this fun free clownfish family crochet along is Pipo the clownfish amigurumi pattern! This one chose to hide his stripes and wear a bi-color clown costume. I hope you will have fun crocheting him, and don’t forget to send me your pictures, there are free patterns to win! You can check all the crochet along rules in this article on the blog: Clownfish family crochet along.
Instructions to assemble them into a baby mobile will be published at the end of the CAL.
No time right now? Pin this crochet pattern for later.
*This blog contains affiliate links for products I use, believe in or recommend. This means I will earn a small commission if you make a purchase from one of these links, and of course it is at no extra cost for you. It helps me to keep Octopus Crochet going and to keep publishing new free patterns and tutorials for you to enjoy, so thank you! You can check my full disclosure here.
This guy was the third one I created, but as it uses a different crochet technique regarding the colors, I thought I’d put him second in the CAL, and keep the easier one towards the end.
To achieve this bi-color costume, I used a classic technique of color change, but I also carried the yarn since half of the round is in green and the other half in yellow, at each round. Don’t worry, it’s the perfect occasion to learn a new technique if you’re not familiar with this, and I thought I would make it easier for you and shot a little tutorial for the occasion. You’ll find the link below!
Scroll down for the free patterns and links below.
Intermediate.
This pattern uses US terms abbreviations.
Gauge for the clownfish with the above material (2.5mm hook): 5-round circle = 4cm (1.6″). Find out how to measure gauge for amigurumis in my tutorial here.
With the material mentioned above and when gauge is achieved:
st: stitch/es
sc: single crochet
hdc: half double crochet
dc: double crochet
tr: treble crochet
sl st: slip stitch
inc: single crochet increase (work 2 sc into the same st)
dec: single crochet decrease (single crochet two stitches together)
hdc inc: half double crochet increase (work 2 hdc into the same st)
[number]: total number of stitches of the round
Rnd: round
(…) x 2: repeat whatever is inside the brackets the number of times indicated
(…) in next st: work all the instructions inside the brackets in the next stitch
in BLO: in the back loop only
in FLO: in the front loop only
With DMC Happy Cotton shade 761 (off-white).
Rnd 1: Work 6sc into a magic ring. [6]
Rnd 2: inc in each stitch around. [12]
Rnd 3: (sc, inc) x 6. [18]
Rnd 4: (2sc, inc) x 6. [24]
Rnd 5: (3sc, inc) x 6. [30]
Rnd 6: (4sc, inc) x 6. [36]
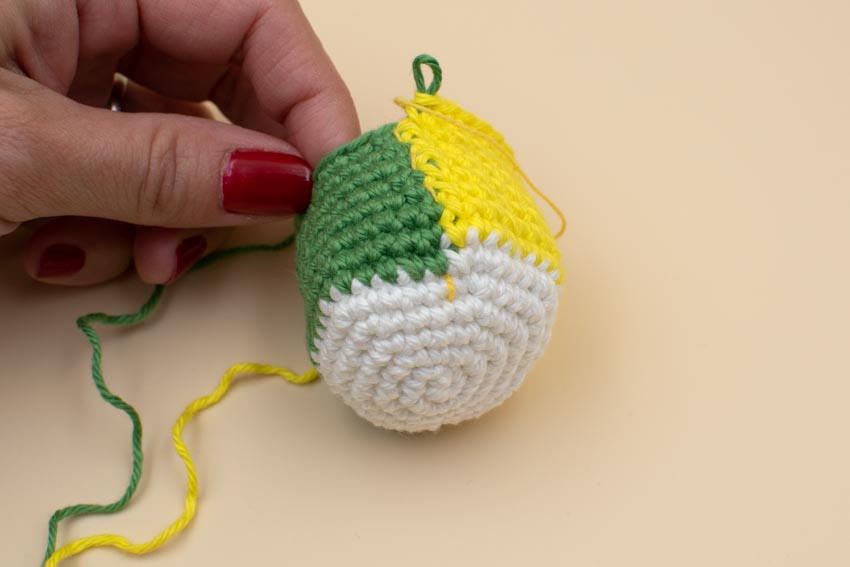
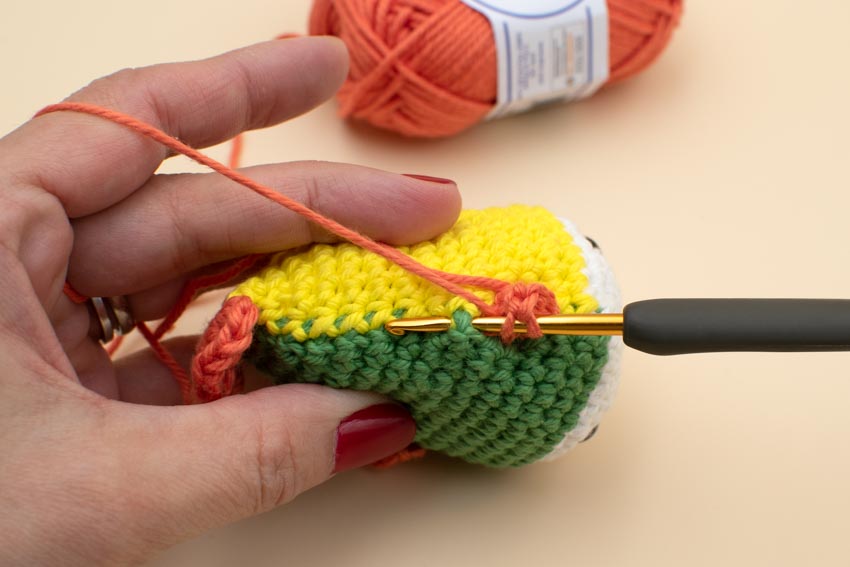
Change color to green.
Rnd 7: 18sc, change colour to yellow and carry green yarn, 18sc. [36]
Change colour to green and carry yellow.
Rdn 8: 18sc, change colour to yellow and carry green, 18 sc. [36]
Change color to green and carry yellow.
Cut the white yarn, make a knot to secure it and weave in the yarn tail so that it doesn’t get in your way.
Rnd 9: 18sc, change colour to yellow and carry green, 18sc. [36]
Change colour to green and carry yellow.
Rnd 10: dec, 16sc, change colour to yellow and carry green, dec, 16sc. [34]
Change colour to green and carry yellow.
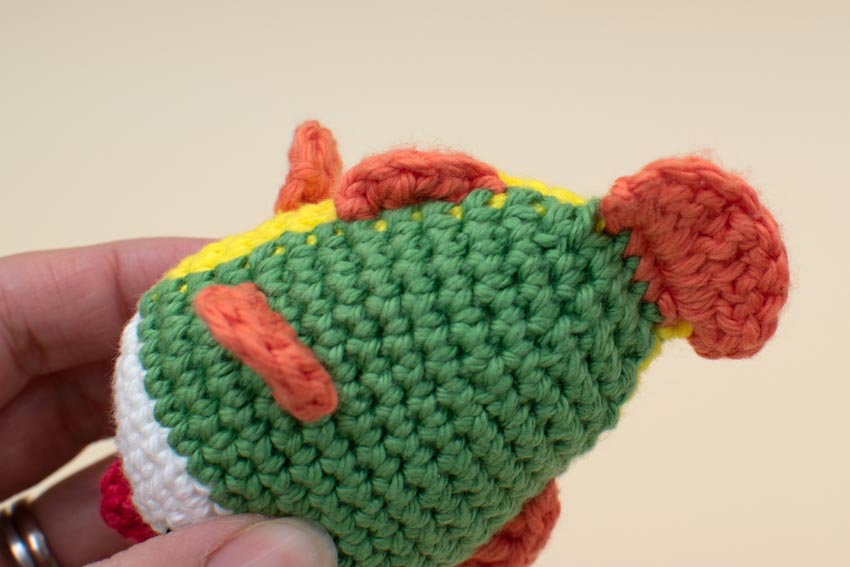
Rnd 11: dec, 10sc, in BLO 3sc, 2sc (in both loops), change colour to yellow and carry green, dec, sc, in BLO 3sc, in both loops 11sc .[32]
Change color to green and carry yellow.
Rnd 12: 16sc, change colour to yellow and carry green, 16sc. [32]
Change colour to green and carry yellow.
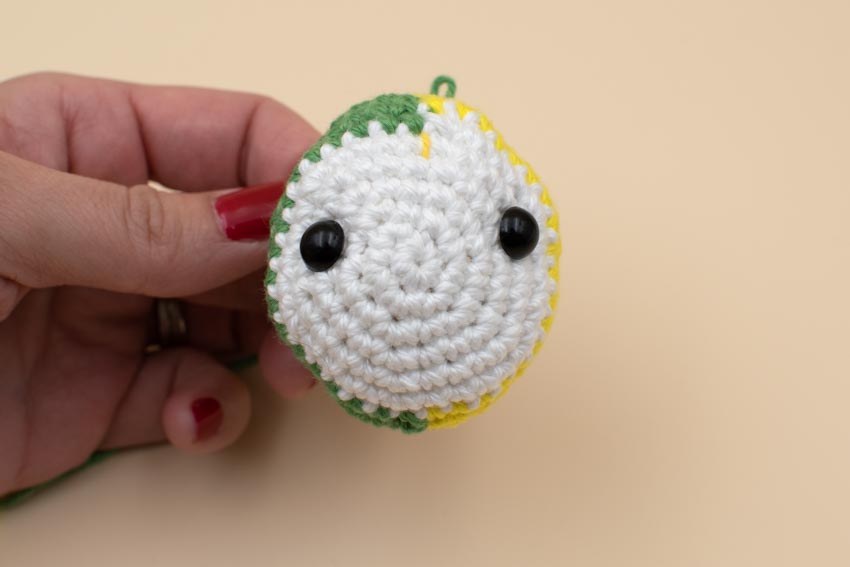
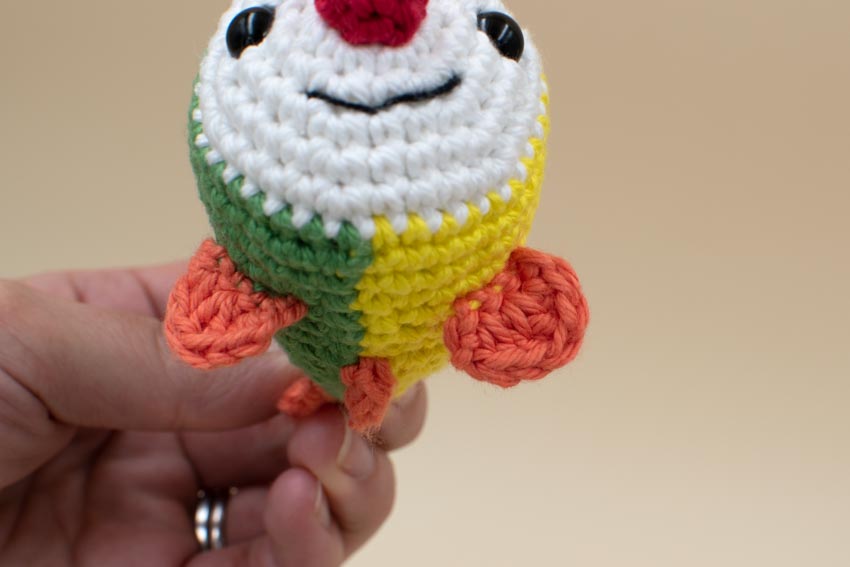
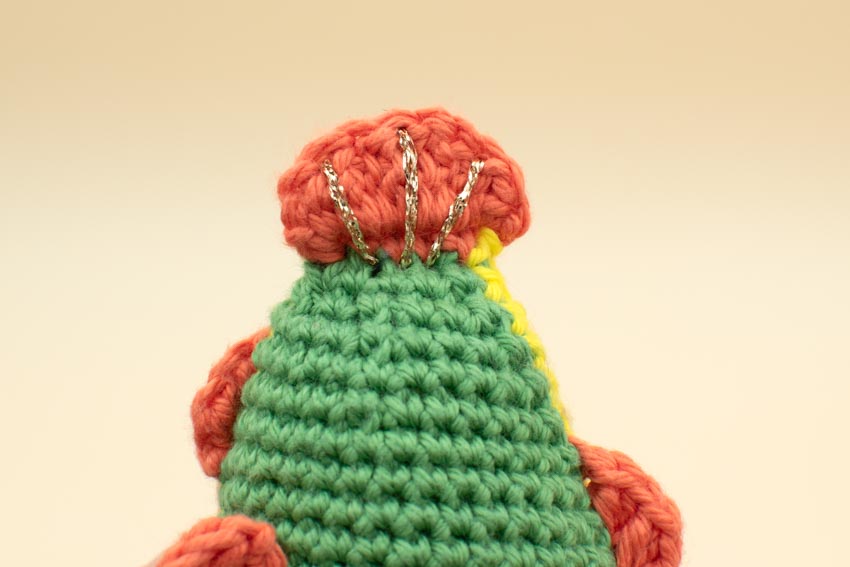
Insert 8mm safety eyes between rounds 4 and 5, 9 stitches apart (counting stitches from beginning and end of round 4, see first picture). Double check each eye is at the same distance from the 3BLO from round 11, this is where the pectoral fins will be crocheted).
Rnd 13: dec, 14sc, change colour to yellow and carry green, dec, 14sc. [30]
Change colour to green and carry yellow.
Rnd 14: 15sc, change colour to yellow and carry green, 15sc. [30]
Change colour to green and carry yellow.
Rnd 15: dec, 13sc, change colour to yellow and carry green, dec, 13sc. [28]
Change colour to green and carry yellow.
Rnd 16: (dec, 5sc) x 2, change colour to yellow and carry green, (dec, 5sc) x 2. [24]
Change colour to green and carry yellow.
Rnd 17: dec, 10sc, change colour to yellow and carry green, dec, 10sc . [22]
Change colour to green and carry yellow.
Start stuffing with fiberfill.
Rnd 18: dec, 3sc, dec, 4sc, change colour to yellow and carry green, dec, 4sc, dec, 3sc. [18]
Change colour to green and carry yellow
Rnd 19: dec, 2sc, dec, sc, dec, change colour to yellow and carry green, 2sc, dec, 3sc, dec. [13]
Change colour to green and carry yellow.
Rnd 20: dec, 4sc, change colour to yellow and carry green, dec, 5sc. [11]
Change colour to orange.
Finish stuffing with fiberfill.
Cut the green and yellow yarn tails, make a knot to secure them, and hide it inside the fish.
Rnd 21: With orange yarn, flatten and sc both sides together so that you end up with 5sc. [5]
Now let’s crochet the tail:
The chain doesn’t count as a stitch.
Row 1: Chain 1, turn, (sc, hdc) in the same st, (2dc) in the next st, (2tr) in the next st, (2dc) in the next st, (hdc, sc) in the last st. [10]
Fasten off leaving a tail, make a knot to secure it, and hide the yarn end inside the fish.
With orange yarn.
Make a slip knot.
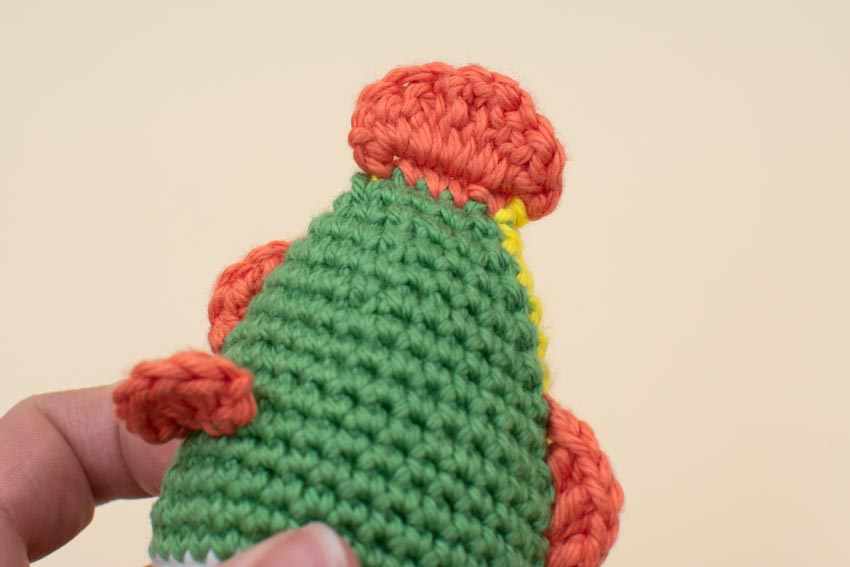
The pectoral fins are crocheted using the front loops from round 11. The fin is crocheted in rows, and the right side of row 2 is prettier than the wrong side: for the left fin, start crocheting from top to bottom (in other words, start in the loop that is closer from the back of the fish, and crocheting towards the belly).
For the right fin, start crocheting from bottom to top (or from the belly towards the back).
Row 1: 3sc. [3]
Row 2: chain 1, turn, (sc, hdc) in first st, (2dc) in next st, (hdc, sc) in last st. [6] (The chain doesn’t count as a stitch)
Fasten off leaving a tail, secure it with a knot, and hide it inside. Hide the other yarn tail inside as well.
With orange yarn.
Make a slip knot.
Start on the top of the fish, insert your hook between row 9 and 10, and exit between row 10 and 11.
Row 1: Sl st, (hdc, dc) in next st, (2dc) in next st, (2dc) in next st, skip 1, sl st. [7] (The first sl st doesn’t count as a stitch).
Fasten off, leaving a tail, make a knot to secure the yarn end and hide the tails inside.
With orange yarn.
Make a slip knot. Under the fish belly, at the center, insert your hook between rounds 13 and 14, and exit between rounds 14 and 15.
Row 1: (sl st, hdc) in the first st, (2hdc) in next st, hdc in next st, sl st in next st. [5] (The first sl st doesn’t count as a stitch).
Fasten off, leaving a tail, make a knot to secure the yarn end, and hide the tail inside.
With Happy Cotton shade 754 (pinkish red).
Rnd 1: work 4sc into a magic ring. [4]
Rnd 2: (inc, sc) x 2. [6]
Rnd 3: sc around. [6]
Fasten off leaving a long tail for sewing, fill slightly with the starting yarn tail or fiberfill if needed, and sew closed.
Add some blush powder on the cheeks with a small brush.
Congratulations on completing the part two of this clownfish family set! I can’t wait to see your makes, don’t forget to tag me on Instagram @octopuscrochetdesign and use the hashtag #clownfishcal .
The next one will be published on March 12 !
Crochet Designer
Hi friend, I learned crochet online, so you can do it too! I created this blog to share my tips and tricks for beginners and detailed patterns of amigurumis, crochet toys and home decor items. Jump in and beware of the crochet addiction: it’s real!!!