Sharing is caring!
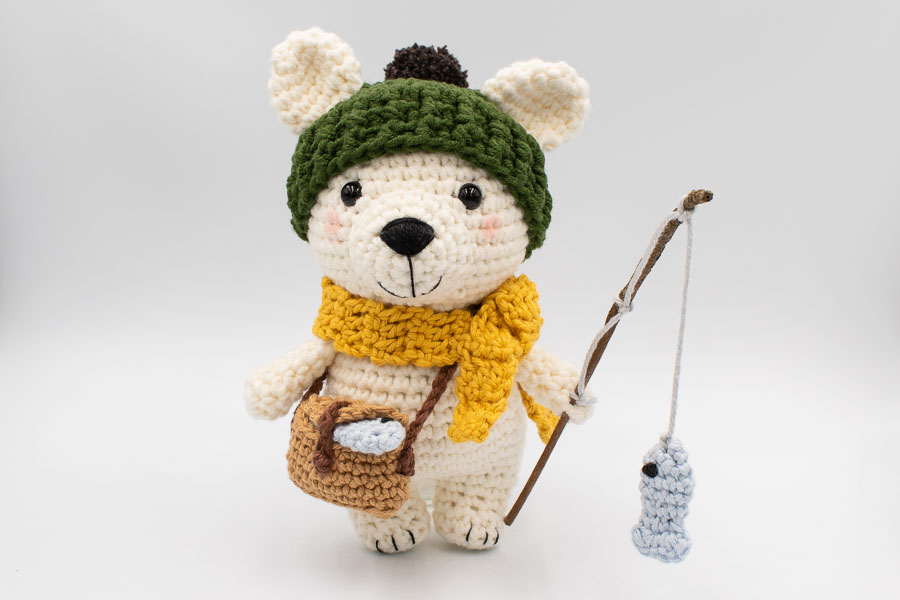
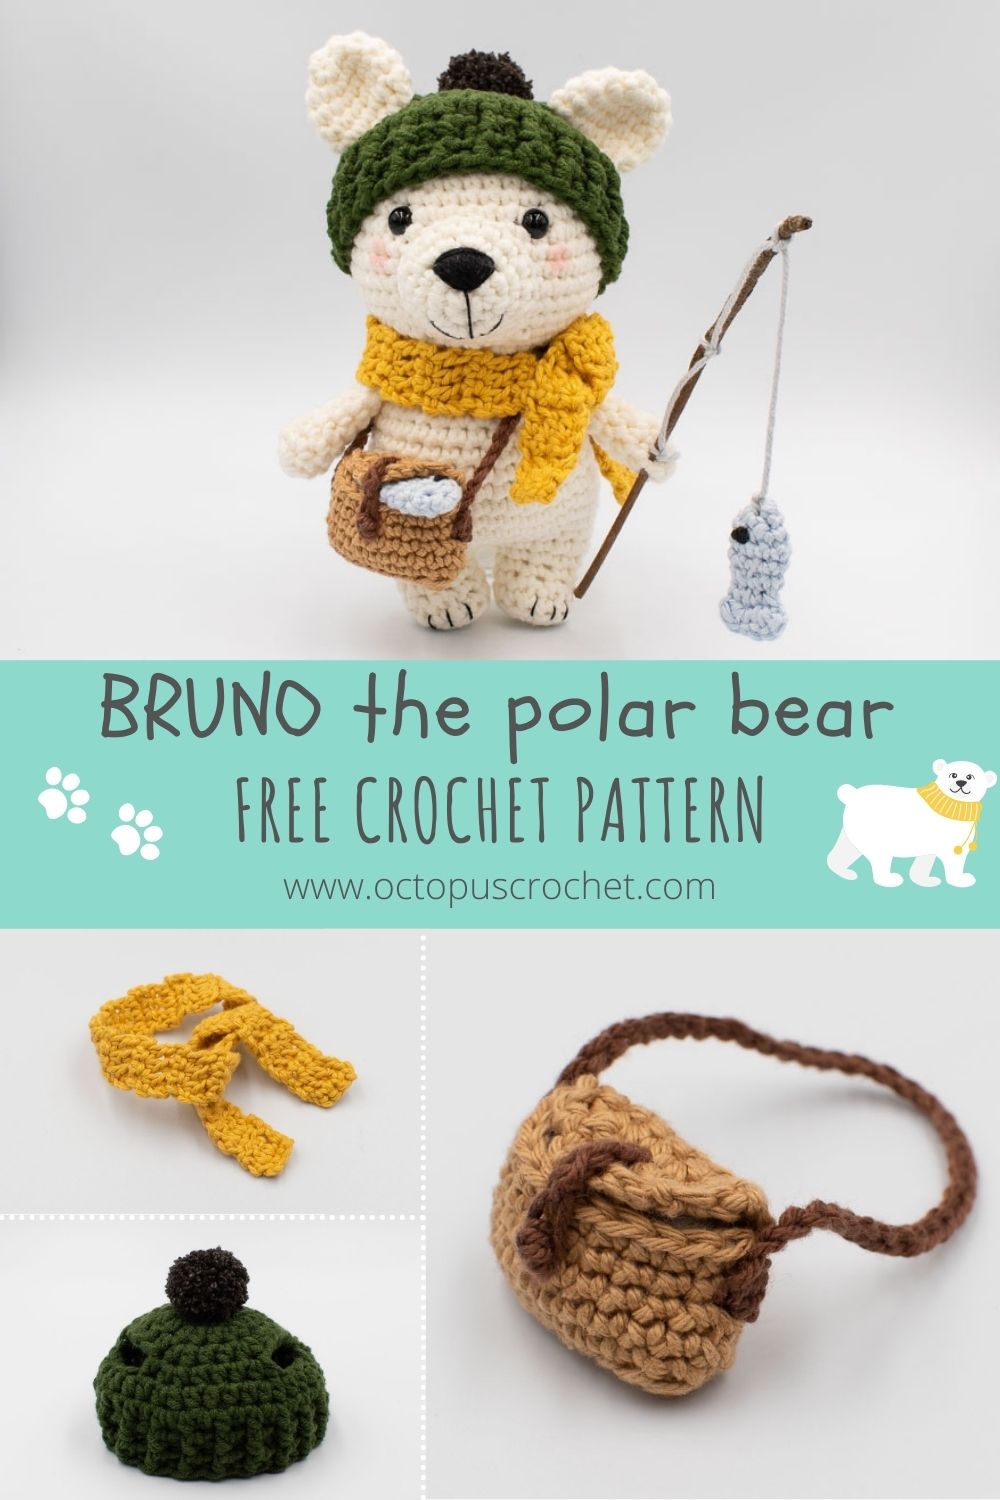
This little fisherman is very special to my heart. Read more about the inspiration for Bruno the polar bear amigurumi pattern below or scroll down for the free pattern.
No time right now? Pin this tutorial for later.
*This blog contains affiliate links for products I use, believe in or recommend. This means I will earn a small commission if you make a purchase from one of these links, and of course it is at no extra cost for you. It helps me to keep Octopus Crochet going and to keep publishing new free patterns and tutorials for you to enjoy, so thank you! You can check my full disclosure here.
If you prefer to purchase an inexpensive add-free pdf version of this pattern I’ve got you covered. The premium pdf version has all the instructions, more step by step pictures, no ad, and it’s ready-to-print for you to carry around everywhere you can crochet and are not in front of a laptop. Bruno the polar bear amigurumi pattern is available in my shops on Etsy and Ravelry.
BRUNO THE POLAR BEAR: THE INSPIRATION
Quite often you crochet for people you love, right? This one is no exception, and the source of inspiration is pretty close to me: my hubby. He is a fly fisherman and is as much a geek with fly-tying than I can be with making amigurumis! A few years back some friends asked if we wanted to go out one night, and we said no cause I needed to crochet some toys for a fair, and my hubby needed to tie a few more flies for a fishing session the next day. Oups, grand-pa and grand-ma below 30 already?
Haha noooo, fishing is coming back in the trends of young people’s favourite hobbies, and same goes for crocheting! It’s no surprise that in this fast-paced world more and more people are looking for an escape to slow down for a moment, reconnect with themselves, and there is nothing more efficient than NATURE. But with the restrictions of the past year, I guess crocheting at home became more feasible than fishing!
So to my dear hubby, partner, friend, amazing dad to our son, who always supported me in my artistic fantasy, I wish you to be able to do more of what makes you so happy.
BEFORE YOU START
- Purchase the ad-free printable pdf on Etsy here.
- Add this amigurumi pattern to your Ravelry queue here.
- Pin this polar bear pattern to your Pinterest boards here.
MATERIAL
- 3.5mm / US E-4 crochet hook
- 2.5mm crochet hook
- Yarn:
- #4 / aran / worsted yarn, 8ply, 80% cotton 20% Milk Fiber, in off white, forest green, dark brown for the pom pom (I use a local shop yarn, an equivalent would be Paintbox Cotton Aran but keep the 3.5mm hook to obtain tight stitches and avoid gaps where the fiberfill shows)
- DMC Cotton Perle N°8 shade 310 (black) to embroider the nose, mouth and claws
- DMC Happy Cotton: shades 776 and 777 for the fishing bag, shade 794 for the scarf, shade 796 for the fishes. This yarn is a #3 /DK-light 100% cotton, and I use the 2.5mm hook.
- Tapestry needle
- Fiberfill
- Stitch marker or a strand of thinner yarn
- A pair of 8mm safety eyes
- Ball point pins for assembly
- A small piece of wood for the fishing rod.
LEVEL
Intermediate to advanced.
GAUGE AND SIZE
With the above material: 5-round circle = 5cm (2″). Find out how to measure gauge for amigurumis in my tutorial here.
With the material mentioned above and when gauge is achieved:
•The bear is 16cm tall (6.3″)
PATTERN NOTES AND SPECIAL TECHNIQUES
-
The number before the abbreviation represents how many times to work one type of stitch into consecutive stitches from the previous round (unless stated otherwise). Ex: 3inc = work one increase into each of the next 3 stitches.
-
This pattern is worked in continuous spiral rounds (i.e. without closing the rounds with a slip stitch) unless stated otherwise (the apron is worked in rows). It may help to mark the first stitch of each round with a stitch marker.
-
For amigurumi in general, I always use an invisible decrease (unless stated otherwise) to minimize the gaps between these stitches so that the fiberfill doesn’t show too much. You can check this simple technique in a video tutorial here, but if it’s too much hassle and you prefer to start right away you can also work with normal decrease, no big deal!
-
Do spend time to embroider the nose and mouth nicely, these details make a big difference on the final look and expression of your amigurumis!
STITCHES AND ABBREVIATIONS (US CROCHET TERMS)
st: stitch/es
sc: single crochet
sl st: slip stitch
inc: single crochet increase (work 2 sc into the same st)
dec: single crochet decrease (single crochet two stitches together)
hdc: half double crochet
dc: double crochet
hdc inc: half double crochet increase (work 2 hdc into the same st)
[number]: total number of stitches of the round
Rnd: round
(…) x 2: repeat whatever is in between the parenthesis the number of times indicated
in BLO: in the back loop only
in FLO: in the front loop only
FPhdc: front post half double crochet (Work the stitch just like a normal half double crochet, except you insert your hook from front to back around the post of the next stitch in the row below).
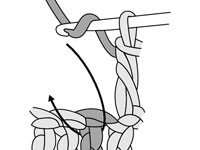
BPhdc: back post half double crochet (Work the stitch just like a normal half double crochet, except you insert your hook from front to back around the post of the next stitch in the row below).
BRUNO THE POLAR BEAR AMIGURUMI PATTERN
THE LEGS AND BODY
With off-white yarn and a 3.5mm hook.
Rnd 1: Work 6sc into a magic ring. [6]
Rnd 2: inc in each st around. [12]
Rnd 3: in BLO, sc around. [12]
Rnd 4: 4sc, 2dec, 4sc. [10]
Rnd 5: sc around. [10]
Rnd 6: (2sc, inc) x 3, sc in last st. [13]
Fasten off, leave a tail to close the gap between the legs later. This one is leg 1.
Make a second leg, and don’t fasten off after round 6. This one is leg 2.
Rnd 7: now let’s join the two legs together, so that the toes are pointing in the same direction. In leg 2, 11sc. Continue in the 4th stitch of leg 1, sc in all 13 stitches of leg 1. Continue in leg 2, 2sc (work the first sc in the stitch that already has a sc in it, not in the first available stitch). [27]
Rnd 8: sc around. [27]
Rnd 9: (3sc, inc) x 6, 2sc, inc. [34]
Use the tail of leg 1 to sew closed the small gap between the two legs.
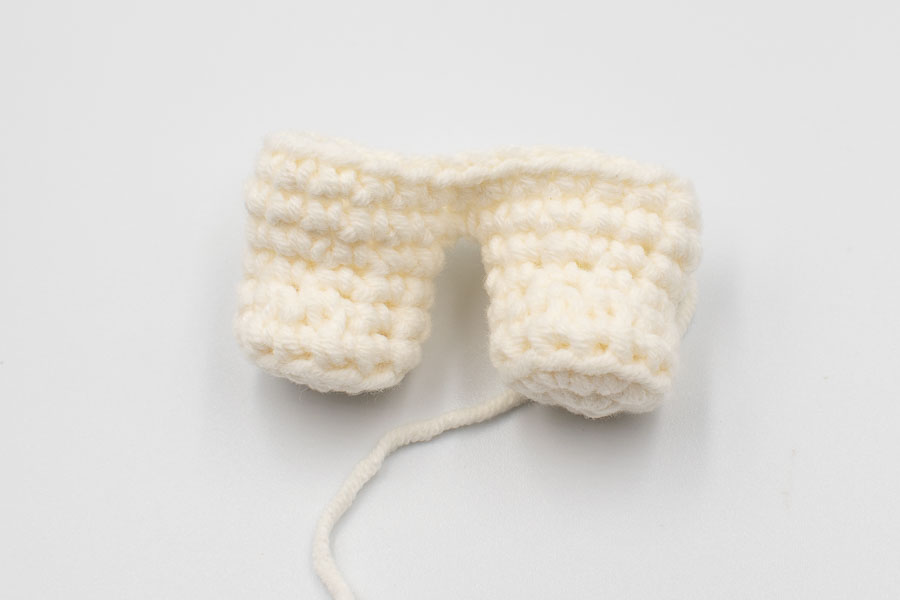
Rnd 10: 9sc, (inc, 2sc) x 3, 16sc. [37]
Rnd 11 – 12: sc around. [37]
Stuff the legs with fiberfill.
Rnd 13: (3sc, dec) x 7, 2sc. [30]
Rnd 14: sc, dec, sc around. [29]
Rnd 15: 11sc, dec, 16sc. [28]
Rnd 16 – 17: sc around. [28]
Rnd 18: (2sc, dec) x 7. [21]
Rnd 19: 8sc, dec, 9sc, dec. [19]
Rnd 20: sc around [19]
Fasten off and leave a long tail to sew to the head later. Finish stuffing firmly with fiberfill.
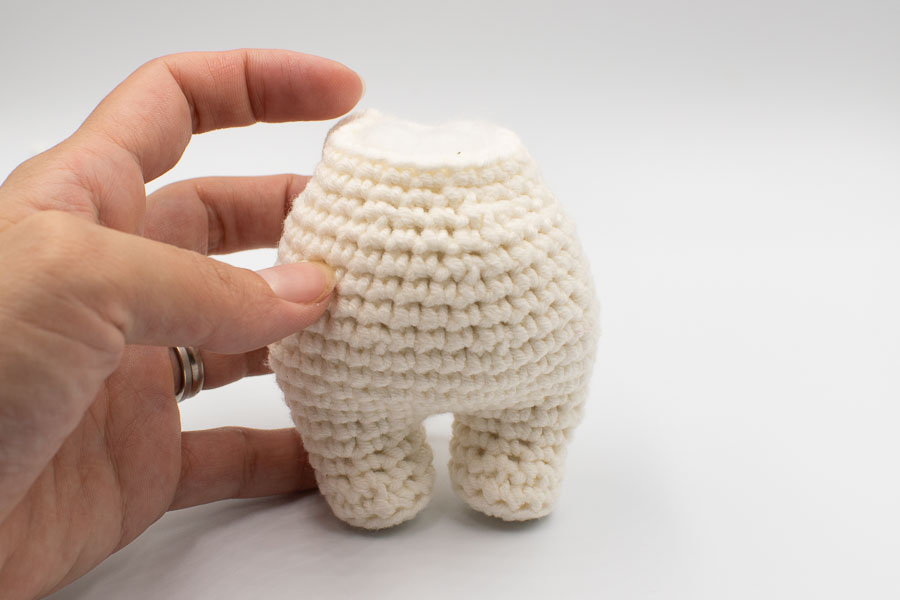
THE HEAD
Rnd 1: Work 6sc into a magic ring. [6]
Rnd 2: inc in each st around. [12]
Rnd 3: (sc, inc) x 6. [18]
Rnd 4: (2sc, inc) x 6. [24]
Rnd 5: (3sc, inc) x 6. [30]
Rnd 6: sc in each st around. [30]
Rnd 7: (4sc, inc) x 6. [36]
Rnd 8: sc in each st around. [36]
Rnd 9: (5sc, inc) x 6. [42]
Rnd 10-14: sc in each st around [42]
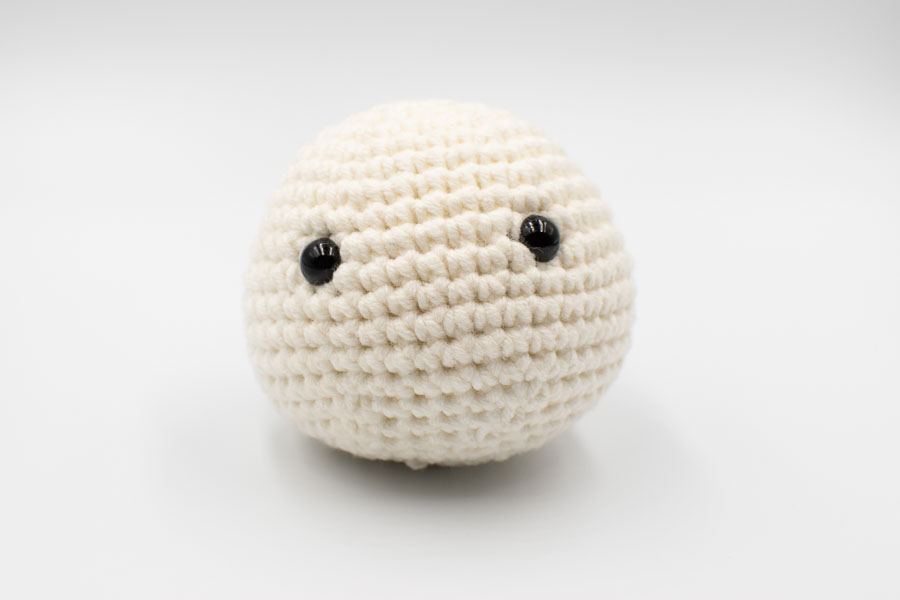
Insert safety eyes between round 9 and 10, with 7 stitches between the 2 eyes.
Rnd 15: (5sc, dec) x 6. [36]
Rnd 16: (4sc, dec) x 6. [30]
Rnd 17: (3sc, dec) x 6. [24]
Rnd 18: (2sc, dec) x 6. [18]
Stuff firmly with fiberfill.
Rnd 19: (sc, dec) x 6. [12]
Rnd 20: 6dec. [6]
Fasten off and sew closed. (You’re not sure how to sew closed nicely? I’ve got you covered, check this tutorial on this blog).
THE ARMS (make 2)
Rnd 1: Work 6sc into a magic ring. [6]
Rnd 2: (inc, 2sc) x 2. [8]
Rnd 3: sc around. [8]
Rnd 4: (2sc, dec) x 2. [6]
Rnd 5 – 8: sc around. [6]
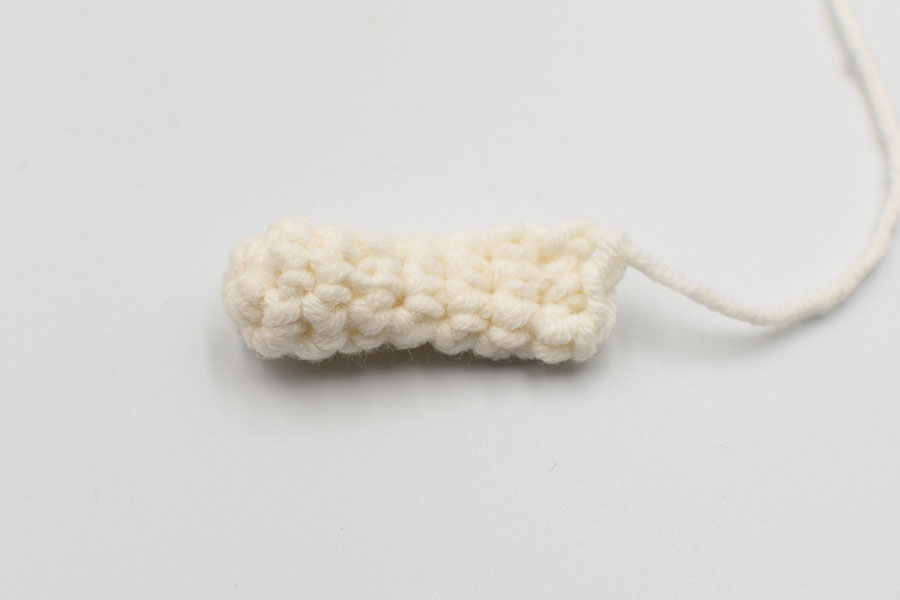
Don’t fill, flatten and close by crocheting both edges together with 2sc.
Fasten off and leave a long tail for sewing. Make a second one.
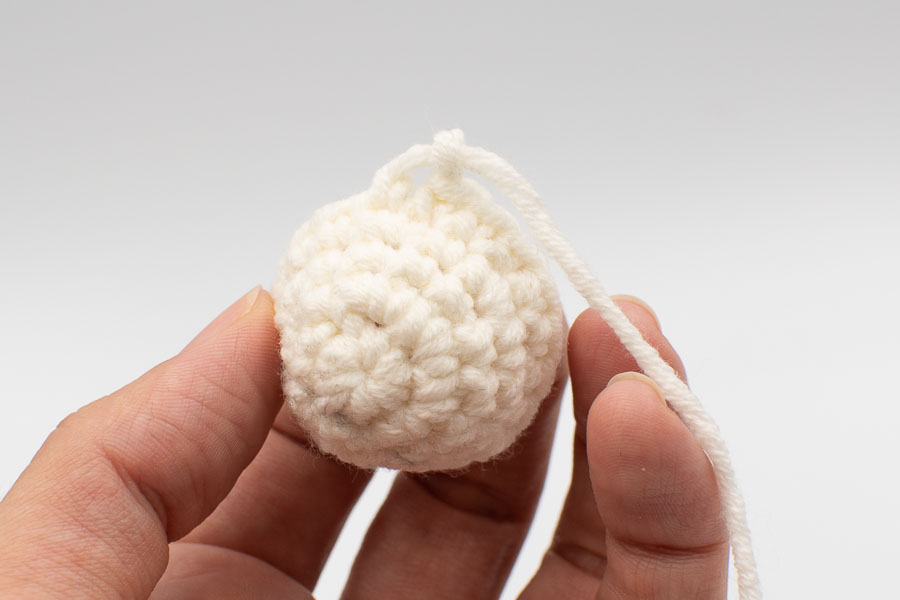
THE NOSE
Rnd 1: work 6sc into a magic ring. [6]
Rnd 2: inc in each st around. [12]
Rnd 3: sc around. [12]
Rnd 4: (sc, inc) x 6. [18]
Rnd 5: sc around. [18]
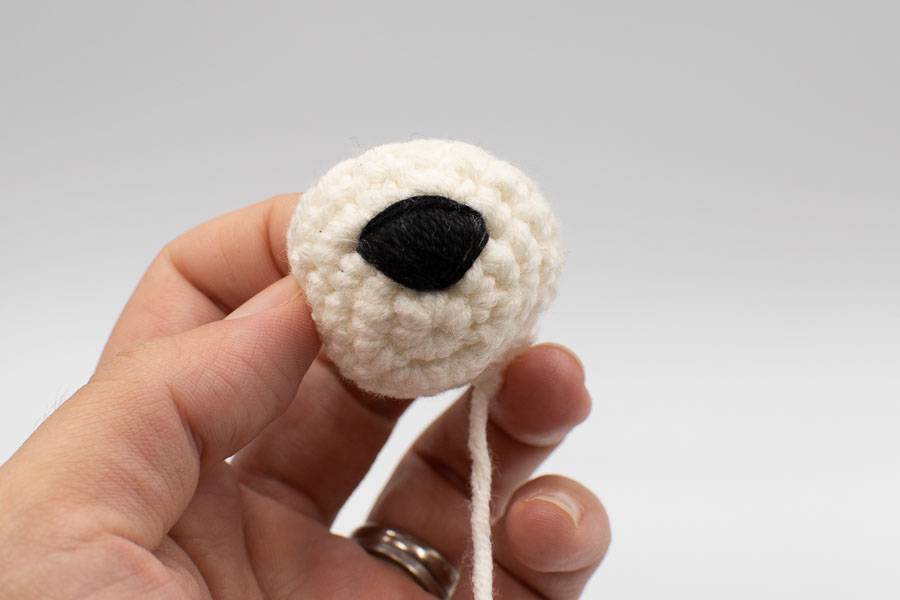
Embroider the nose with DMC cotton perle black thread. I strongly advise to embroider the upper part of the nose before stuffing and attaching to the head, it’s much easier, and less messy in case you need to undo and redo. First embroider the edges as guides, then fill inside, vertically.
THE EARS (make 2)
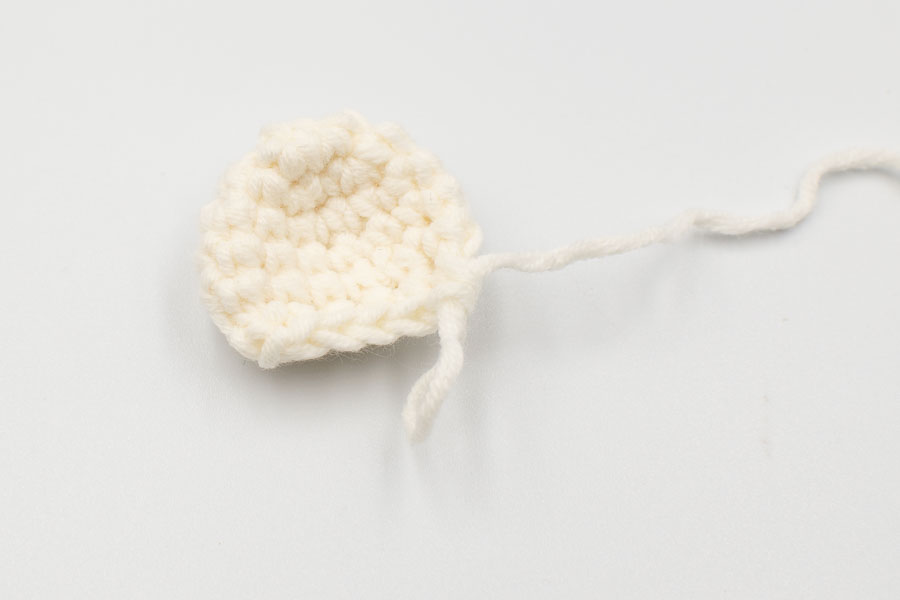
Rnd 1: Work 6sc into a magic ring. [6]
Rnd 2: inc in each st around. [12]
Rnd 3: (3sc, inc) x 3. [15]
Rnd 4 – 5: sc around. [15]
Rnd 6: (3sc, dec) x 3. [12]
Don’t fill, flatten and close by crocheting both edges together.
Fasten off and leave a long tail for sewing. Make a second one.
THE FISHES (make 2 or 3…or more!)
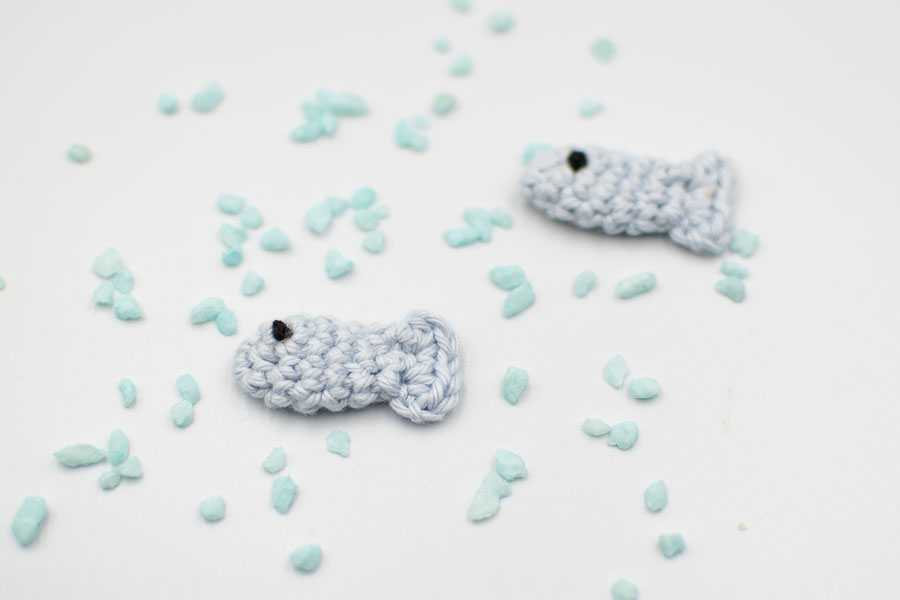
With DMC happy cotton shade 796 (light blue) and a 2.5mm hook.
Rnd 1: Work 5sc into a magic ring. [5]
Rnd 2: 2sc, inc, 2sc. [6]
Rnd 3: (inc, 2sc) x 2. [8]
Rnd 4 – 5: sc around. [8]
Rnd 6: (dec, 2sc) x 2. [6]
Rnd 7: Flatten and close (don’t stuff with fiberfill) by crocheting both edges together with 2sc.[2]
Rnd 8: chain1, turn, (hdc, 2sc) in the first stitch, (2sc, hdc) in next stitch. [6]
Fasten off, weave in end.
Embroider an eye with black cotton perle yarn or any other black yarn.
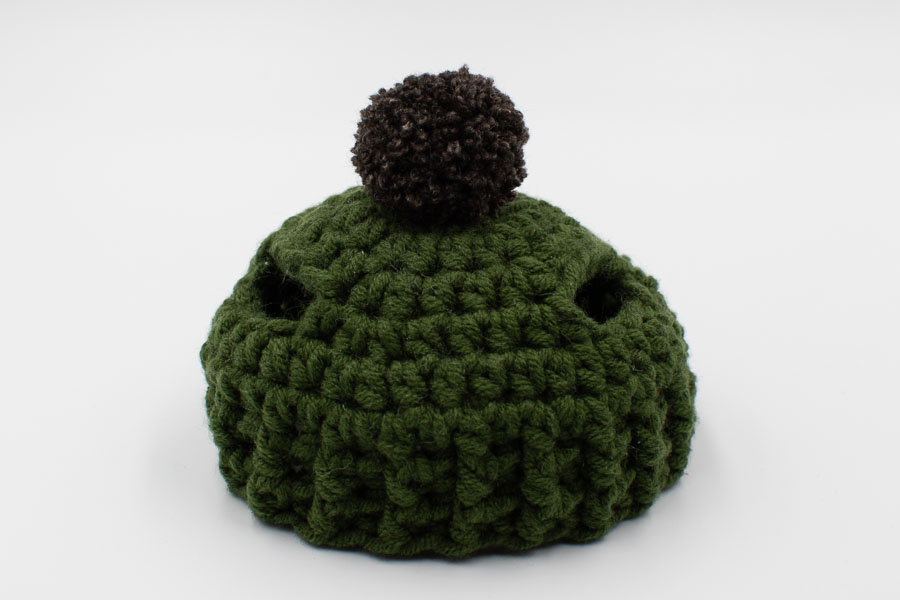
THE BEANIE
With forest green yarn and 3.5mm hook.
Rnd 1: Work 6sc into a magic ring. [6]
Rnd 2: inc in each st around. [12]
Rnd 3: (hdc, hdc inc) x 6. [18]
Rnd 4: (2hdc, hdc inc) x 6. [24]
Rnd 5: 3hdc, hdc inc, 3hdc, chain 4, skip 3 st, hdc, hdc inc, 3hdc, hdc inc, chain 4, skip 3 st, hdc, 3hdc, hdc inc. [30]
Rnd 6: (4hdc, hdc inc) x 6. [36]
Rnd 7: (5hdc, hdc inc) x 6. [42]
Rnd 8: sl st, chain 1. Starting in the same st (first st of previous round, where you just did the sl st), (FPhdc, BPhdc) x 21. [42] (the sl st and chain don’t count as st)
Rnd 9: repeat round 8. [42]
Fasten off, and make an invisible finish. Weave in ends.
The Pom-Pom : very soon I’ll publish a tutorial to make the pompom yourself. Otherwise you can just buy a pompom from the size and colour of your choice!
THE SCARF
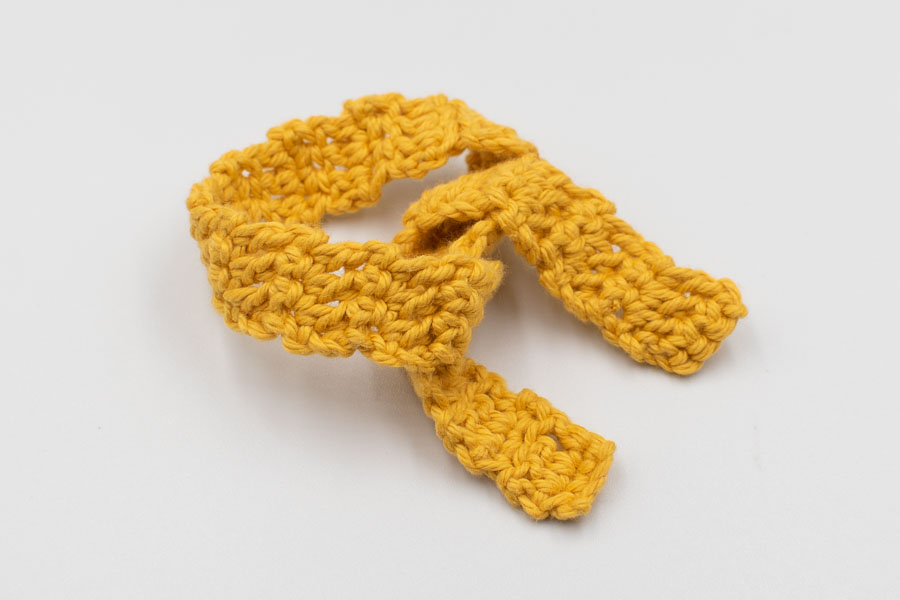
Yarn: DMC happy cotton shade 794 (mustard yellow).
The scarf is worked in rows. The turning chain don’t count as a stitch.
Make a slip knot. Chain 4.
Row 1: Starting in 2nd chain from the hook, 3sc, chain 2, turn. [3]
Row 2: 3dc, chain 1, turn. [3]
Row 3: 3sc, chain 2, turn. [3]
Row 4: 3dc, chain 1, turn. [3]
Row 5: 3sc, chain 2, turn. [3]
Row 6 – 44 : keep repeating row 4 and 5 alternatively. [3]
THE FISHING BAG
Yarn: DMC happy cotton shade 776 (light brown) and a 2.5mm hook.
The beginning of the bag is worked around the chain.
Rnd 1: Chain 8. Work 2sc in 2nd chain from the hook, sc in the next 5 st, work 4sc in the last chain, turn to crochet on the other side of the chain, sc in the next 5 st, inc in last. [18]
Keep working in continuous rounds.
Rnd 2: inc, 7sc, 2inc, 7sc, inc [22]
Rnd 3: in BLO, sc around. [22]
Rnd 4 : sc around [22]
Rnd 5: dec, 8sc, dec, 10sc. [20]
Rnd 6: 4sc, dec, 14sc. [19]
Rnd 7: sc around. [19]
To make the bag flap (in rows):
Rnd 8: chain 1, turn, 8sc. [8]
Rnd 9: chain 1, turn, dec, 4sc, dec. [6]
Rnd 10: chain 1, turn, dec, 2sc, dec. [4]
Rnd 11: chain 1, turn, 2dec. [2]
Fasten off and weave in ends.
To make the bag clasp
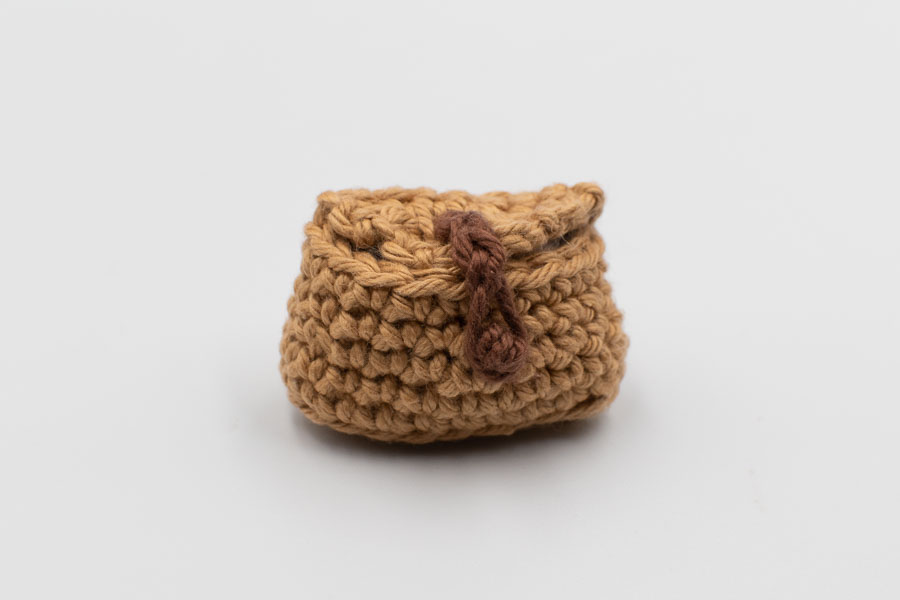
With DMC happy cotton shade 777 (brown) and a 2.5mm hook, make a slip knot, leaving a tail for sewing. Chain 4, fasten off leaving a long tail for sewing. With the tail, make a small loop (to form the buckle) and make a knot around the 4th chain to secure the loop. Hide the tail back along the chain. Sew to the top of the bag flap in the middle, and hide yarn tails inside.
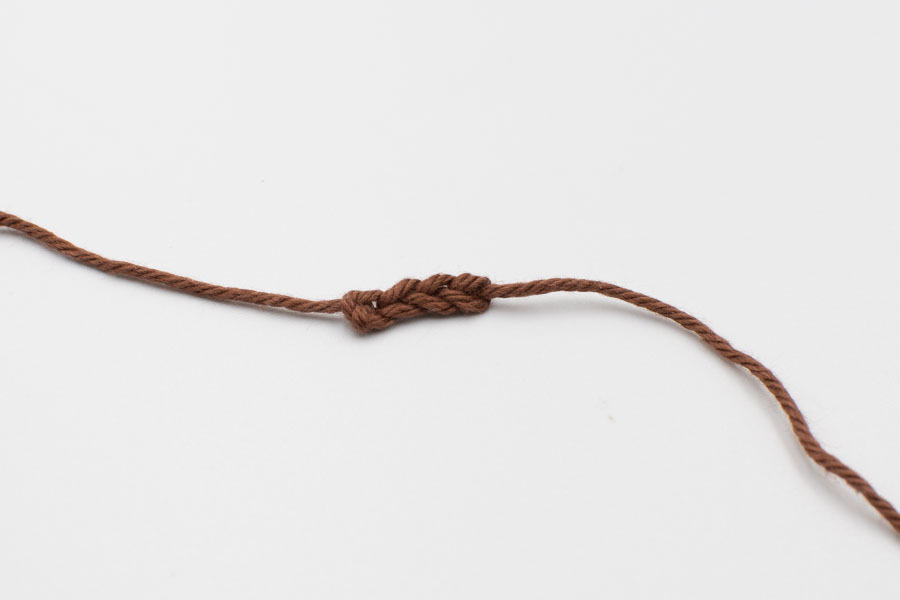
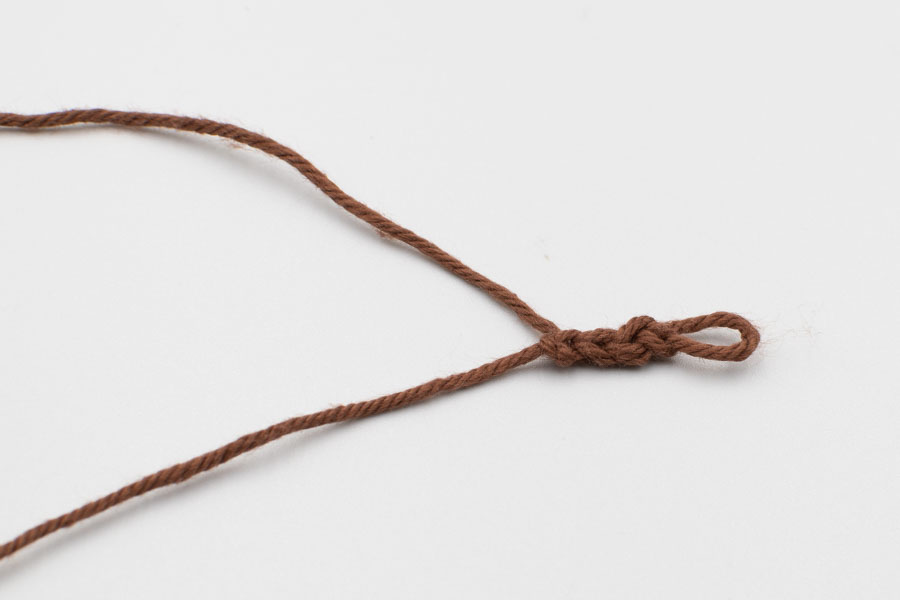
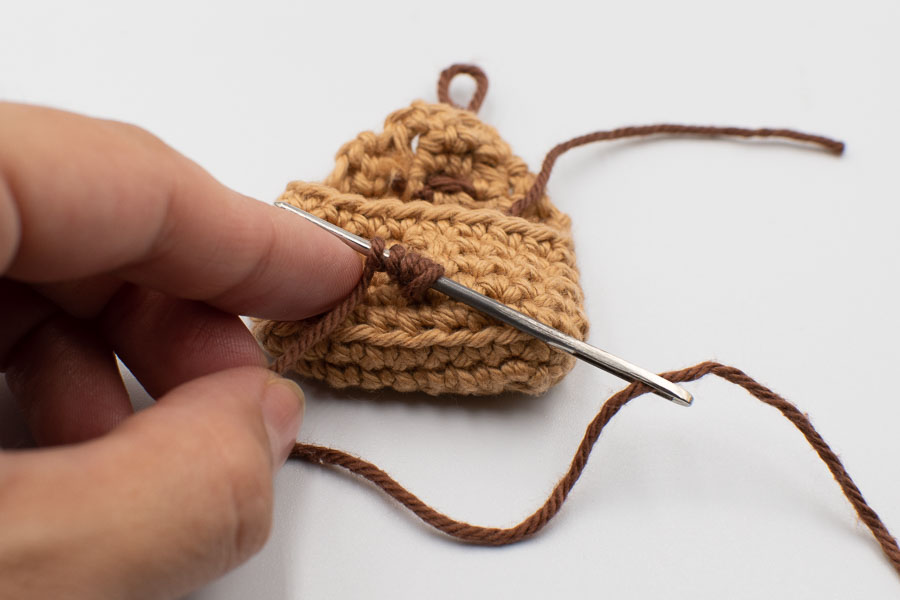
Take another piece of brown yarn, and with a tapestry needle, insert it in the middle of the bag between round 5 and 6, from inside the bag to outside. Make an embroidery knot point: wrap your yarn 5 times around the tip of your needle, and insert your needle back into the same hole, pull delicately. Secure the yarn tails inside the bag by sewing them inside.
To make the bag strap
With DMC happy cotton shade 777 (brown) and a 2.5mm hook, make a slip knot, leaving a tail for sewing. Chain 40, fasten off, and sew to the sides of the fishing bag, halfway up the sides. When sewing, grab the 2nd or 3rd stitch of the strap so that the straps stick to the sides of the bag.
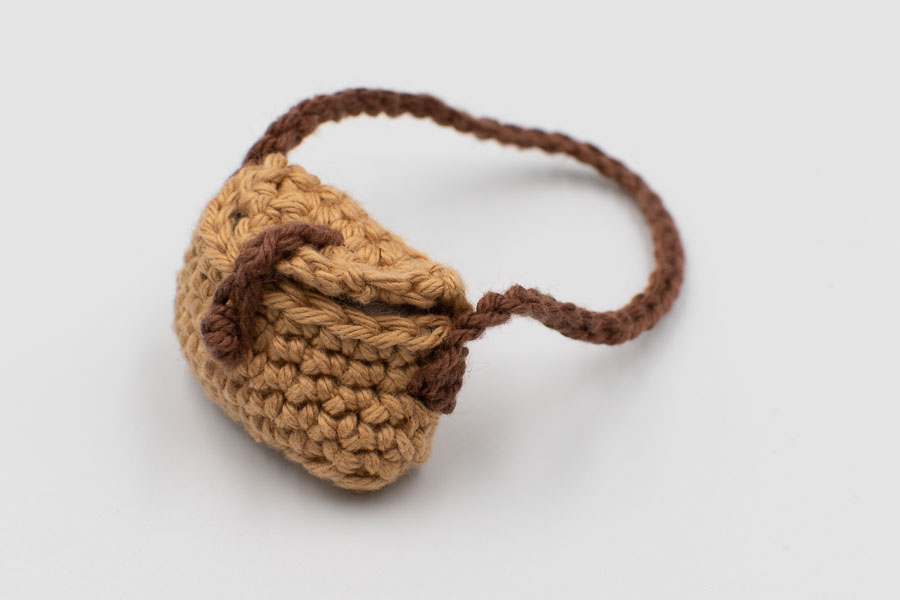
PS*: This accessory doesn’t need to be attached to the body for assembly, you can just slip it on after assembly, from the feet.
PS**: before fastening off, adjust the number of chains to obtain the length you like if needed.
ASSEMBLY
I strongly recommend to use ball point pins for assembly. This way you are sure your piece won’t move during sewing and you save a lot of time and frustration.
1) Embroider the upper part of the nose.
2) Sew the nose to the head (the top of the nose should be sewn between round 9 and 10.
3) Sew the ears to the head (the top of the ears are sewn between round 4 and 5).
4) Attach the head to the body (with the bear belly on the front).
5) Sew the arms to the body between round 19 and 20.
6) Embroider the claws on the paws, and embroider the end of the nose and mouth (it’s easier to see the global expression of your amigurumi once it’s fully assembled, I usually do the smile last cause it’s really important and can change the whole look!)
7) Find a fine piece of wood to make the rod and attach a string to make the line.
8) Attach a fish to the end of the line, and put another fish inside Bruno’s bag. Insert the rod through a stitch of the hand (or attach a string of yarn to the rod and sew it to the hand)
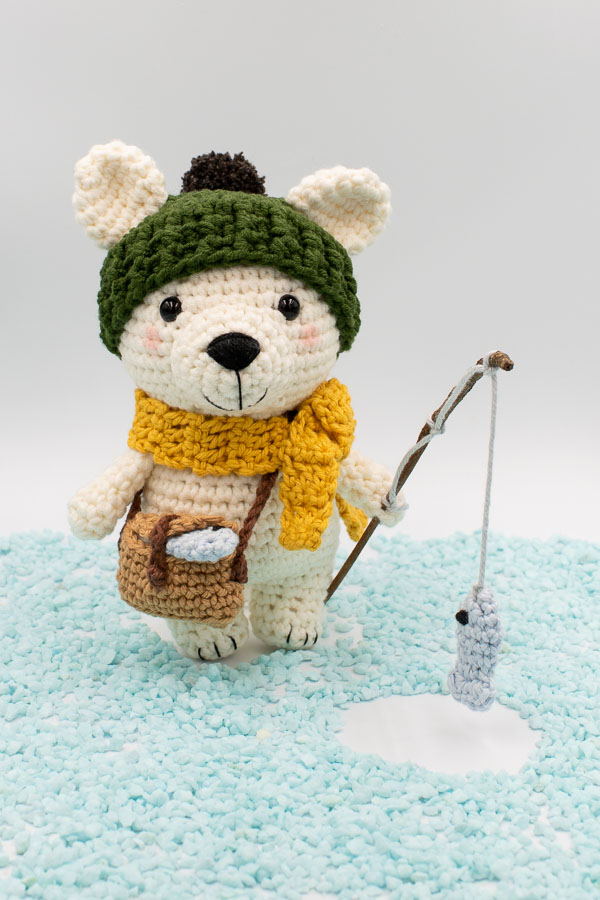
9) Put on the beanie, scarf and fishing bag (slip it on from the feet), and here you go, Bruno is gone fishing!
Let’s connect on Instagram !
I’d be really happy to see your finished polar bear! Tag me on Instagram, you can find me as @octopuscrochetdesign and use the hashtag #octopuscrochetdesign
I look forward to seeing it!

