

Sharing is caring!
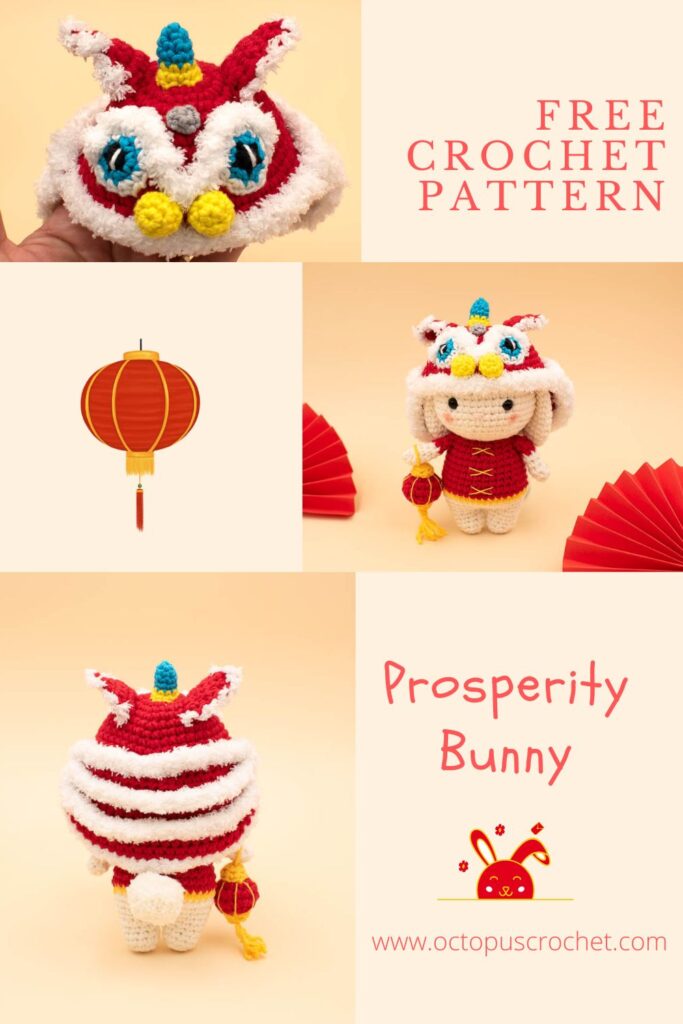
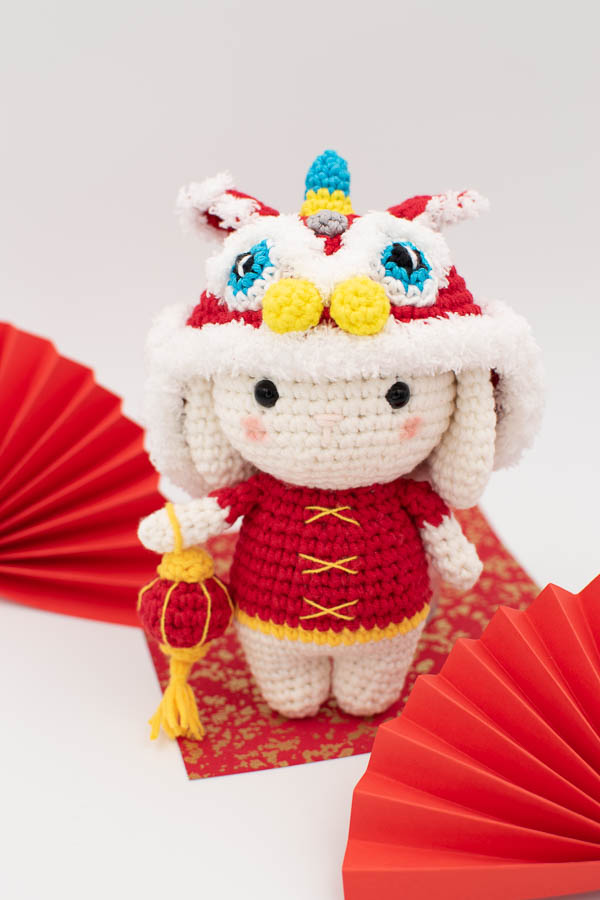
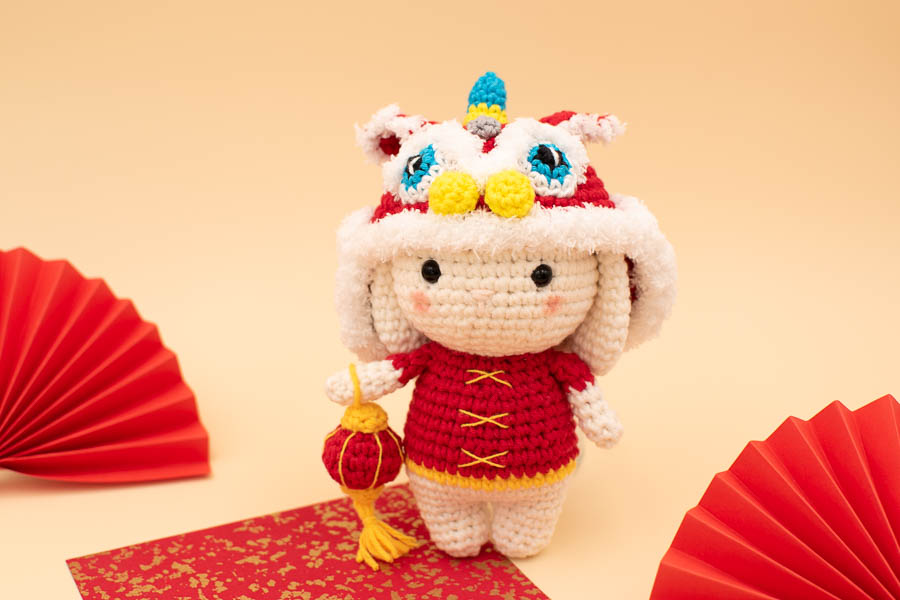
It’s Chinese New Year in less than 10 days now, and I had this prosperity bunny amigurumi pattern in mind for a while. But I clearly underestimated the time I would have during the festive season holidays, I should know by now, Christmas holidays are always super busy! So much cooking, decorating, celebrating, dressing up, gift packing, cleaning up… But also so much precious family time and laughters, it gave me the energy to finish this guy on time!
Read about my inspiration below, then you can purchase the pdf to get all the step-by-step pictures or scroll down for the free version.
No time right now? Pin this crochet pattern for later.
*This blog contains affiliate links for products I use, believe in or recommend. This means I will earn a small commission if you make a purchase from one of these links, and of course it is at no extra cost for you. It helps me to keep Octopus Crochet going and to keep publishing new free patterns and tutorials for you to enjoy, so thank you! You can check my full disclaimer here.
If you prefer to purchase an inexpensive add-free pdf version of this pattern I’ve got you covered. The premium pdf version has all the instructions, more step by step pictures, no ad, and it’s ready-to-print for you to carry around everywhere you can crochet and are not in front of a laptop. The prosperity bunny amigurumi pattern is available in my shop on Etsy.
Chinese New Year is not really celebrated in France, I only learned much more about it when I was living in Malaysia for 6 years. It was strange because over there it was much bigger than Christmas, and as soon as Christmas was gone, all the decorations were turning red and gold, and you could tell that all the shopping malls had a much bigger decoration budget for CNY ! The holidays happen during CNY, not really Christmas. It’s just BIG there, and so festive. Now that my Christmas decorations are down, I guess I miss a bit the CNY frenzy! So this is a tribute to my time in Kuala Lumpur, and everything I discovered there!
For the yarn I used two different sizes, mostly a thick one, number 4, coton aran. I just used a thinner yarn for the small pieces that decorate the lion dance cape. I love DMC Happy Cotton yarn, but you could use any #3, DK cotton yarn like Paintbox Cotton DK. So do read carefully the material instructions to end up with the right proportions.
Scroll down for the free patterns links below or you can also directly purchase a nice add-free pdf version of this project in my shops on Etsy and Ravelry for a small fee. The pdf version has all the pictures, instructions, and it’s ready-to-print to carry along with you wherever you want to sit and crochet!
Yarn:
o #4 / aran / worsted yarn, 80% cotton 20% Milk Fiber, color off-white, red, yellow, plus a small piece of light peach or light pink for the nose (I use a local shop yarn, an equivalent would be Paintbox Cotton Aran, but keep the 3.5mm hook to obtain tight stitches and avoid the fiberfill to show)
o DMC Happy cotton shades 788 (yellow), 786 (electric blue), 762 (white), 775 (black), 759 (grey)
oDMC Cotton Perle N°8 shade 938 to embroider the eyebrows
oFluffy white yarn like the Bernat Pipsqueak Whitey White
Tapestry needle
Fiberfill
Stitch marker or a strand of thinner yarn
A pair of 8mm safety eyes
Ball point pins for assembly
Embroidery needle
Advanced. The pattern has colour changes, small pieces, and crocheting with the fluffy yarn can get tricky for beginners as it is hard to see the stitches.
Gauge for the bunny with the above material: 5-round circle = 5cm (2″).
Find out how to measure gauge for amigurumis in my tutorial here.
With the material mentioned above and when gauge is achieved:
st: stitch/es
sc: single crochet
sl st: slip stitch
inc: single crochet increase (work 2 sc into the same st)
dec: single crochet decrease (single crochet two stitches together).
hdc: half double crochet
hdc-inc: half double crochet increase (work 2 hdc into the same st).
[number]: total number of stitches of the round (or row)
Rnd: round
(…) x 2: repeat whatever is in between the parenthesis the number of times indicated
in BLO: in the back loop only
in FLO: in the front loop only
With off-white yarn and 3.5mm hook.
Rnd 1: Work 5sc into a magic ring. [5]
Rnd 2: inc in each st around. [10]
Rnd 3 – 5: sc around. [10]
Rnd 6: (2s, inc) x 3, sc in last st. [13]
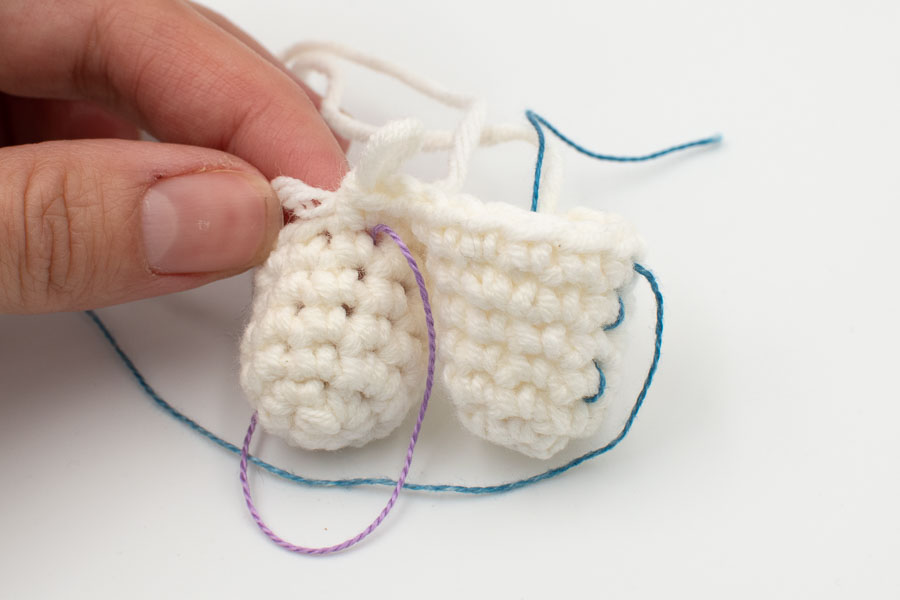
Fasten off, leave a tail to close the gap between the legs later. This one is leg 1.
Make a second leg, and don’t fasten off after round 6. This one is leg 2.
Now let’s join the two legs together. Make sure you crochet extra tight stitches when jumping from one leg to the other, so that you don’t end up with holes. Only the hole in the middle is normal and will be sewn closed afterwards.
Rnd 7: In leg 2, 7sc, continue in first stitch of leg 1, sc in all 13 stitches of leg 1. Continue in leg 2, 7sc (work the first sc in the stitch that already has a sc, not in the first available stitch). [27]
Rnd 8: 6sc, inc,13sc, inc, 6sc. [29]
Rnd 9: inc, 4sc, inc, 2sc, inc, 4sc, inc, 5sc, inc, 2sc, inc, 6sc. [35] Use the tail of leg 1 to sew closed the small gap between the two legs.
Rnd 10: 26sc, inc, 8sc. [36]
Change colour with yellow (finish your last sc with the new colour, tutorial here).
Rnd 11: sl st (tight), chain 1 (make it loose), sc around. [36] (the sl st doesn’t count as a st).
Change colour with red (finish your last sc with the new colour, tutorial here).
Rnd 12: sl st (tight) in the chain from previous rnd, chain 1 (make it loose), sc around. [36] (the sl st doesn’t count as a st).
Tighten up the sl st by pulling on the yarn tails.
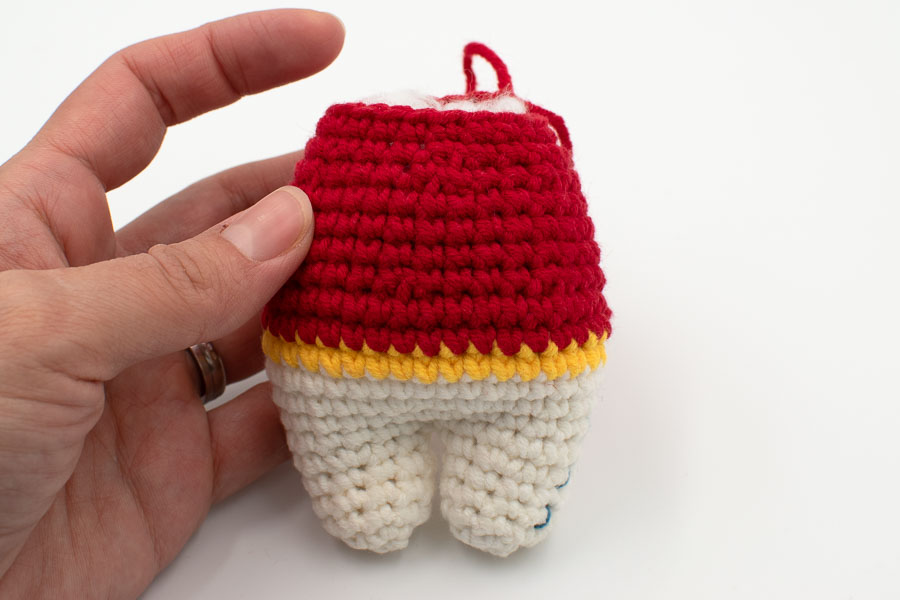
Stuff the legs with fiberfill.
Rnd 13: make your first sc in the chain from previous rnd, and sc around. [36]
Rnd 14: (4sc, dec) x 6. [30]
Rnd 15 – 17: sc in each st around [30]
Start filling the body with fiberfill, not too much so that it doesn’t get in your way.
Rnd 18: (3sc, dec) x 6. [24]
Rnd 19: (6sc, dec) x 3. [21]
Rnd 20: sc around. [21]
Fasten off and leave a long tail to sew to the head later. Finish stuffing firmly with fiberfill.
With off-white yarn and 3.5mm hook.
Rnd 1: Work 6sc into a magic ring. [6]
Rnd 2: inc in each st around. [12]
Rnd 3: (sc, inc) x 6. [18]
Rnd 4: (2sc, inc) x 6. [24]
Rnd 5: (3sc, inc) x 6. [30]
Rnd 6: sc in each st around. [30]
Rnd 7: (4sc, inc) x 6. [36]
Rnd 8: sc in each st around. [36]
Rnd 9: (5sc, inc) x 6. [42]
Rnd 10-14: sc in each st around [42]
Insert safety eyes between round 11 and 12, with 7 stitches between the 2 eyes.
Rnd 15: (5sc, dec) x 6. [36]
Rnd 16: (4sc, dec) x 6. [30]
Rnd 17: (3sc, dec) x 6. [24]
Rnd 18: (2sc, dec) x 6. [18]
Stuff firmly with fiberfill.
Rnd 19: (sc, dec) x 6. [12]
Rnd 20: 6dec. [6]
Fasten off, finish stuffing firmly, and sew closed. (You’re not sure how to sew closed nicely? I’ve got you covered, check this tutorial on my blog).
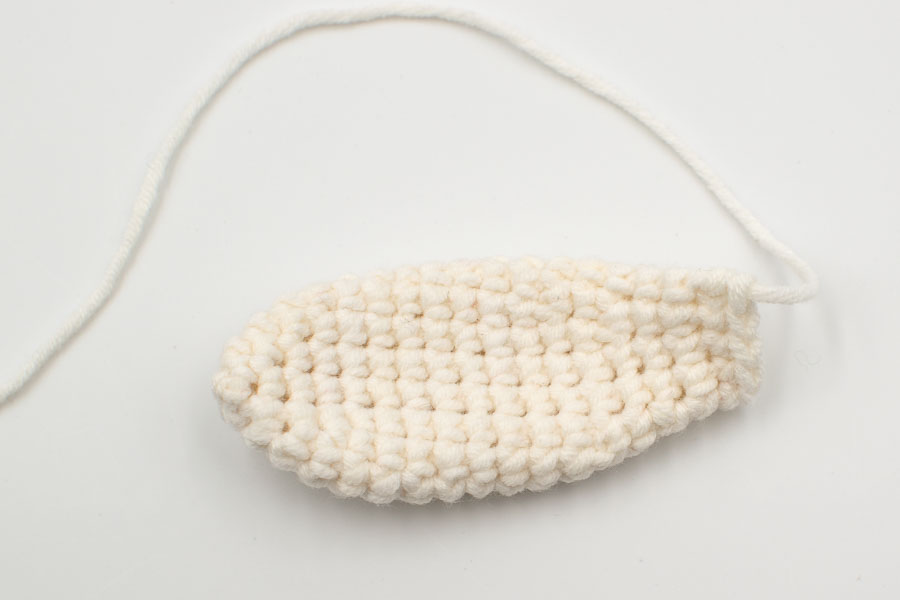
With off-white yarn and a 3.5mm hook.
Rnd 1: Work 6sc into a magic ring. [6]
Rnd 2: (sc, inc) x 3. [9]
Rnd 3: (2sc, inc) x 3. [12]
Rnd 4: (3sc, inc) x 3. [15]
Rnd 5 – 12: sc in each st around. [15]
Rnd 13: (3sc, dec) x 3. [12]
Rnd 14: sc in each st around. [12]
Rnd 15: (2sc, dec) x 3. [9]
Rnd 16 – 17: sc around. [9]
Don’t stuff. Flatten and single crochet both sides together to close (you should be able to make 4sc).
Fasten off and leave a long tail for sewing.
Make a second one.
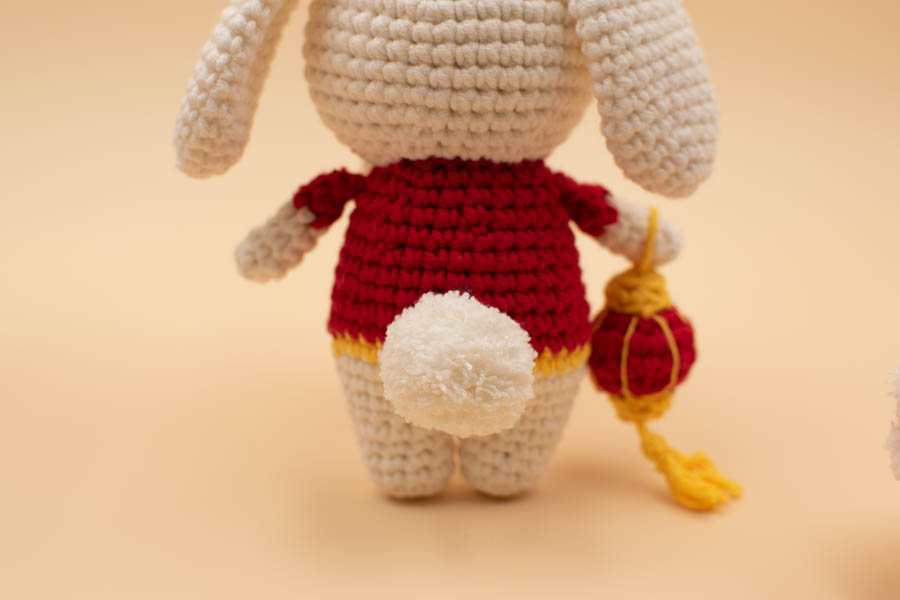
For the bunny tail, with off white yarn, make a pom pom using my Quick way to pom pom tutorial on this blog, or use any other pom pom you may have.
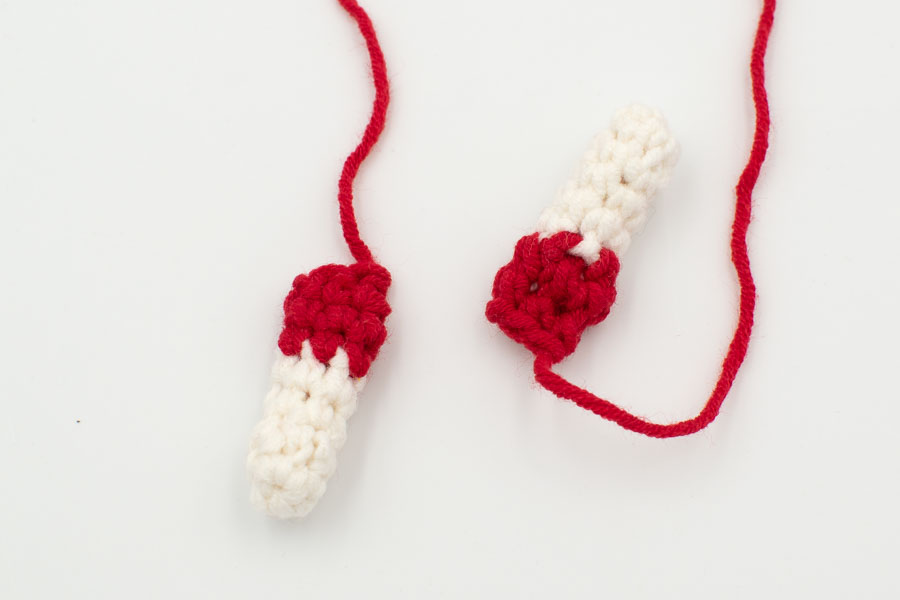
Start with off-white yarn and a 3.5mm hook.
Rnd 1: Work 5sc into a magic ring. [5]
Rnd 2: sc, inc, 2sc, inc. [7]
Rnd 3: sc, dec, 4sc. [6]
Rnd 4 – 5: sc around. [6]
Change colour to red (finish your last stitch with red yarn).
Rnd 6: sl st, chain 1 (loose), 5sc. [6] (the sl st doesn’t count as a st, the chain does).
Rnd 7: work your first sc in the chain, then keep sc around. [6]
Tighten up the sl st to get a neat colour change.
Don’t stuff. Flatten and sc both sides together.
Fasten off and leave a long tail for sewing. Make a second one.
With red yarn and a 3.5mm crochet hook.
Rnd 1: work 6sc into a magic ring. [6]
Rnd 2: inc in each st around. [12]
Rnd 3: (sc, inc) x 6. [18]
Rnd 4: sc around. [18]
Rnd 5: (sc, dec) x 6. [12]
Rnd 6: 6dec. [6]
Fasten off, stuff firmly with fiberfill and sew closed.
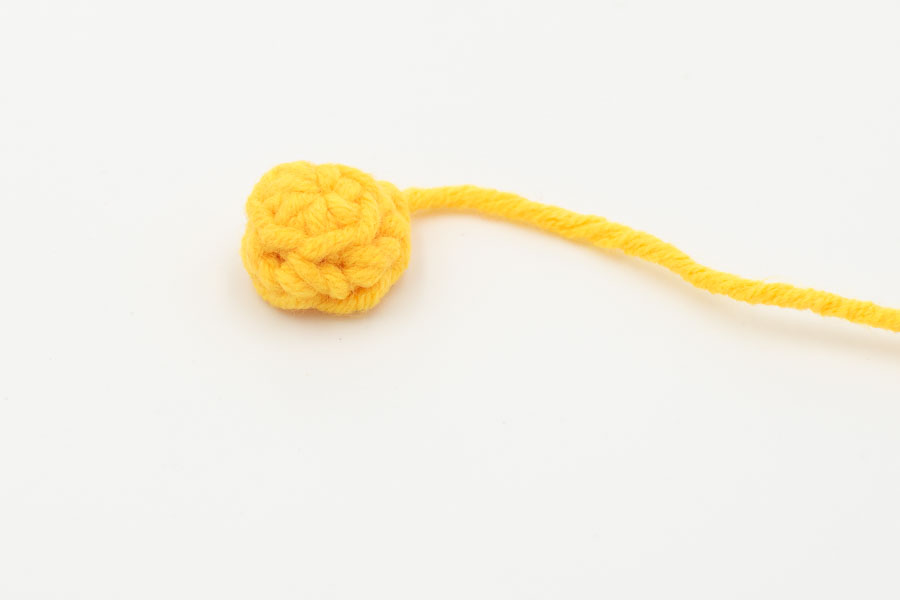
With yellow yarn and 3.5mm crochet hook.
Rnd 1: work 6sc into a magic ring. [6]
Rnd 2: in the BLO, sc around. [6]
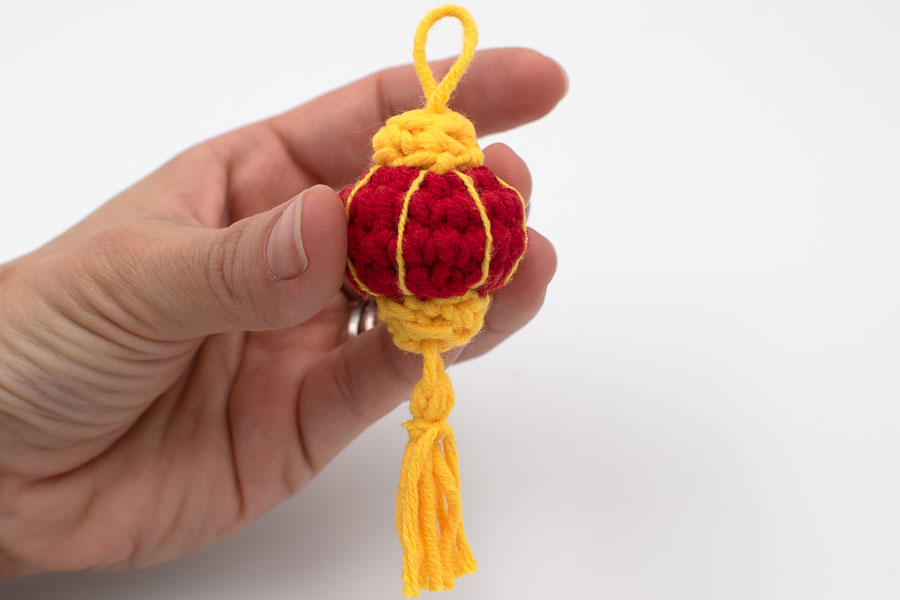
Fasten off leaving a long tail for sewing and sew the cap to the top of the lantern. When it’s attached, exit through the center of your yellow cap, and make a small loop (so that your bunny can carry it). Go back inside, go though your lantern and exit at the center of the bottom, secure with a knot (this will be hidden by the lower cap).
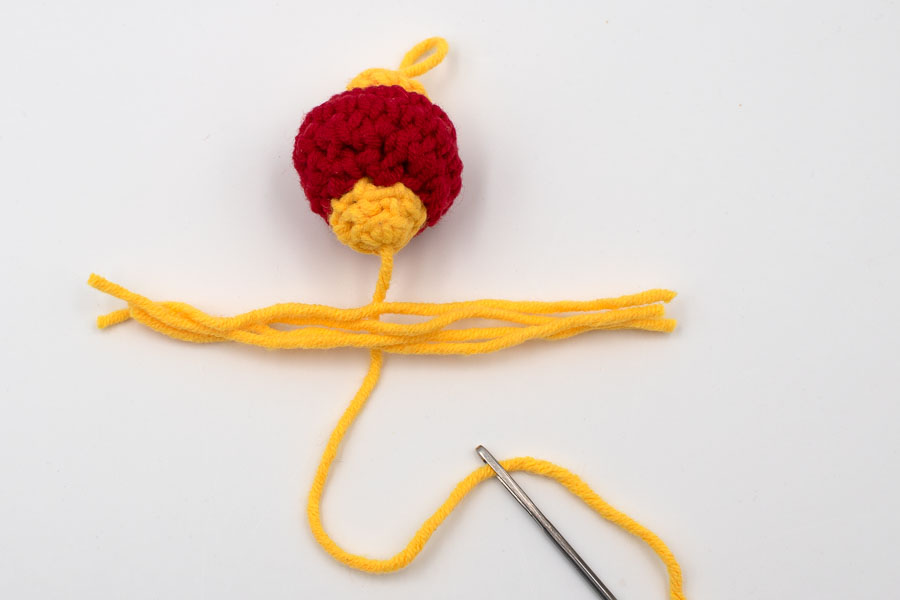
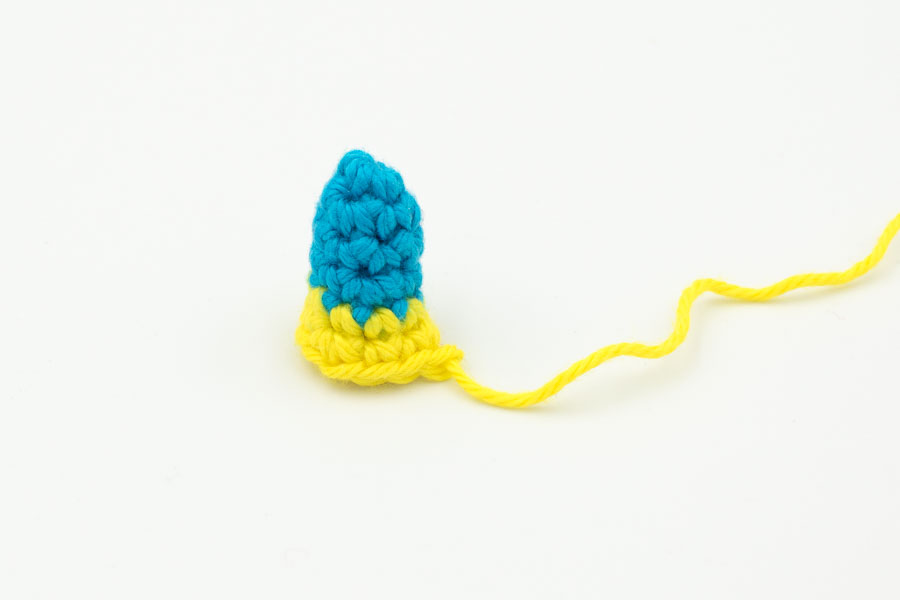
With yellow yarn and a 3.5mm hook.
Rnd 1: work 5sc into a magic ring. [5]
Rnd 2: in the BLO, sc around. [5]
Fasten off, leaving an extra long tail for sewing. Sew the cap to the bottom of the lantern, secure with a knot, and exit through the center of the lower cap. Don’t cut yet.
Now prepare 4 strands of yarn of 10cm (4″) each.
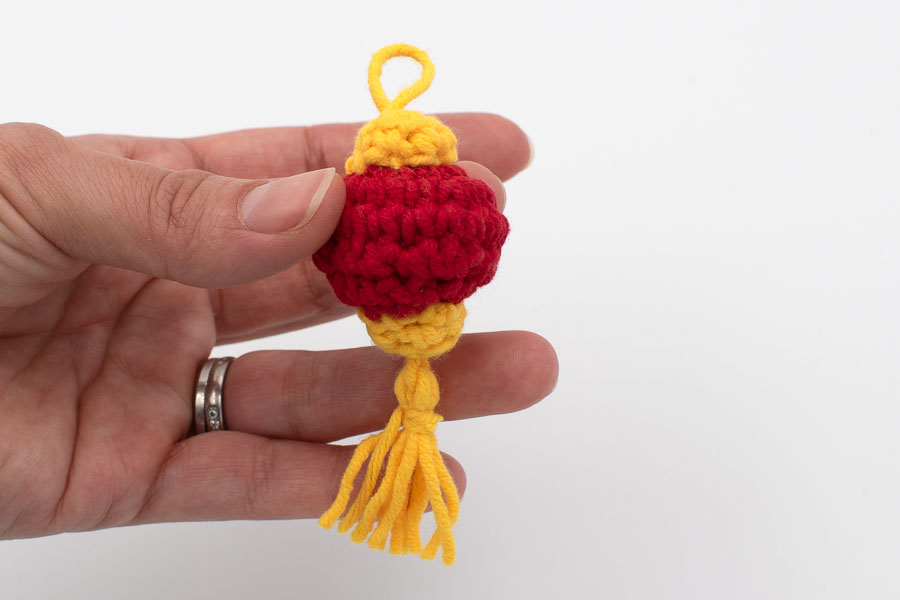
Place them on the yellow tail and with your tapestry needle go back through the center of the lower cap, exit at the base of the cape, secure with a knot. Then take another strand of yarn of 20cm (8″), wrap it around the 4 strands twice, then tie a very tight knot. Cut the strands of yarn to finish your tassel pom pom. Then take a 30cm (12″) strand of yellow yarn, and split the plies to take one long thread that you can use to embroider the lantern wrinkles. This way you get the exact same yellow tone.
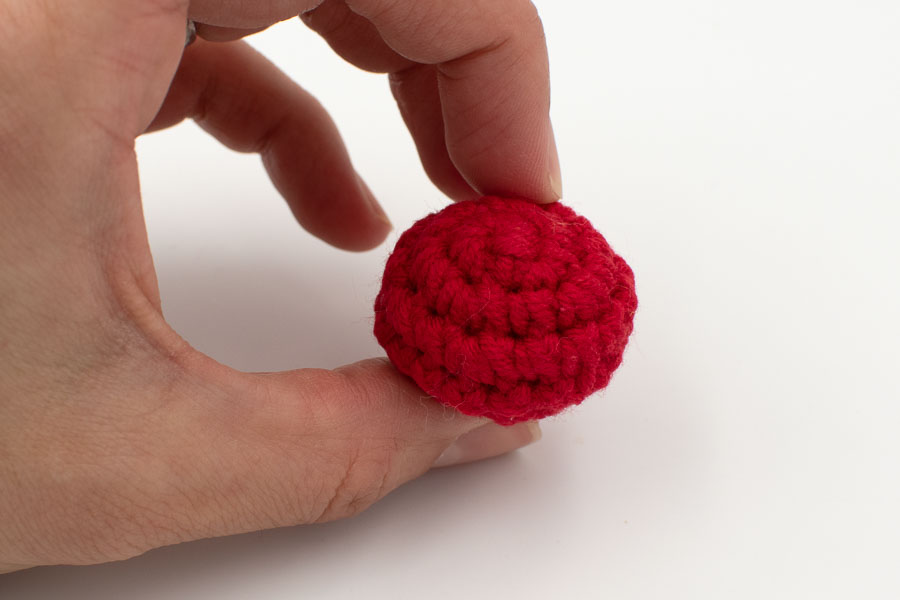
With red yarn and a 3.5mm hook.
Rnd 1: Work 6sc into a magic ring. [6]
Rnd 2: inc in each st around. [12]
Rnd 3: (sc, inc) x 6. [18]
Rnd 4: (2sc, inc) x 6. [24]
Rnd 5: (3sc, inc) x 6. [30]
Rnd 6: (4sc, inc) x 6. [36]
Rnd 7: sc around. [36]
Rnd 8: (5sc, inc) x 6. [42]
Rnd 9: sc around. [42]
Rnd 10: (6sc, inc) x 6. [48]
Rnd 11 – 12: sc around. [48]
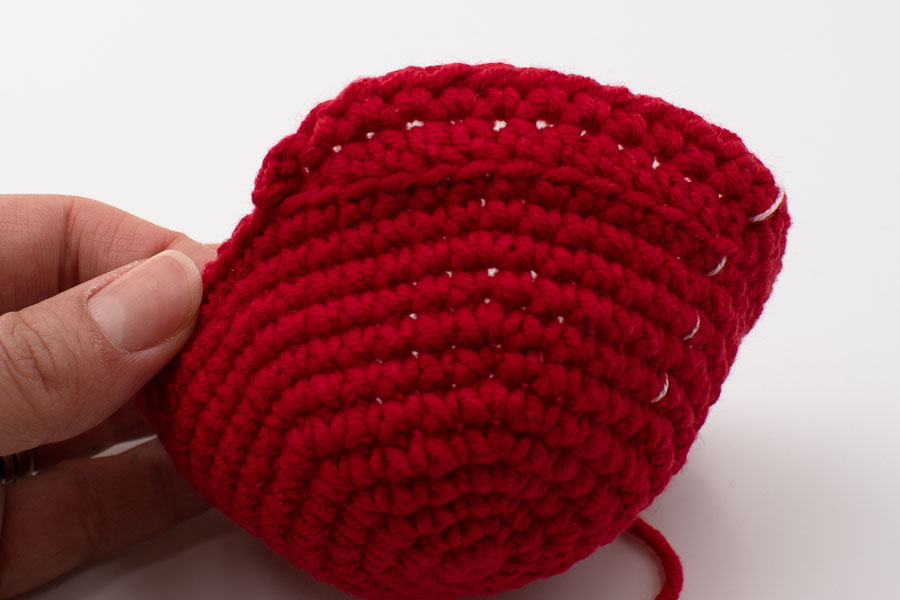
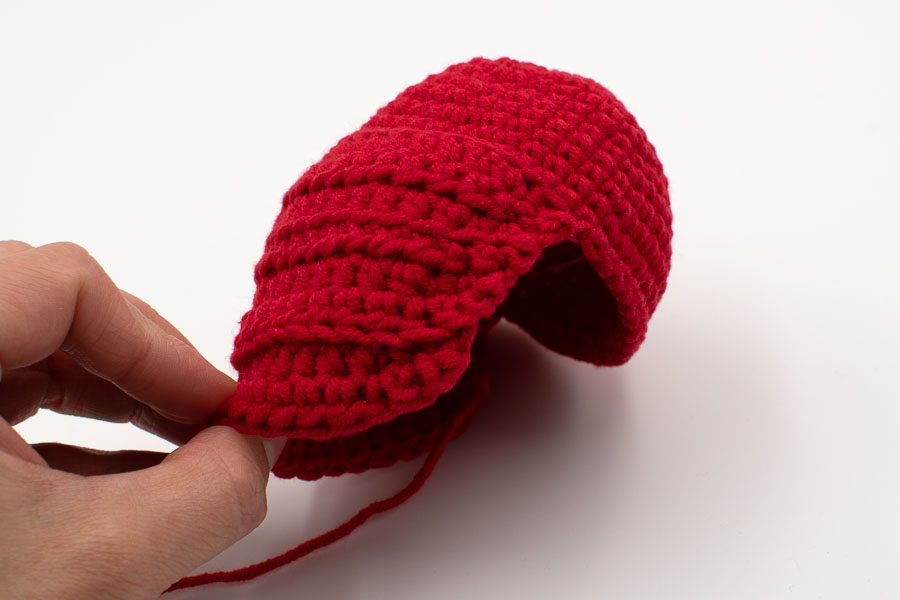
(Now we start building the cape at the back of the head, this part will be crocheted in rows).
Row 13: in the BLO, 11hdc, 2sc, sl st in both loops, chain 1, turn your work. [14] (the chain doesn’t count as a stitch)
Row 14: (in both loops) skip the sl st, sl st in next st, sc, 11hdc. Then in the FLO, 11hdc, 2sc, sl st (in both loops), chain 1, turn. [27] (the chains don’t count as a stitch).
Row 15: (in both loops) skip the sl st, sl st in next st, sc, 21 hdc, 2sc, sl st, chain 1, turn. [26] (the chain doesn’t count as a stitch)
Row 16: in the FLO, skip the sl st, 2sc, 20hdc, 2sc, sl st, chain 1, turn. [25] (the chain doesn’t count as a stitch)
Row 17: (in both loops), skip the sl st, 2sc, 19 hdc, 2sc, sl st, chain1, turn. [24] (the chain doesn’t count as a stitch)
Row 18: skip the sl st, 2sc, 6hdc, hdc-inc, 5hdc, hdc-inc, 5hdc, 2sc, sl st, chain 1, turn. [25] (the chain doesn’t count as a stitch)
Row 19: in the BLO, skip the sl st, 2sc, 19hdc, 2sc, sl st, chain 1, turn. [24] (the chain doesn’t count as a stitch)
Row 20: (in boths loops) skip the sl st, 2sc, 18hdc, 2sc, sl st. [23]
Fasten off, leaving a long tail in case you want to secure the lion dance cape to the bunny head later.
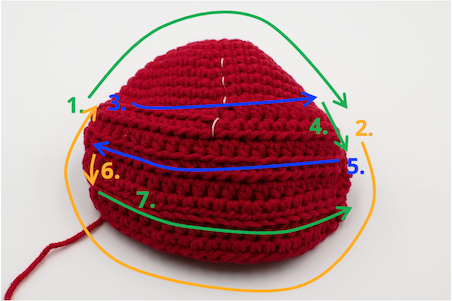
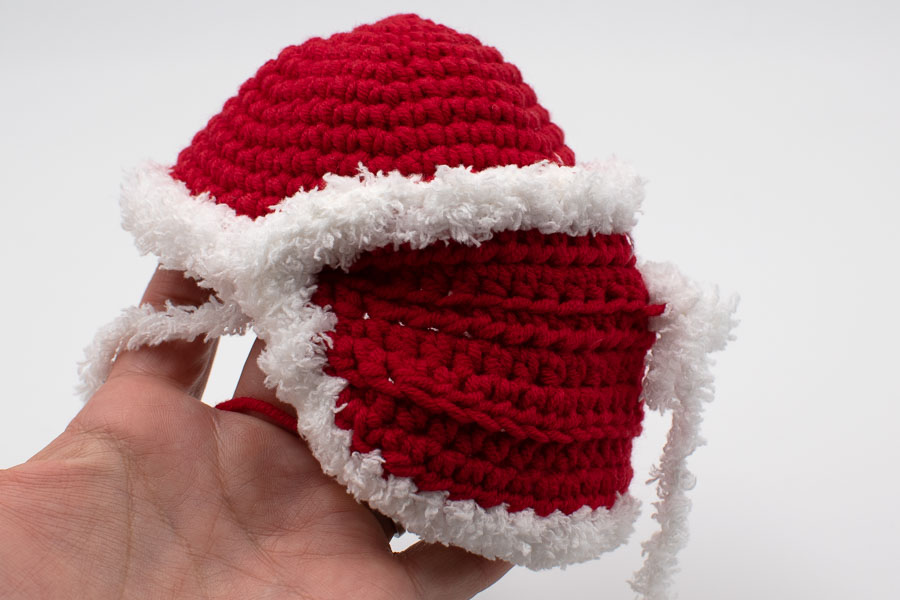
With the fluffy white yarn.
Make a slip knot. Sc around the hat, following the diagram below: start on the left side (as left ear side) of the hat, sc around the front of the head first (1). Then sc down on the side of the cape (you can sc wherever you have enough space to insert your hook, try to keep an even interval between your stitches), then along the bottom of the cape , then up again on the left side of the cape (2). Then sc along using the back loops from row 14, and front loops from row 13 (3). Then go down on the right side of the cape (4) to grab the back loops from row 16 and sc along (5). At the end of the row, go down on the left side of the cape (6) to sc along the front loops of row 19 (7).
Fasten off, secure with a knot, and weave in the ends.
The lion dance costumes are very fluffy so it doen’ts matter if you missed a stitch or made a few more with the fluffy yarn, it won’t show.
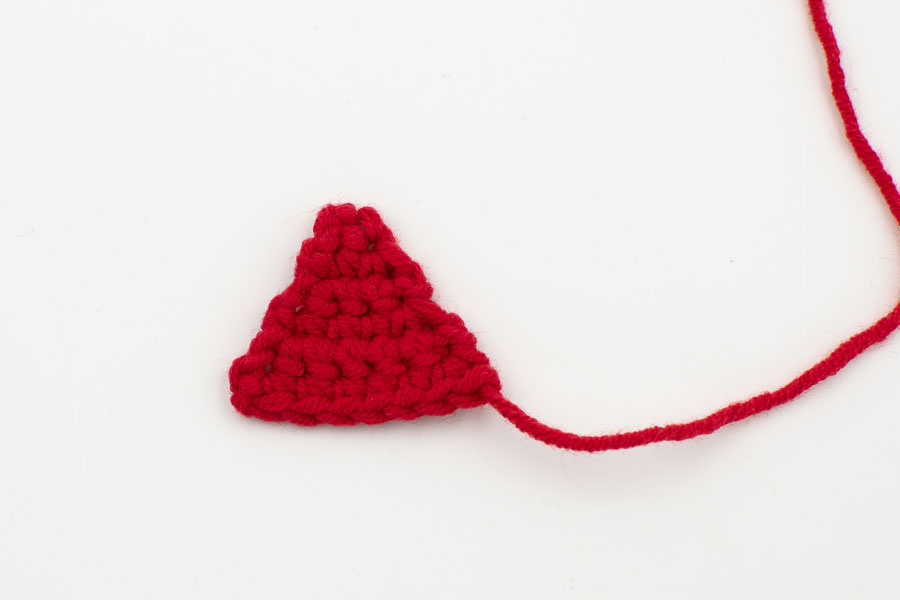
With red yarn and a 3.5mm hook. The chains don’t count as stitches.
Make a slip knot. Chain 2.
Row 1: Starting in the second chain from the hook, inc. [2]
Row 2: Chain 1, turn, sc, inc. [3]
Row 3: Chain 1, turn, 2sc, inc. [4]
Row 4: Chain 1, turn, 3sc, inc. [5]
Row 5: Chain 1, turn, 4sc, inc. [6]
Row 6: Chain 1, turn, 5sc, inc. [7]
Fasten off, leaving a tail for sewing. Weave in the other end.
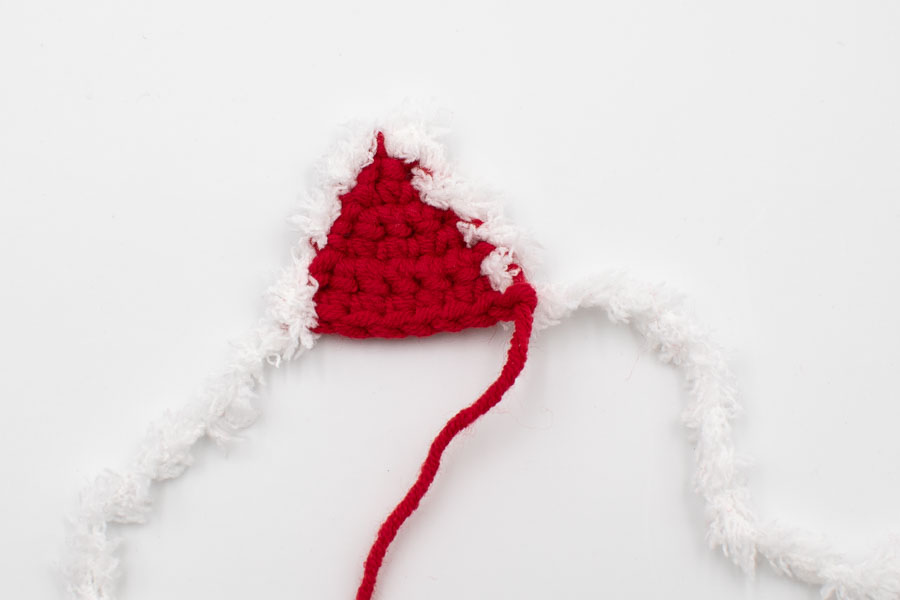
Cut a 15cm (6″) strand of white fluffy yarn. With your tapestry needle, sew it around two edges of the ear. Leave the ends on both sides, it will be used to attach the ears to the cape later. Make a second one.
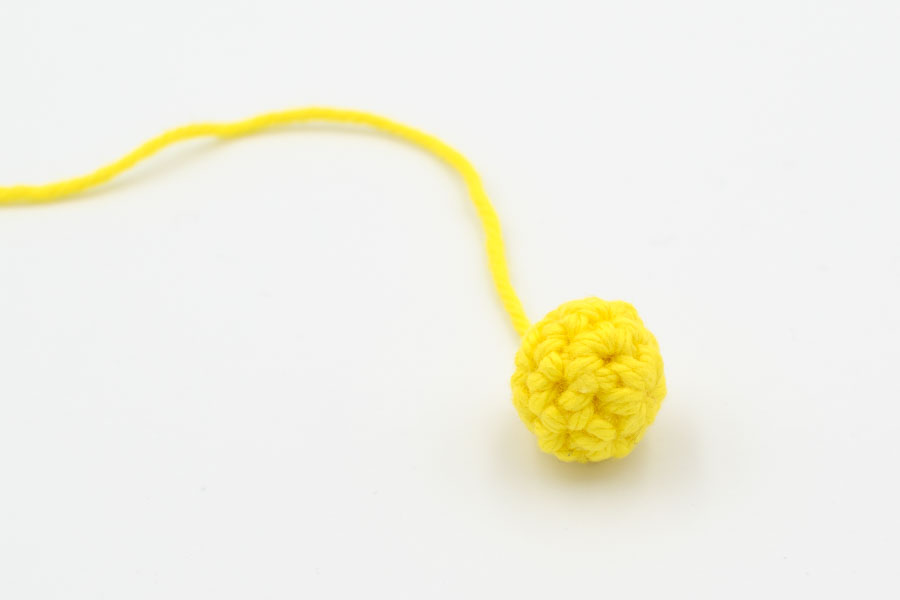
With Happy Cotton yellow yarn and 2.5mm hook.
Rnd 1: Work 6sc into a magic ring. [6]
Rnd 2: (sc, inc) x 3. [9]
Rnd 3: sc around. [9]
Rnd 4: (sc, dec) x 3. [6]
Fasten off, leave a tail for sewing, stuff with fiberfill, and sew closed.
Make a second one.
With Happy Cotton grey yarn and a 2.5mm hook.
Rnd 1: Work 5sc into a magic ring. [5]
Rnd 2: inc in each st around. [10]
Rnd 3: sc around. [10]
Fasten off, leave a tail to sew to the cape.
With Happy Cotton Blue yarn and a 2.5mm hook
Rnd 1: Work 4sc into a magic ring. [4]
Rnd 2: (sc, inc) x 2. [6]
Rnd 3: sc, inc, 4sc. [7]
Rnd 4: 4sc, inc, 2sc. [8]
Change colour to Yellow (finish the last sc with the yellow yarn).
Rnd 5: sc around. [8]
Rnd 6: (3sc, inc) x 2. [10]
Fasten off, leaving a tail for sewing. Stuff lightly with fiberfill.
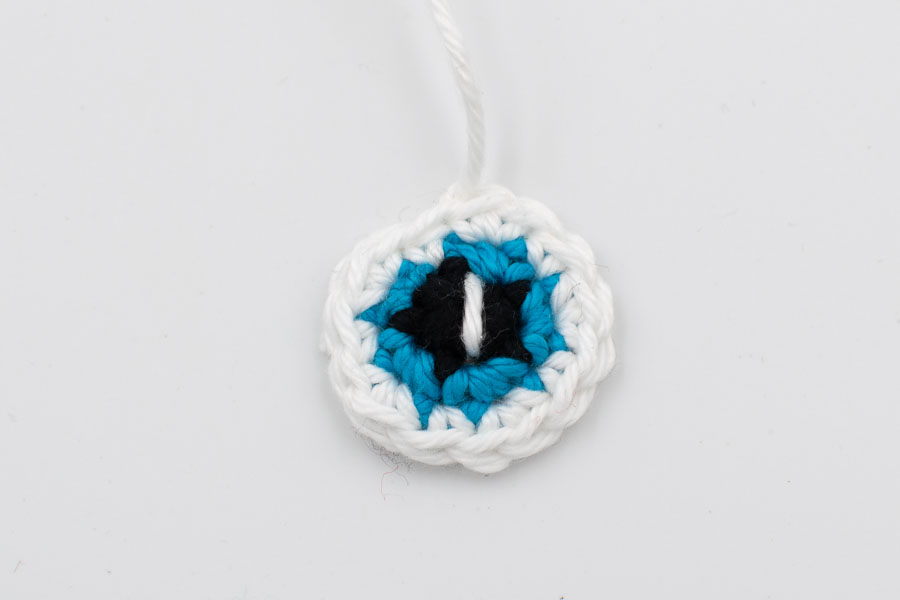
With Happy Cotton Black Yarn and a 2.5mm hook.
Rnd 1: Work 5sc into a magic ring. [5]
Change colour to Happy Cotton blue yarn (finish the last st of previous rnd with blue yarn).
Rnd 2: inc in each st around. [10]
Change colour to Happy Cotton white yarn (finish the last st of the previous rnd with white yarn, leaving a tail to embroider the center of the eye.
Rnd 3: (sc, inc) x 5. [15]
Fasten off leaving a tail for sewing. With your tapestry needle, use the short white tail to embroider the eye center. Then make small knots with the blue, black and white short tails, and cut them short.
With the white long tail, make an invisible finish.
With the white fluffy yarn, make a slip knot and chain 18. (Depending on the yarn you’re using, chain as many as you need to adapt the length to the eyes contour). Leave a long tail to sew it to the cape around the eyes.
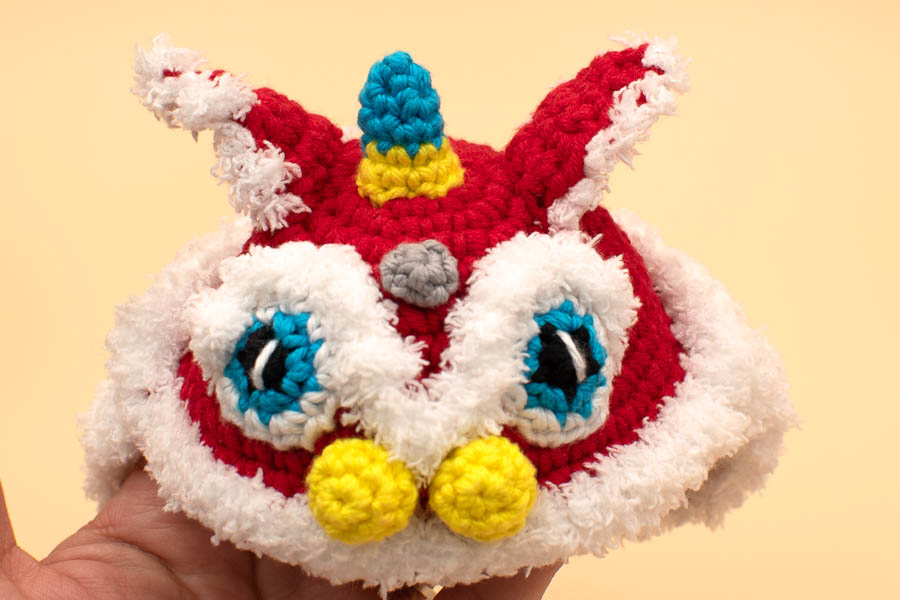
1) Sew the nose to the cape (make sure it’s in the middle).
2) Sew the eyes to the cape: there are two rows of red yarn below the bottom of the eyes, and minimum 3 stitches between the two eyes (at the center).
3) Sew the eyebrows to the cape (use the long tail to secure the position with a few stitches, above the eyes, above the nose and wherever you feel necessary: using your tapestry needle, exit from under the cape, and go back in the same stitch, it’s so fluffy it won’t show).
4) Sew the middle eye to the cape.
5) Sew the decorative horn to the top of the cape.
6) Sew the ears, so that the bottom edge of the ear is slightly curved. They are sewn 2 rounds below the horn on each side. With your tapestry needle, insert the fluffy yarn through the cape on both sides, it will help to maintain the right position. Then use the red tail to sew the ear to the cape. Secure the fluffy yarn with knots under the cape, and weave in ends.
You can decide if you want to sew the cape to the bunny’s head later, using the long red tail of the cape, to hide all the tails that are weaved in under the cape.
1) Sew the body to the head.
2) Sew the ears to the head (they are sewn between rounds 4 and 5 of the head.
3) Sew the arms to the body one round below the top of the body (between rounds 19 and 20 of the body).
4) Sew the pom pom to the back of the bunny (to sew it extra tight, sew the tail to the bunny’s back, then go through the center of your pom pom, exit, pull the yarn and go back through the center of your pom pom, and back into the bunny’s back, secure with a tight knot).
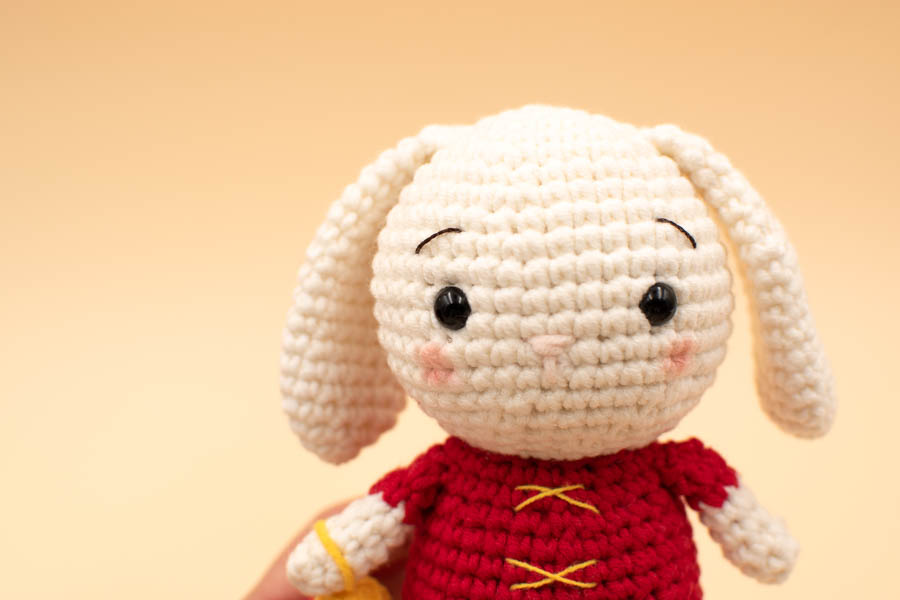
5) With the same yellow thin plies of yarn you used for the lantern, embroider the 3 jacket strings at the front.
6) With a light pink strand of yarn, embroider the bunny nose.
7) With DMC Cotton perle black or brown, embroider the bunny eyebrows (they will be hidden when you put the lion dance cape on, but they are nice to have when you take it off).
8) I like to add a bit of pink blush on the cheeks, I love the expression it gives to the bunny.
Now the last thing you need to do is take your prosperity bunny for a lion dance training!!! If you’ve never seen them, they are quite impressive!
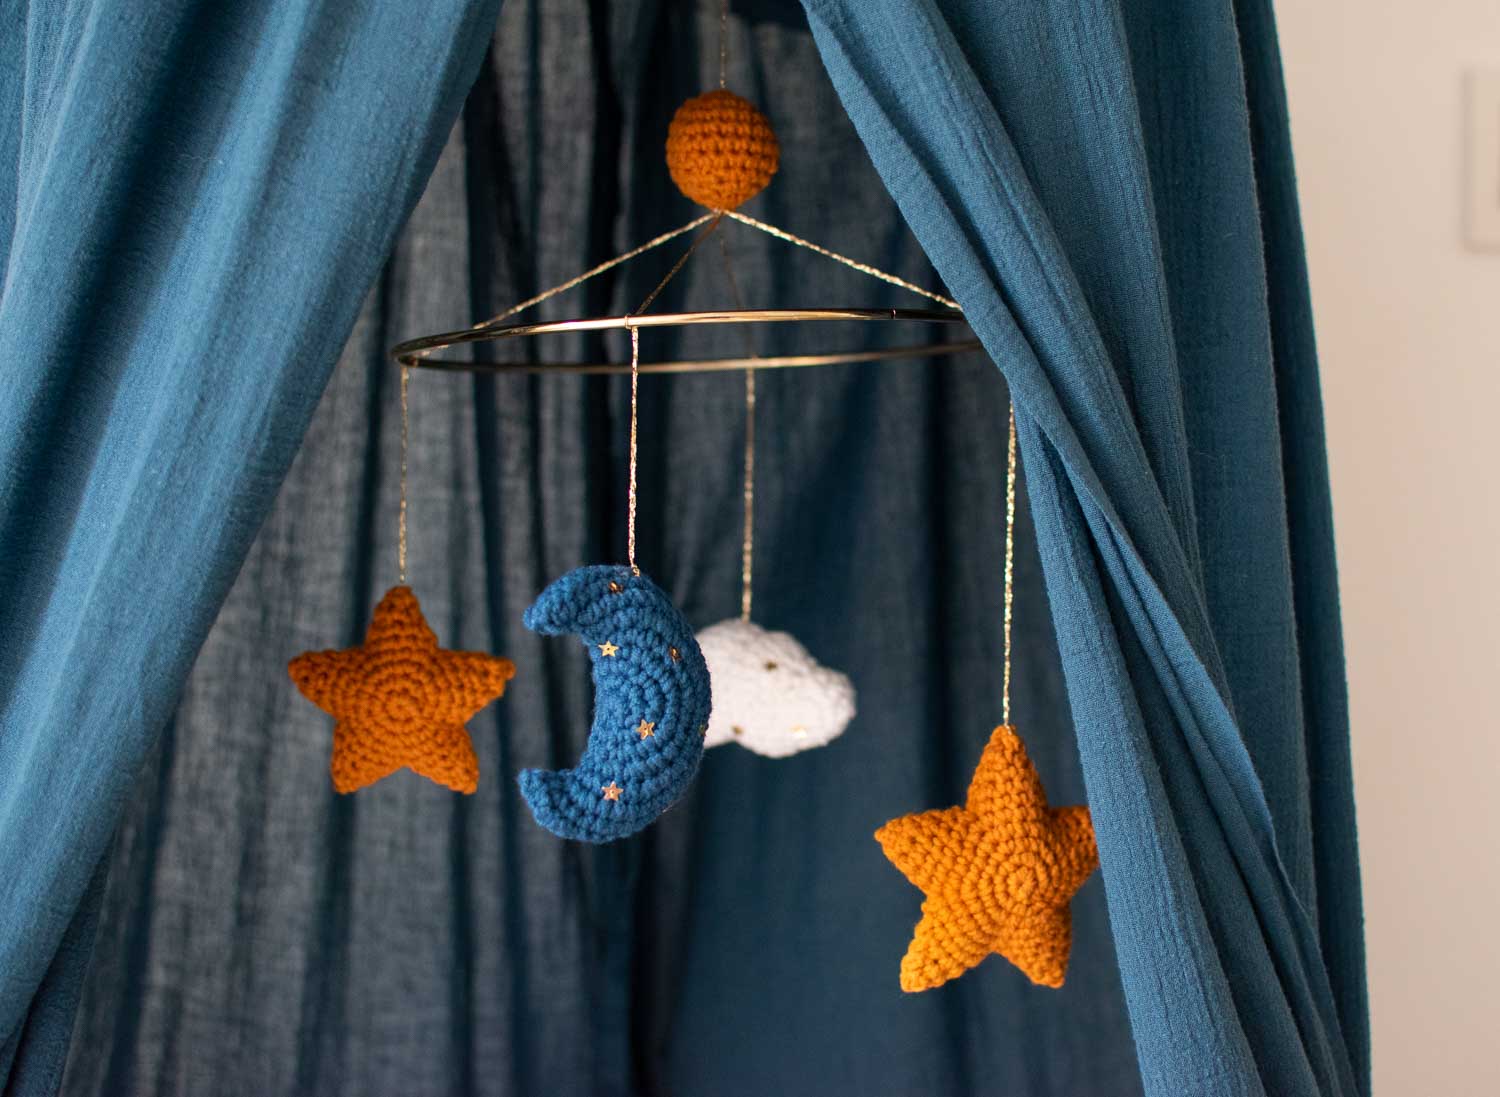
I’d be really happy to see your finished mobile ! Tag me on Instagram, you can find me as @octopuscrochetdesign and use the hashtag #octopuscrochet
I look forward to seeing it!
Crochet Designer
Hi friend, I learned crochet online, so you can do it too! I created this blog to share my tips and tricks for beginners and detailed patterns of amigurumis, crochet toys and home decor items. Jump in and beware of the crochet addiction: it’s real!!!